Review: PhotoSweeper

Back in December when I was scanning in old photos, I found that I had some of the photos already in digital form leaving me with duplicates. The photos weren’t always of the same quality and I had to manually go through to pick the best one. I knew that there were programs out there to find duplicates, so I started searching. After a little while I stumbled upon PhotoSweeper and gave it a test drive.

The first step in using PhotoSweeper is to select a bunch of photos. In my case, I went ahead and selected all the photos.

PhotoSweeper

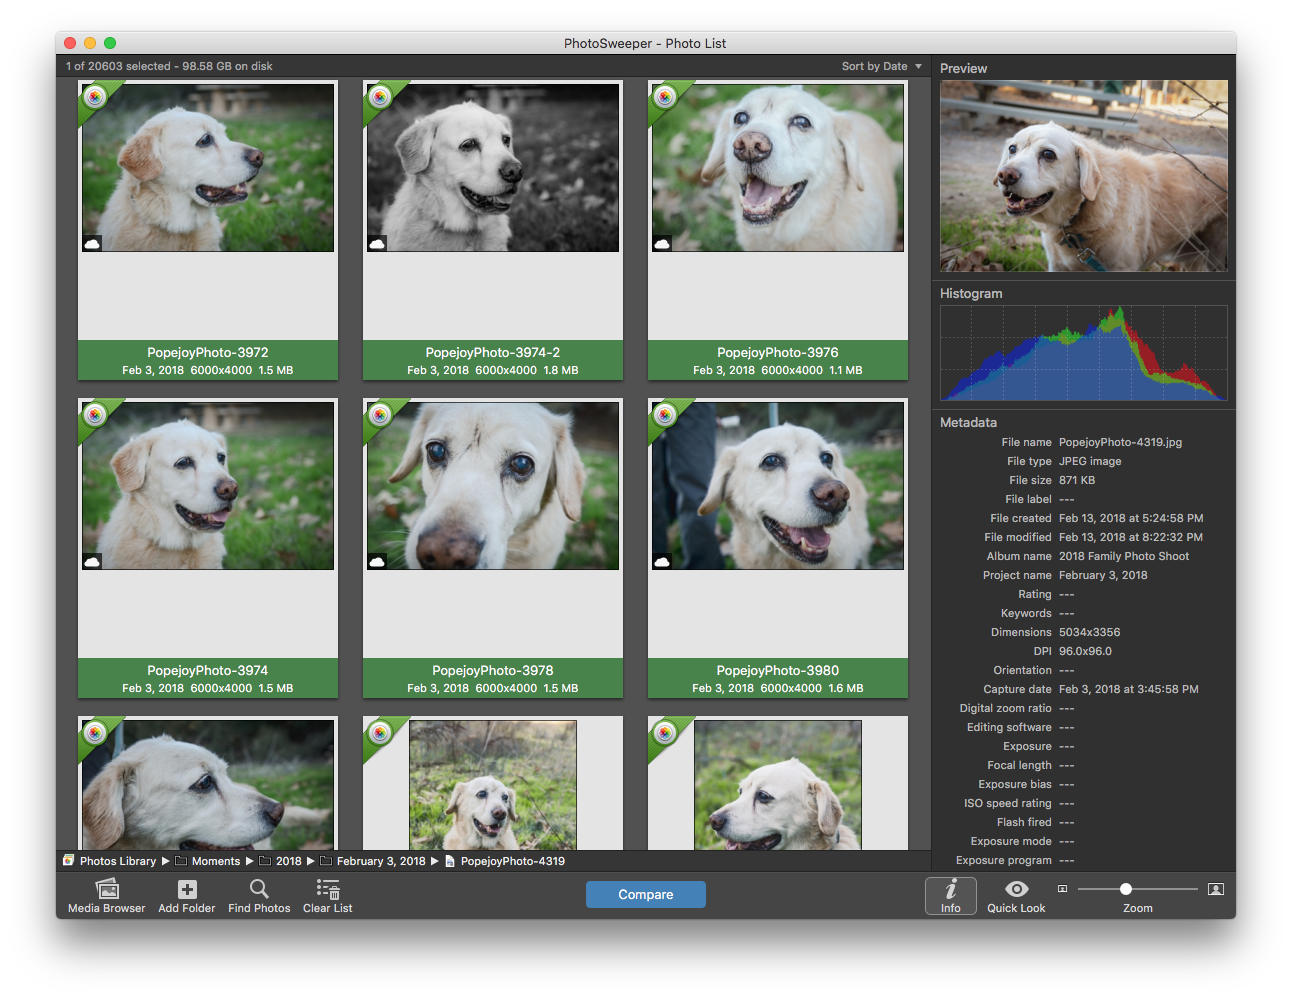
You then click Compare and select your options for comparison.

Compare

I selected a pretty loose matching criteria knowing that I would get a lot of matches. After you start, you see the blurred thumbnails of the photos as it goes through and does the comparisons.

Comparing

The number of photos and your matching criteria determines how long the process will take. The first time I ran it, I did a small sample just to see the results. I was amazed at the results as it found matches where the photos were scanned at different times, the color was different in them and sometimes the photos were cropped differently.

Duplicate

You then walk through the groups of photos and select the ones to mark for deletion. The process takes awhile depending on the number of photos you are comparing, but most of the matches really are duplicates or close to being duplicates. Once you hit Trash Marked, PhotoSweeper opens Photos and moves the photos you marked to its own album and gives instructions on how to permanently remove the photos.

Warning

The process is quite simple and straightforward. While the program may seem like a use once application, I’ve run it a few times just to see if I missed anything. The side by side comparison of matches is also quite useful to see if you want to remove photos that are not exact duplicates, but are close enough. In my match example above, the photos are quite close and I’d be fine with keeping just one of them. (If you can’t tell, the photo on the right shows a little bit of the electrical panel in the left side of the photo.)

Pros

  • Integrates with Photos app to read photos.
  • Creates new album for photos marked as deleted.
  • Many options for photo matching.
  • Works on JPEGs and HEIC (new image format used on iPhones).

Cons

  • I’m not a fan of the dark interface. I know this is more the norm in applications today, but I just don’t like it.

Summary

After I tried PhotoSweeper (you can get a trial version from the developer’s website) in a basic test to see if it would work, I immediately went to purchase it on the Mac App Store (I like the ease of use of the App Store and while I know that developers take a hit, the seamless process especially using Touch ID on my MacBook Pro takes the thinking out of the purchase.) Much to my surprise, I had already purchased the application! I’m not quite sure when or why I had purchased it. The $9.99 price tag is a small price to pay for an application that does exactly what it says it will do and does it well. I have no hesitation in recommending this application to anyone that has a photo album. Even if you aren’t scanning in photos, using the side by side comparison tool makes it easy to see if you want to remove similar photos.

Working with blocks

In Mac OS X 10.6 and iOS 4, Apple added blocks to Objective-C. When I first started looking at them because various APIs used them, the syntax confused me, and I pretty much ignored them as I was still doing work that ran on iOS 4 and Mac OS X 10.5.

This spring, all my projects moved to iOS 4 and Mac OS X 10.6 as the minimum requirements, so I took another pass at learning blocks. This time, however, I could actually use them and read all I could about them. The more I started looking at them, the more I became enamored with them. I started using blocks in my own APIs and just finished rewriting a significant chunk of code using blocks. Using blocks has made my code more readable and has greatly simplified certain aspects of our app.

One of my co-workers cautioned me to not use blocks just because they were the shiny new tool which I admit was what I was looking at doing. However, after using them, we found that using blocks was pretty much vital to making our code more readable.

For developers that aren’t familiar with blocks, I’d suggest learning them. With most iOS apps having a minimum OS of 4.0, there is no reason to avoid them.

The end of MovieConverter

It was just over 2 months ago when I released MovieConverter to the world to fill a gap where iMovie for iPad wouldn’t import videos from certain video cameras including my Sony Cyber-Shot DSC-WX9. I had originally came up with the idea for MovieConverter back when I got my iPad 2 and started playing with iMovie. I worked on MovieConverter over the summer and finally released it.

When I installed iOS 5 on my iPad 2, I found that iMovie imported more videos than before, but still not ones from my WX9. I made a few minor updates to MovieConverter to get it working better on iOS 5 and pushed it out the door. I got back from vacation the day after iOS 5 got released to the public and quickly updated everything including iMovie. The iMovie 1.2.2 notes said it added support for importing video from additional cameras.

Much to my delight and dismay, the videos from my WX9 imported into iMovie without MovieConverter. I immediately updated the MovieConverter description to say it may longer be needed and dropped the price to free so that no users would be pissed at me for writing a “useless” program.

From an iMovie user point of view, this is great news. I didn’t write MovieConverter for fame or fortune, but it was nice to get a little money from it.

Oh well, now I have to come up with another idea that will have a little more than 2 months on the app store.

iOS App Store’s ups and downs

At the beginning of August, I released MovieConverter to the App Store. I created the app to fill a personal need and decided to see if it met the needs of others. My goal, financially, was to recoup the cost of having an icon created for it; icons are not cheap and since I can’t design one myself, I had to commission one. I used Jordan Langille of One Toad Design and was pleased with his work, so he got my business again.

Within a few weeks, I managed to reach my financial goal and things have still been going; it’s not going to make me a million dollars, but it’s enough to buy a few dinners.

That’s the good part of the App Store; no advertising and I get money. The bad part is the user reviews. Despite my full description and warnings that it may not work on all videos and the videos must play in the Photos app, I’m getting some bad reviews. Most are because people don’t read what the app does and expect it to do something it wasn’t designed to do. Is there anything a developer can do? Nope. Oh well, the app still sells and serves a need.

I wish that Apple would provide a way for developers to respond directly to reviews like MacUpdate does where it clearly indicates that the developer has responded; with the App Store, some developers (against Apple guidelines), post 5 star reviews and respond. If apps I publish on the App Store where my sole means of income, then I’d be really annoyed. However, this is just a side project, so it’s not a huge deal to me.

Protected PDFs are a waste of time

Today I had to electronically sign some documents and then the document was available to download as a PDF. Preview on the Mac wouldn’t properly render it and required Adobe Reader. As I refuse to put that awful program on my machine, I tried to use VMWare Fusion with some PDF writers on it, tried printing to a Printopia printer, but everything failed. I finally put Adobe Reader on another machine, installed CUPS-PDF, played with a few options in Reader (told it to output as an image), and ended up with a 700 MB PDF that Preview could read! I then opened it in Preview and printed it to a PDF. I ended up with an 11 MB file that was had all the Adobe protection stripped out of it. I can’t select text in the PDF as it is an image based PDF, but I didn’t want it. I simply wanted a copy of the document in a format I could use with Paperless.

I love the PDF format, but I hate extensions like this that just make me go through hoops to get what I’m entitled to have. (I could have printed the 37 pages and scanned them back in, but that would be a waste of paper, not time because I spent more time with all my hoops.)

MovieConverter available on the App Store

I’m pleased to announce that my MovieConverter app is now available on the iOS App Store. The app is designed for iPad users that want to import and edit video that was taken with a compact digital camera in iMovie.

The premise is pretty simple, but I think it is a huge help to those that don’t want to travel with a laptop and want to edit video.

While I don’t expect to become a millionaire on this, I do hope to sell enough copies to go out to dinner a few times!

Thanks Apple for the fast turnaround on approving this! Total time less than 9 calendar days from initial submission.

Choosing a software contractor

When companies look to hire a developer to write software, in particular iOS (iPhone and iPad), they expect to hire an expert. However these days everyone and his dog claims to be able write iPhone and iPad software. While this may be true, it is nearly impossible to know if you’re getting a good product. Apps may have great visual design, but in some cases it is just a pretty face. So how do you pick a developer that is going to produce a quality product that is stable, maintainable, and works well. Many projects get passed from developer to developer, so having good quality code to begin with, the app will have a higher change that it can continue without being completely rewritten.

I’ve written software as a contractor for many years and like to think that I know what I’m doing, so here are some tips and questions to ask that may help companies hire a quality developer.

  • Does the developer rely heavily on open source? Open source itself isn’t inherently a problem, but should be used sparingly for specific purposes and should be easily removed at a later time if need be. Building an entire application on an open source framework makes things needlessly complicated and fragile.
  • How long has the developer been writing Objective-C software (Mac or iOS)? Experience says a lot about how easily the code can be maintained in the future.
  • What do the applications that the developer has developed look like? Take a look at the App Store and see how complicated the apps are and how well they work?
  • Ask for references. Ask why the developer is no longer doing work for the references. There are a number of ways to say “we got fired”, so be on the lookout for those. If the app is no longer being developed, the company ran out of money, or the developer no longer has time are probably the best reasons; anything else might be suspect.
  • Does the developer use source control? This is a pretty basic requirement. If a developer doesn’t use source control for his/her own projects, that would worry me. There are many sites that offer free or cheap source control, so there is no excuse for avoiding it.
  • Does the developer use code analysis tools such as CLANG? It’s built into Xcode and there is no excuse for avoiding it.
  • Does the developer allow warnings when building the project? Compiler warnings should be avoided at all costs.
  • Can the developer provide code samples for review? In particular, an app that can be built using the Apple Developer Tools. This is important as some developers have a huge list of tasks to get a project built. A project should be delivered such that you can unzip the archive and build the project. I’ve seen projects delivered that have a list of steps to build including checking out code from open source repositories. This is extremely problematic and error prone as the repositories could change by the time the app is delivered.
  • Ask the developer what is the right way to determine if a feature is available on a particular device. Today I saw code that checked the OS version to determine if Retina display graphics should be used. This is completely wrong because for example, iOS 4 runs on devices that don’t have Retina displays. (Also the code that checked the OS version didn’t properly check the version.) Apple has identified ways to determine if a particular function should be used or a feature is available.

These questions are probably hard for non-developers to ask and know if the answers are legit, so it might be worth spending a few bucks to find an expert, such as me, that can spare a few hours to evaluate a developer, but doesn’t have time to actually do the project.

An exercise in frustration

When I was training for the 2 marathons I ran, I listened to audiobooks to pass the time as training runs could last for hours (it takes awhile to run 20+ miles on the long runs). I bought a number of books from Audible.com. Once I stopped training, I couldn’t justify the monthly cost for audible, so I switched to listening to podcasts on my runs. The other day, my dad showed me how he checked out an audio book from the library to listen on his iPod Touch. It looked promising, so when I got home, I went to the San Diego Public Library Web site and browsed to the eCollections link. I found a book that said it could be played on the iPod, so I checked it out and installed the OverDrive software on my iPhone.

Safari.png

Unfortunately that’s where the easy part ended. After a bunch of frustrating tries and re-reading the help information, I realized that the OverDrive software only played MP3 files. Well, I can use iTunes on my iPhone to do that, so what good was the software? There is a button on there labeled “Add Website” which implies it would make it easier to download directly on the device. I tapped on it and it launched Safari on the iPhone. Lovely. After more searching and reading reviews about the software, I came to the conclusion that the software was almost useless. I would have expected that I could enter my library card number and PIN, browse for books on the device and listen to any available audiobook. That’s not what happens; the OverDrive folks didn’t implement a WMA player that handles the DRM used on the books, so it would only play unprotected MP3 files.

I almost gave up on the concept of listening to checked out audiobooks on my iPod that I use for running or iPhone when I decided to install the OverDrive software in Windows 7 in VMWare (remember I’m a Mac user). The software offers an option to transfer the audiobook to an iPod. Hmmm…my iPod is Mac formatted and the documentation said it had to be Windows formatted. I didn’t want to do this and dug into my box of cables and stuff and found an old iPod Nano. I plugged it in, grabbed iTunes for Windows, reformatted the iPod and started the process to transfer the audiobooks to the iPod.

I’m not going to get into the nitty gritty of what is going on, but using the software in the manner it was intended, I was able to transfer unprotected audiobooks to my iPod and iPhone. Wow, this is a huge hole that isn’t the same as the analog hole. Either this is a significant oversight or a deliberate choice that the audiobook publishers have decided to accept.

The process of checking out these audiobooks was quite painful despite reading all the FAQs and me being a software engineer. My dad figured it out much faster than I did, so maybe I over analyzed it or my dad wasn’t as discriminating in his choice of books. Our library offers 100 audiobooks in MP3 format which I could have used with much less frustration while it offers 1784 books in WMA format (most of it protected so that it expires after the lending period). I’m not sure how OverDrive has convinced over 13,000 libraries to adopt their system, but the system is almost unusable.

Has anyone found the process of checking out audiobooks easy? It’s almost worth buying them from Audible.com to avoid the dealing with this.

Review: MailHub (plugin for Mail.app)

One of the things I do is “collect” software never knowing when I’ll use it, but there are a small staple of applications I use all the time. When I saw MailHub, a plugin for Mail.app, I quickly downloaded it and played with it for a few minutes. I don’t think I spent more than 10 minutes with it before I pulled out my credit card and purchased it! One of the problems with receiving so much email is what to do with it. I used to run rules on messages and kept having to setup new rules to move messages. This was inefficient for me, so dealing with messages as I read them seemed much more efficient.

If you don’t use rules in Mail, you have to use the mouse to move messages to different mailboxes/folders. For people like me that like to use the keyboard as much as possible, the process of reading a message, then moving my hand to the trackpad/mouse to file a message just wasn’t attractive. With MailHub one or two keystrokes is all it takes to move messages to mailboxes. To top it off, MailHub has smarts that tries to figure out where the messages will go and it does a pretty decent job. MailHub does a number of other things, but the ability to file messages quickly is ideal for me. My inbox is now down to zero as I deal with messages quickly as I read it.

The $19 cost for MailHub is peanuts as it saves me a significant amount of time. The plugin hasn’t affected the stability of Mail and is quite integrated into Mail.

Pros

  • Excellent integration with Mail.
  • Learns about where to file messages.
  • Easy to use keystrokes to file messages.
  • Low price.

Cons

  • Every update to Mail requires a plugin update. Mail plugins are not supported by Apple and with Snow Leopard, Apple has added a version ID to each Mail release, so plugins have to get updated. MailHub has been updated to support the new Mail versions.
  • Only works with Mail. This really isn’t a knock on MailHub, but I’ve started using Outlook for Mac to integrate with my work’s Exchange server and I miss MailHub when using Outlook

Summary

If you use Mail on the Mac and get more than just a few messages a day, MailHub is definitely worth a look. There is a 30 day trial, but I suspect that you’ll purchase it after just a few days. The plugin is well done and it’s simplicity makes it a breeze to use.

Another run in with Mail.app

It seems that I rarely encounter issues with Mail hanging while talking to Gmail. Maybe I’m lucky, but it seems that my sister has more problems with the combination than anyone else I know. Today she called me almost panicked as her husband’s machine wasn’t getting mail. Turns out there were a number of issues contributing to the problem. The solution was relatively simple once I figured out the issue.

The problems:

  • Too many messages in All Mail. There were over 37000 messages in the All Mail folder on Gmail, so when he selected All Mail, Mail happily started retrieving all 37000 messages (several gigabytes). This never finished.
  • Closing the computer kept restarting the process.
  • Corrupted IMAP cache directory.

The solution:

After a bit of searching I came across a reference to the .OfflineCache folder. This is a hidden folder in ~/Library/Mail/IMAP-nameofaccount/. You have to use Terminal to access it. Removing this folder (when Mail is not running) will cause Mail to start recaching the IMAP mail. This would unstick Mail, but the problem would come back once the All Mail was hit.

I remembered that Gmail labs added some advanced IMAP options. I turned on Advanced IMAP options in Gmail labs. This brings up a few very important options.

Safari.png

Once that option is turned on (and saved), Forwarding and POP/IMAP has an extra option.

Safari.png

If you set the limit, Mail will at most show 1000 messages. This significantly reduces the number of messages that come down. Deleting the cache folder, setting this option, and then restarting Mail (and waiting a few minutes), cleaned up everything. However, there was one more option that I missed that would reduce that 1000 down to none (viewing All Mail in Mail is kind of a waste). Click on Labels and you can turn off the Labels that are shown in IMAP. Basically turn all of them off.

Safari.png

Presto! Problem solved.