-
Mounting a HAM UHF/VHF Antenna
Anyone that knows radio knows that a good antenna is key to success in transmitting and receiving. Once I decided to get a radio, I knew I had to buy a decent antenna and mount it as high as possible. My wife said I could get an antenna as long as it didn't block her view, so I decided on an antenna that wasn't too big and might provide me with decent communication. I decided to get a Diamond X50A
antenna which is about five and a half feet tall. After getting the antenna, I temporarily mounted it to a deck we have outside our bedroom on the second floor; I fashioned a mounted out of some plywood and 2x4s such that I sandwiched the railing supports between the wood. I was pretty impressed with myself for coming up with a working solution out of scrap material.
While this worked, I wanted to mount the antenna higher. My options were to put it on the roof or to mount it to the side of the house. As I believe we have a 30' height restriction where I live (imposed by the city) and I didn't really want to get on the roof, a roof mount was not my preferred option. I asked my father for some help and we spent about 45 minutes looking at how to mount it and came up with a plan that involved various brackets, drilling into the house, and being up on a ladder (neither of us was keen on the ladder). Once we came downstairs and were looking at the backyard, my dad noticed the dried bamboo I have lying around and starting thinking about how we could use the bamboo as a pole. After a few minutes of discussion, we came up with a plan that involved a trip to Home Depot to get $4 in parts. Yes, our solution involved parts that I already had.
Installation was pretty straightforward as I already had the basic mounting setup. I am pretty pleased with the result and the antenna is performing quite well. Of course mounting it higher would yield better results, but this solution was quite easy, didn't put any holes in the house or roof and can easily be removed if need be. This mount is also not too noticeable that it would raise concern with my neighbors.


-
Rebooting the Subaru Impreza 2017 Infotainment System
A few months ago in my post about a year with my 2017 Subaru Impreza, I mentioned that sometimes CarPlay doesn't start. This is annoying and I thought the problems were gone with the recents updates. However, last Saturday it didn't start again and I actually needed the navigation to get somewhere. I had read that opening and closing the door 3 times would reboot the car, but it didn't work. I could wait 10 minutes, but I had to leave. That left me without navigation but luckily my son was able to use an iPad connected to my hotspot to navigate.
After this episode, I started looking for the real answer to rebooting the infotainment system. I searched and searched and found on a forum (can't find the reference right now) that if you press and hold the power button for the radio until it shuts off and then for another 10 seconds, the unit restarts. I found this hard to believe, but went out to my car and tried it out. It actually worked! Now I had a potential workaround the next time I had a problem.
Yesterday I plugged in my phone as normal and CarPlay didn't start. I pushed and held the power button to reset the unit. Once it was up again, I reconnected my phone and presto, it worked! This definitely should be documented somewhere as it is extremely convenient. Let's hope that a software update doesn't remove this functionality.
-
Review: Irwin Self-Adjusting Wire Stripper
Like many people, I like to have the right tool whenever I do household projects. So when I see a tool that may come in handy, I think about purchasing it for my collection. While I might not have a need for it today who knows when it will come in handy in the future.
In December I saw the IRWIN VISE-GRIP Self-Adjusting Wire Stripper
on sale and it looked interesting. The theory behind this tool is that you put in any gauge wire and it strips it without nicking the wire. If it worked as advertised, this tool could have saved me countless hours over the last 20 years of being a home owner. I've installed outlets, switches, ran Cat 6 cable, installed landscape lighting, ran speaker wire, and numerous other projects that required me to strip wire.
When I received the stripper, I looked for scrap pieces of wire in my random collection of parts. I tried the stripper on different stranded and solid wire. I put the wire in the tool, squeezed the handles and the wire was effortlessly stripped. After I got used to the tool (it didn't include instructions and I was at first confused as to how it worked), all I wanted to do is find wire to strip! Whatever wire I threw at it, it did a flawless job at taking off the insulation and not touching the wire. I was in awe that the tool worked so well; it was almost too good to be true.
I do have to tug on the side that isn't getting stripped so that the wire doesn't move, but other than that the tool is simple to use. I'm working on putting all my HAM radio equipment in a transportable box (more on that another day) and everything I've read says to use Anderson Powerpole connectors. Just about every installation video for these connectors uses a tool similar to these self-adjusting wire stripper; I am very excited to actually use the tool in a project and not just testing it!
Pros
- Easy to use.
- Fast.
- Strips wire without nicking the wire.
- Works on every gauge wire I've tried.
Cons
- Didn't purchase sooner.
Summary
If you don't already have this tool or a similar one, I'd recommend purchasing it even if you don't have a need for it today. The current price is about $20 and after using it, I would gladly pay the current price. Any homeowner that does any type of work with wire will wonder how he or she lived without this.
-
Review: SyncWire USB-C Ethernet Adapter
Now that I have a MacBook Pro with only USB-C ports and no USB-C peripherals, dongles are the only way to connect devices. I wrote about dongles last year and have been happy with just a USB-C to Thunderbolt and a USB-C to USB-A dongle. I haven't seen the need for additional dongles, yet, but with the hopes that Apple will release its own display instead of promoting the LG UltraFine display I've been revisiting that.
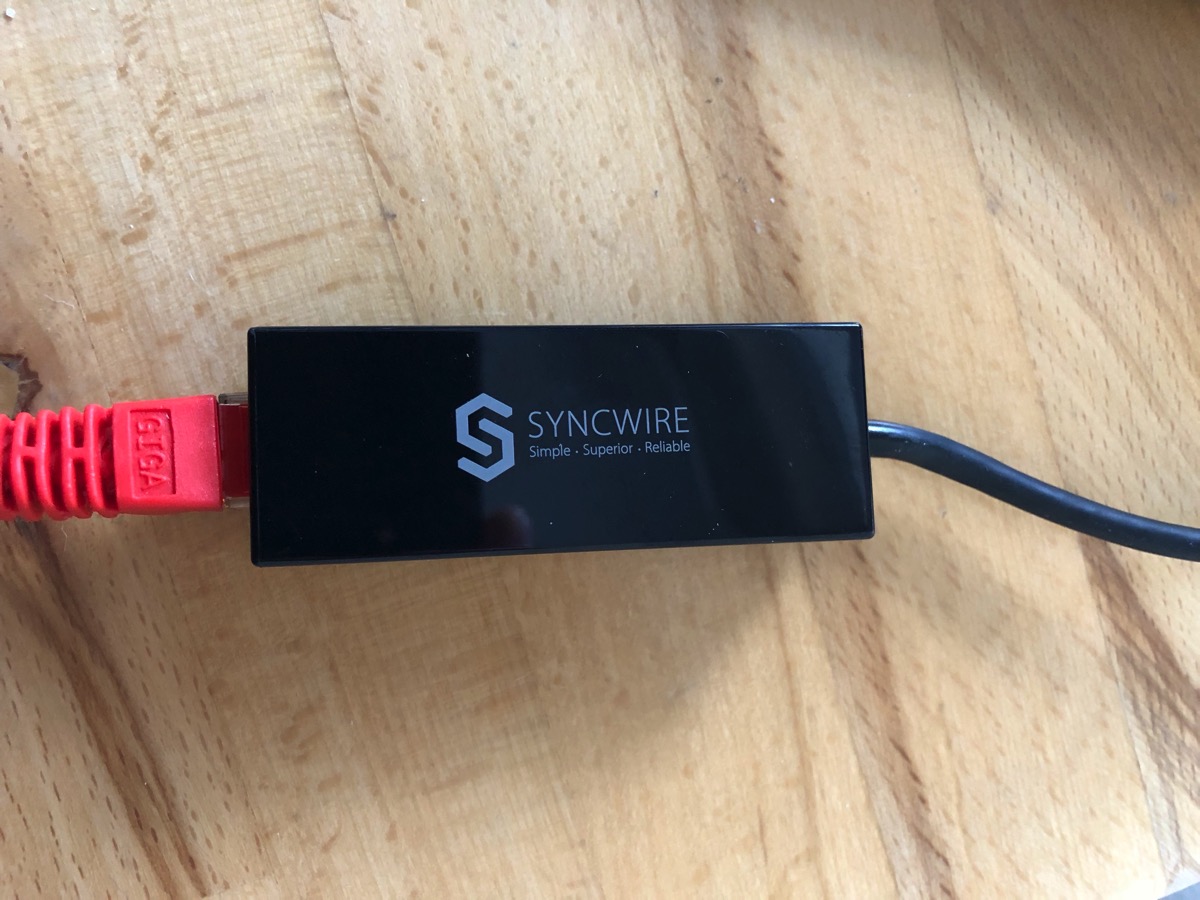
With my current Thunderbolt Display, I have Ethernet, FireWire (I don't use it), Thunderbolt and 3 USB-A ports. If Apple follows LG's lead on a new display, the display will only have USB-C ports. If and when I purchase this magical display that doesn't exist, yet, I'll have to figure out how to connect my array of devices. Currently I am connected to the network through the Ethernet in the display which would go away with a new monitor. I always prefer wired networking over wireless networking, so when I was offered a SyncWire USB-C to Ethernet Adapter
to review, I jumped at the opportunity.
An Ethernet adapter is pretty basic; plug it in and it works. That was definitely the case with the SyncWire adapter. There were no drivers and it was instantly recognized by my Mac.

There are only a few thing that I care about for Ethernet:
- Does it work?
- Is it reliable?
- Is it fast?
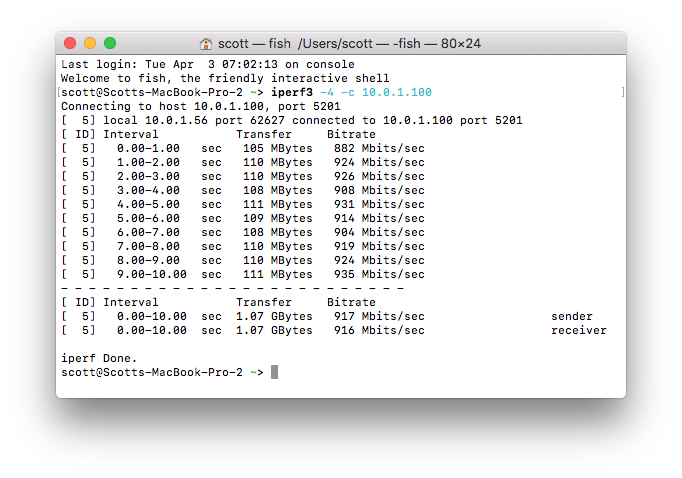
For the first two, I've been using the adapter for 5 days now and I haven't seen any hiccups. I disconnected the Ethernet from my display and turned off WiFi. I do regular backups and transfer a decent amount of through it which should put the adapter through its paces. For the last one, the test I used was iperf3 running between my MacBook Pro and my Mac Pro on the same LAN connected via a Ubiquiti UniFi Switch. The result is that the adapter could transfer data at over 900 Mbits/sec. This is definitely not bad. On WiFi, I can get about 360 Mbits/sec. When my MacBook Pro is connected to the Thunderbolt Display, I see about 935 Mbits/sec. I would have expected better throughput with the adapter, but in the real world I'll likely never see sustained speeds anywhere close to this.

So far the adapter meets my three basic needs for a network adapter.
Pros
- Compact size
- Reasonable price point
- Appears reliable
- Decent transfer speeds
Cons
- Unknown long term reliability
Summary
While I wasn't looking for a USB-C to Ethernet adapter right now, this would probably have been on my shopping list when I get monitors that only have USB-C ports. When I purchase equipment for my computer, I tend to goto brand names that I have heard of before as I don't like messing around with shoddy parts just to save a few dollars. I chose SyncWire for a few Lightning cables as they were MFi certified and were on sale. Prior to that, I had never heard of SyncWire and definitely wouldn't have bought their adapter. Now that I've had a chance to try out their USB-C to Ethernet adapter, I'm not sure I can recommend the product. While the price is right and it performs well, the big unknown is how reliable is the adapter in the future. If I was going to spend my money on an adapter, I'd probably look at a more dock like adapter that had USB-A ports in addition to Ethernet.
The purchase price of the adapter was refunded to me in exchange for writing this review. However, it didn't influence what I wrote.
I was asked to post a review of this product on Amazon, but it is against Amazon guidelines to post incentivized reviews, so I posted this review here.