Review: Motorola Talkabout T460

Many years ago I purchased FRS (Family Radio Service) radios commonly called walkie talkies. I chose the Motorola T5000 because it came with 4 radios and the price was right; I know I didn’t spend much time researching them. The radios have served me well over the years. The radios operated on both FRS and GMRS (General Mobile Radio Service) frequencies. Certain frequencies (the radios have specific channels that correspond with frequencies) are FRS only, some are GMRS only and some are available on both. FRS is unlicensed whereas GMRS requires a license. Since I don’t have a GMRS license, I’ve always stuck to the FRS channels. I suspect that many people just picked a channel and used it not realizing that they were violating FCC regulations.

In 2017 the FCC adopted changes to FRS and GMRS which increased the maximum output for FRS radios (from 0.5 W to 2.0 W) and made available certain channels that were GMRS only to FRS users. They basically acknowledged that people were using the FRS/GMRS radios with no regard to which channels were being used.

The rechargeable batteries on the Motorola T5000 radios I owned had long died and with my push to have all my devices rechargeable via USB, I decided this past spring to replace the radios. The radios also had a maximum output of 0.48 W on the GMRS channels (now available for FRS) which meant that the range of the radios was quite limited.

I liked the styling of the newer Motorola Talkabout radios, so I picked up a pair of Talkabout T260 radios. I used the radios on a Scout trip and they worked quite well, but there was a place that I lost contact with another leader that was at the front of the hiking group. We also used the radios on a cruise ship and they worked pretty well across several decks even with all the steel that blocks signals. Even though the radios performed decently, I decided to do some more research on the radios. The radios are advertised with a 22 mile range; that, of course, is in ideal conditions and never happens. The manual has a chart of channels and shows the maximum output power on the different frequencies. This is quite misleading as I soon discovered. All FCC registered devices have information available on the FCC’s website including test reports showing the actual power output. Doing a search of the FCC ID AZ489FT4929, I discovered that the maximum output of the radio was 0.8 W which is far lower than the legal maximum.

After more research, I found the older manual for the radio and it appears that Motorola changed a few pieces when the new FCC regulations took effect including the chart; the old chart showed which channels were FRS and which were GMRS. The new chart was basically a waste because all the channels could be used by all users; some of the channels would have higher output. Motorola did respond to my claim that the manual was misleading by saying that the chart in the manual wasn’t there to indicate how much power the radios actually put out, but to show that it complied with the FCC maximum.

This newfound knowledge kind of bummed me out, so I went back to the drawing board and went through all the Motorola Talkabout radios (I like the design of the radios over other brands) and looked up the FCC ID of each one looking for the radios that had the highest output power (up to the legal limit). If my information is correct, the Motorola Talkabout T460 which has an FCC ID of AZ489FT4924 has a maximum output power twice that of the T260 (1.7 W). While I don’t expect to ever get the 35 mile range advertised with these radios, I at least could have radios with the highest power available.

I purchased a pair of the T460 radios and have now used the radios on a couple of trips and they are far superior to the T260 (and the old T5000 ones I had before). (While I did purchase these radios, Motorola generously sent me another pair of the T460 radios in response to my letter to them about the T260 manual). Specifically the T460 has an analog control for the volume making it easier to turn the units on/off and control the volume. They also have a feature called VibraCall which vibrates the radio the first time it receives a transmission if it hasn’t received a transmission in a certain period of time; this is handy if the volume is turned down or you happen to not be paying attention. Once the radio vibrates, you can ask the other end to repeat the message. The radios also have a weather radio, different call tones, and a few other features that are generally not of much use to me.

Pros

  • Highest power output of Motorola Talkabout radios
  • Water/splash resistant (IP54)
  • VibraCall
  • Analog volume control
  • Acceptable voice quality
  • Standby time allows for all day usage in my testing

Cons

  • Doesn’t come anywhere close to the advertised range

Summary

If you’re looking for relatively low-cost, unlicensed FRS radios, I think the Motorola Talkabout T460 are hard to beat. They have a decent range and a number of features that make them easy to use. Time, of course, will tell how durable they are and how good the range is in a variety of environments.

All In with Home Assistant

I’ve spent parts of the last 9 months playing with Home Assistant and have written about some of my adventures. A few weeks ago, I finally decided to go all in with Home Assistant and ditch my Vera. I bought an Aeotec Z-Stick Gen5 Z-Wave dongle and starting moving all my devices over to it. Within a few days, I had all my devices moved over and unplugged my Vera. Everything was running great on my Raspberry Pi B, but I noticed that the History and Logbook features were slow. I like looking at the history to look at temperature fluctuations in the house.

History graph

I had read that switching from the SQLite database to a MySQL database would speed things up. So I installed MariaDB (a fork of MySQL) on my Raspberry Pi and saw a slight increase in speed, but not much. Next was to move MariaDB to a separate server using Docker. Again, a slight increase in speed, but it still lagged. At this point everything I read pointed to running Home Assistant on an Intel NUC or another computer. I didn’t want to invest that kind of money in this, so I took a look at what I had and started down the path of installing Ubuntu on my old Mac mini which was completely overkill for it (Intel Quad Core i7, 16 GB RAM, 1 TB SSD). Then I remembered that I had read about a virtual machine image for Hass.io and decided to give that a try.

After some experimenting, I managed to get Home Assistant installed on a virtual machine running in VMWare on my Mac Pro. (A few days after I did this, I saw that someone posted an article documenting this.) I gave the VM 8 GB of RAM, 2 cores (the Mac Pro has 12) and 50 GB of storage. Wow, the speed improvement was significant and history now shows up almost instantly (the database is running in a separate VM)! I was so pleased with this, I decided to unplug the Raspberry Pi and make the virtual machine my home automation hub. There were a few tricks, however. The virtual machine’s main disk had to be setup as a SATA drive (the default SCSI wouldn’t boot), suspending the VM confused it, and the Z-Wave stick wouldn’t reconnect upon restart. After much digging, I found the changes I needed to make to the .vmx file in the virtual machine:

    suspend.disabled = "TRUE"
    usb.autoConnect.device0 = "name:Sigma\ Designs\ Modem"

(The USB auto connect is documented deep down on VMWare’s site.)

I’ve rebooted the Mac Pro a few times and everything comes up without a problem very quickly, so I’m now good to go with this setup. Z-Wave takes about 2.5 minutes to finish startup vs. 5 or 6 on the Pi. A friend asked if I was OK with running a “mission critical” component on a VM. I said that I was because the Mac Pro has been rock solid for a long time and my virtual machines have been performing well. I could change my mind later on, but I see no reason to spin up another machine when I have a perfectly overpowered machine that is idle 95% of the time.

What next? Now that I have more power for my automation, I may look at more pretty graphs and statistics. I may also just cool it for awhile as I’ve poured a lot of time into this lately to get things working to my satisfaction. This has definitely been an adventure and am glad that I embarked on it.

Dipping my toe in the world of Docker

A former co-worker of mine has talked about Docker for years and I’ve taken a look at it a few times, but have generally been uninterested in it. Recently with my interest in Home Assistant, I’ve decided to take another look as many of the installs of Home Assistant as well as Hass.io are based on Docker.

I’ve used virtual machines running on VMware Fusion for years with some Windows installs and some Linux installs. I’m very comfortable with Linux, but kind of dislike maintaining different packages. There are package managers that handle much of it for me, but then there are other packages that have special installations.

I had a few goals in mind for seeing if Docker could replace the current virtual machines I had running for Pi-hole and Observium. The goals were pretty simple that I wanted easy updates and be able to easily backup the data. In the Docker world, updates are dead simple and in many docker containers, the data is stored outside of the container making it easy to backup. As another goal, I wanted to be able to experiment with other containers to see what else I could add to my network.

With all this in mind, I started looking at how to setup Docker. Pretty quickly, I realized that Docker for the Mac was virtually useless for me as it didn’t handle all the networking that Docker running on Linux could. So that meant installing Docker on a Linux VM; that almost negated my goal of easy updates as I’d still have to update the virtual machine running Ubuntu. I could live with that if the rest of the setup was straight forward and didn’t have to remember how to update each container individually.

In order to make backups easy, I wanted to store the data on my Mac and not inside of the virtual machine. I’ve not had great luck with the VMWare tools for mounting volumes, so I decided to use CIFS (SMB) to mount a volume in Linux which works well except for the MariaDB (MySQL fork) Docker container. Not a big deal, I’d just add a cron job to dump the databases every few hours and store the dumps on the mounted volume. I added the following to /etc/fstab

    //myserver/account/Documents/Ubuntu /mnt/mediacenter cifs username=account,domain=WORKGROUP,password=password,rw,hard,uid=1000,gid=1000 0 0

I also had to turn on Windows File Sharing options on the Mac.

Windows File Sharing

The crontab is:

    30 */2 * * * /usr/local/bin/backup_mysql

with the backup_mysql file being

    #!/bin/sh
    /usr/bin/mysqldump -h 127.0.0.1 -u root -ppassword --lock-all-tables --all-databases | gzip > /mnt/mediacenter/backups/mysql/mysql_backup_$(date +"%m-%d-%Y-%H_%M_%S").gz
    find /mnt/mediacenter/backups/mysql/* -mtime +3 -exec rm {} \;

The next hurdle was dealing with IPv6; most people don’t care about it, but I’m not most people! IPv6 is quite complicated (at least to me), so that took a bit of experimenting to get it to work in Docker. For future reference, ndppd lets the virtual machine tell the world that it handles IPv6 for the Docker containers (basically).

So where was I? After getting the Linux VM setup, it was on to setting up my containers. With docker-compose, I could setup one file that was the configuration for all my containers. Now this was great as I could modify it and test out different containers. After a few days of work, this is the core of my docker-compose file. There are a few other containers I’ve added including LibreNMS, but this is basically what I have. The nginx-proxy is great as I just add DNS entries for each service and it handles SSL and lets me run multiple web services on the same machine.

version: "2.3"
services:
  nginx-proxy:
   image: jwilder/nginx-proxy
   environment:
      - DEFAULT_HOST=pihole.exmple.com
   ports:
     - "80:80"
     - "443:443"
     - "::1:8080:80"
   dns:
     - 10.0.1.1
   volumes:
     - /var/run/docker.sock:/tmp/docker.sock:ro
     - '/mnt/mediacenter/docker/certs:/etc/nginx/certs'
   restart: always
   networks:
      default:
        ipv6_address: XXXX:XXXX:XXXX:XXXX:1::2

  pihole:
    image: pihole/pihole:latest
    ports:
      - "53:53/tcp"
      - "53:53/udp"
    environment:
      # enter your docker host IP here
      ServerIP: 10.0.1.200
      WEBPASSWORD: ''
      DNS1: 127.0.0.1
      DNS2: 10.0.1.1
      DNS3: XXXX:XXXX:XXXX:XXXX:XXXX:XXXX:XXXX:XXXX
      # IPv6 Address if your network supports it
      ServerIPv6: XXXX:XXXX:XXXX:XXXX:1::3
      VIRTUAL_HOST: pihole.example.com
    volumes:
      - '/mnt/mediacenter/docker/pihole/pihole/:/etc/pihole/'
      - '/mnt/mediacenter/docker/pihole/dnsmasq.d/:/etc/dnsmasq.d/'
      - '/mnt/mediacenter/docker/pihole/pihole.log:/var/log/pihole.log'
      # WARNING: if this log don't exist as a file on the host already
      # docker will try to create a directory in it's place making for lots of errors
      # - '/var/log/pihole.log:/var/log/pihole.log'
    restart: always
    cap_add:
        - NET_ADMIN
    networks:
      default:
        ipv6_address: XXXX:XXXX:XXXX:XXXX:1::3

  mariadb:
     image: mariadb
     ports:
       - 3306:3306
     volumes:
       - '/mariadb/data/:/var/lib/mysql/'
     environment:
       MYSQL_ROOT_PASSWORD: password
     restart: always
     user: "1000"
     networks:
       default:
        ipv6_address: XXXX:XXXX:XXXX:XXXX:1::4

networks:
  default:
      driver: bridge
      enable_ipv6: true
      ipam:            
        driver: default            
        config:                
            - subnet: 192.168.0.0/24                
            - subnet: "XXXX:XXXX:XXXX:XXXX:1::/120"                

Phew, that was a lot of work to get things running. However, I’m pretty pleased with how things are working. I now have the ability to experiment with other containers and can restore my data easily if things go awry. Is Docker the answer to everything? Probably not, but it appears to handle this job well.

Non-secure network connections in Carnival Cruise’s app

This past summer my family took a cruise on Carnival Cruise Lines to the Eastern Caribbean. There were a total of 17 of us and we had a good time. One of the suggested ways for everyone to stay in touch was to use the Carnival Hub App which is basically their goto app for up to date information on the ship which has a messaging component. For $5 per device for the cruise, it didn’t seem all that unreasonable except that just about everything on the cruise costs extra!

The chat app, like most chat apps, has push notifications. In iOS, there are 2 types of push notifications, local and remote. The remote ones require a persistent connection to Apple’s Push Notification Service (APNS). I suspected that the app used local notifications and stayed open in the background as having several thousand devices connected to either Apple or Google’s push servers over a satellite link would not make much sense. So I pulled out my trusty copy of Charles Proxy and decided to see what traffic was being sent. What I saw just about shocked me.

Connections using the app were NOT using SSL! Since the WiFi was unprotected (it would be cumbersome to give out the WiFI password to so many users), anyone with rudimentary hardware/software could sniff all the traffic. SSL certificates are cheap and easy to deploy, so there is no excuse for every service not to be using them (I use them internally on all services running at my house).

Is it so bad that the app isn’t using SSL as no credit card data is flowing through the app? Absolutely! People could be chatting about which rooms they are in and when they are going to meet giving criminals information about when to go into their rooms. People could also tell their friends/family what they have in their rooms making them targets for criminals (“I put the laptop/camera under the bed”, for example). Not only was chat not SSL protected, all other aspects of the app’s communication were sent in clear text.

Example requests and responses

This request has my Folio number and name; those 2 pieces of information could allow anyone to charge to my room. While they should look at the ship ID (you are given basically a name badge that is your room key and used for purchases), I don’t know if the staff always looked at them. My cabin number was also in the request.

GET /FHMA-leviathan/api/Guest?isKiosk=false HTTP/1.1

{
    "ChatPassword": "efabb219324c47dfbfef469523b495d0",
    "Nickname": "SCOTT GRUBY",
    "DiningRoom": "Northern Lights Upr",
    "DiningTime": "E",
    "DiningTable": "494",
    "MusterStation": "B4",
    "LoyaltyNumber": "XXXXXXX",
    "LoyaltyLevel": "BLUE",
    "NumCruises": "1",
    "DateOfBirth": "",
    "Age": "45",
    "BookingNumber": "XXXXX",
    "BookingSequenceNumber": "18",
    "FolioNumber": "8540",
    "FolioActiveIndicator": "A",
    "FolioType": "G",
    "FolioAccountNum": "8829",
    "ResponsibleParty": "Y",
    "AlcoholRestricted": "N",
    "AtRisk": "",
    "CashBalance": "85.25",
    "AccountType": "MIXED",
    "FolioLimit": "",
    "TotalCharges": "43.66",
    "CabinNumber": "2309",
    "CrewInfoNumber": "",
    "VoyageStartDate": "2018-08-04T10:01:55",
    "VoyageEndDate": "2018-08-11T10:01:55",
    "Duration": "7",
    "FacebookId": null,
    "InitialLogin": "2018-08-04T14:08:02.963",
    "ChatPurchased": "2018-08-04T14:10:15.9",
    "InitialUserAgent": "funhub/2587 CFNetwork/902.2 Darwin/17.7.0",
    "IsResponsibleParty": true,
    "IsFolioCancelled": false,
    "IsFolioDeactivated": false,
    "FirstName": "SCOTT",
    "LastName": "GRUBY",
    "VoyageId": "MC20180804007",
    "AvatarUrl": "http://leviathan.cclfunhub.com/FHMA-leviathan/Avatars/2811.jpg?636690028868502174",
    "IsChatProvisioned": true,
    "IsChatPurchased": true,
    "AcceptedPixelsTerms": false,
    "ChatId": 2811,
    "SelfieUrl": null,
    "DecurtisGuestId": "445911",
    "DismissedPixelsSurvey": null,
    "CompletedPixelsSurvey": true
}

Want to know who I have on my chat list? Bingo! (Names were removed.)

GET /FHMA-leviathan/api/contacts HTTP/1.1

[{
    "Relationship": "Chat contact request",
    "IsMinor": false,
    "FirstName": "XXXXXXX",
    "LastName": "XXXXXXX",
    "VoyageId": "MC20180804007",
    "AvatarUrl": "http://leviathan.cclfunhub.com/FHMA-leviathan/Avatars/1248.jpg?636690701830901659",
    "IsChatProvisioned": true,
    "IsChatPurchased": true,
    "AcceptedPixelsTerms": null,
    "ChatId": 1248,
    "SelfieUrl": null,
    "DecurtisGuestId": null,
    "DismissedPixelsSurvey": null,
    "CompletedPixelsSurvey": null
}, {
    "Relationship": "Chat contact request",
    "IsMinor": false,
    "FirstName": "XXXXXXX",
    "LastName": "XXXXXXX",
    "VoyageId": "MC20180804007",
    "AvatarUrl": "http://leviathan.cclfunhub.com/FHMA-leviathan/Avatars/2074.jpg?636690009457720910",
    "IsChatProvisioned": true,
    "IsChatPurchased": true,
    "AcceptedPixelsTerms": null,
    "ChatId": 2074,
    "SelfieUrl": null,
    "DecurtisGuestId": null,
    "DismissedPixelsSurvey": null,
    "CompletedPixelsSurvey": null
}, {
    "Relationship": "Chat contact request",
    "IsMinor": false,
    "FirstName": "XXXXXXX",
    "LastName": "XXXXXXX",
    "VoyageId": "MC20180804007",
    "AvatarUrl": "http://leviathan.cclfunhub.com/FHMA-leviathan/Avatars/2075.jpg?636690046360212793",
    "IsChatProvisioned": true,
    "IsChatPurchased": true,
    "AcceptedPixelsTerms": null,
    "ChatId": 2075,
    "SelfieUrl": null,
    "DecurtisGuestId": null,
    "DismissedPixelsSurvey": null,
    "CompletedPixelsSurvey": null
}, {
    "Relationship": "Chat contact request",
    "IsMinor": false,
    "FirstName": "XXXXXXX",
    "LastName": "XXXXXXX",
    "VoyageId": "MC20180804007",
    "AvatarUrl": null,
    "IsChatProvisioned": true,
    "IsChatPurchased": true,
    "AcceptedPixelsTerms": null,
    "ChatId": 2396,
    "SelfieUrl": null,
    "DecurtisGuestId": null,
    "DismissedPixelsSurvey": null,
    "CompletedPixelsSurvey": null
}]

Want to know what my room charges were?

GET /FHMA-leviathan/api/guest/AccountSummary HTTP/1.1

{
    "TotalCharges": "346.17",
    "TotalCash": "0",
    "TotalCredits": "60.92",
    "BalanceDue": "0",
    "AvailableCash": "0",
    "AvailableCashAtFolio": "0",
    "MaxCashForDeposit": "9999",
    "CashBalance": "85.25",
    "AccountType": "MIXED",
    "GuestList": [{
        "GuestCharges": "134.31",
        "GuestChargesLessGrats": "43.66",
        "LastName": "GRUBY",
        "FirstName": "SCOTT",
        "MiddleName": "ALLEN",
        "FolioNumber": "8540",
        "VoyageNumber": "MC20180804007",
        "BookingNumber": "8GM8F5",
        "PaxSeqNumber": "18"
    }, {
        "GuestCharges": "91.65",
        "GuestChargesLessGrats": "1",
        "LastName": "GRUBY",
        "FirstName": "XXXXXX",
        "MiddleName": "XXXXXX",
        "FolioNumber": "8538",
        "VoyageNumber": "MC20180804007",
        "BookingNumber": "8GM8F5",
        "PaxSeqNumber": "20"
    }, {
        "GuestCharges": "120.21",
        "GuestChargesLessGrats": "29.56",
        "LastName": "GRUBY",
        "FirstName": "XXXXXXX",
        "MiddleName": "XXXXX",
        "FolioNumber": "8539",
        "VoyageNumber": "MC20180804007",
        "BookingNumber": "8GM8F5",
        "PaxSeqNumber": "19"
    }],
    "FolioCharges": [{
        "LastName": "GRUBY",
        "FirstName": "SCOTT",
        "MiddleName": "ALLEN",
        "ChargeDate": "8/4/2018",
        "ChargeTime": "11:28:17AM",
        "ChargeLocation": "INTERNET ACCESS",
        "ReceiptNumber": "379101",
        "ChargedAmount": "0",
        "IsReceiptAvailable": "Y"
    }, {
        "LastName": "GRUBY",
        "FirstName": "SCOTT",
        "MiddleName": "ALLEN",
        "ChargeDate": "8/4/2018",
        "ChargeTime": "11:40:45AM",
        "ChargeLocation": "NON-REFUNDABLE ONBOARD CREDITS",
        "ReceiptNumber": "020620",
        "ChargedAmount": "-25",
        "IsReceiptAvailable": "N"
    }, {
        "LastName": "GRUBY",
        "FirstName": "SCOTT",
        "MiddleName": "ALLEN",
        "ChargeDate": "8/4/2018",
        "ChargeTime": "11:40:46AM",
        "ChargeLocation": "REFUNDABLE ONBOARD CREDITS",
        "ReceiptNumber": "020620",
        "ChargedAmount": "-3.64",
        "IsReceiptAvailable": "N"
    }, {
        "LastName": "GRUBY",
        "FirstName": "SCOTT",
        "MiddleName": "ALLEN",
        "ChargeDate": "8/4/2018",
        "ChargeTime": "2:14:49PM",
        "ChargeLocation": "CHAT PLAN",
        "ReceiptNumber": "381964",
        "ChargedAmount": "5",
        "IsReceiptAvailable": "Y"
    }, {
        "LastName": "GRUBY",
        "FirstName": "SCOTT",
        "MiddleName": "ALLEN",
        "ChargeDate": "8/4/2018",
        "ChargeTime": "2:51:38PM",
        "ChargeLocation": "BLUE IGUANA BAR",
        "ReceiptNumber": "382739",
        "ChargedAmount": "10.07",
        "IsReceiptAvailable": "Y"
    }, {
        "LastName": "GRUBY",
        "FirstName": "SCOTT",
        "MiddleName": "ALLEN",
        "ChargeDate": "8/6/2018",
        "ChargeTime": "6:18:33PM",
        "ChargeLocation": "NORTHRN LS UPPER SVC served in Main Dining Room",
        "ReceiptNumber": "419829",
        "ChargedAmount": "10.64",
        "IsReceiptAvailable": "Y"
    }, {
        "LastName": "GRUBY",
        "FirstName": "SCOTT",
        "MiddleName": "ALLEN",
        "ChargeDate": "8/7/2018",
        "ChargeTime": "8:37:19AM",
        "ChargeLocation": "LAUNDRY SELF-SERVICE",
        "ReceiptNumber": "429017",
        "ChargedAmount": "3",
        "IsReceiptAvailable": "Y"
    }, {
        "LastName": "GRUBY",
        "FirstName": "SCOTT",
        "MiddleName": "ALLEN",
        "ChargeDate": "8/7/2018",
        "ChargeTime": "11:31:37AM",
        "ChargeLocation": "TOWELS,ROBES&BOOKS",
        "ReceiptNumber": "430321",
        "ChargedAmount": "14.95",
        "IsReceiptAvailable": "Y"
    }, {
        "LastName": "GRUBY",
        "FirstName": "SCOTT",
        "MiddleName": "ALLEN",
        "ChargeDate": "8/9/2018",
        "ChargeTime": "2:04:26PM",
        "ChargeLocation": "SERVICE GRATUITY",
        "ReceiptNumber": "876839",
        "ChargedAmount": "90.65",
        "IsReceiptAvailable": "Y"
    }]
}

It appears that the chat application was using the Jabber protocol (XMPP) running on port 5222 (non SSL port). I only grabbed a little of the traffic, but the XMPP protocol would have all the chat conversations appearing in it.

<stream:stream xmlns:stream='http://etherx.jabber.org/streams'
xmlns='jabber:client' xml:lang='en-US.UTF-8' id='1B9C3F49DB9F71'
from='chat.cclfunhub.com'
version='1.0'><stream:features><mechanisms
xmlns='urn:ietf:params:xml:ns:xmpp-sasl'><mechanism>PLAIN</
mechanism><mechanism>CISCO-VTG-TOKEN</mechanism></mechanisms></
stream:features><success
xmlns='urn:ietf:params:xml:ns:xmpp-sasl'/><stream:stream
xmlns:stream='http://etherx.jabber.org/streams'
xmlns='jabber:client' xml:lang='en-US.UTF-8' id='1B9C3F49DB9F71'
from='chat.cclfunhub.com' version='1.0'><stream:features><bind
xmlns='urn:ietf:params:xml:ns:xmpp-bind'/><session
xmlns='urn:ietf:params:xml:ns:xmpp-session'/></stream:features><
iq id='0E579D08-88CC-4A8E-8A80-C730BA9B0505' type='result'><bind
xmlns='urn:ietf:params:xml:ns:xmpp-bind'><jid>2811@chat.
cclfunhub.com/FA8CEBAF-6EDF-4B10-8D1E-7E6AF213F07C</jid></bind><
/iq><iq id='63D67AE8-2A53-4047-A9BE-A3E429953B7E'
type='result'/><presence
from='505c1c79-24c3-41d6-89c3-31e687ad3ab4@conference-2-
standalonecluster61f84.chat.cclfunhub.com/3940#ad29759f-2e4d-
4428-bbd2-23f953c285d2' id='tlDWA-7797'
to='2811@chat.cclfunhub.com/FA8CEBAF-6EDF-4B10-8D1E-7E6AF213F07C
'><x xmlns='http://jabber.org/protocol/muc#user'><item
affiliation='owner'
jid='3940@chat.cclfunhub.com/8f1c3bd92d91ad29'
role='moderator'/></x><c hash='sha-1'
node='http://www.igniterealtime.org/projects/smack'
ver='A1TcJY4mFaFrO9M5ctJsIPdHhsU='
xmlns='http://jabber.org/protocol/caps'/><delay
stamp='2018-08-10T04:05:07.36362Z' xmlns='urn:xmpp:delay'/><x
stamp='20180810T04:05:07.36362'
xmlns='jabber:x:delay'/></presence><presence
from='505c1c79-24c3-41d6-89c3-31e687ad3ab4@conference-2-
standalonecluster61f84.chat.cclfunhub.com/2508#4faf58be-ee9d-
4d80-8ee2-2ee662f6629a' id='vj32Z-86255'
to='2811@chat.cclfunhub.com/FA8CEBAF-6EDF-4B10-8D1E-7E6AF213F07C
'><x xmlns='http://jabber.org/protocol/muc#user'><item
affiliation='owner'
jid='2508@chat.cclfunhub.com/887e88d21b5f8201'
role='moderator'/></x><c hash='sha-1'
node='http://www.igniterealtime.org/projects/smack'
ver='A1TcJY4mFaFrO9M5ctJsIPdHhsU='
xmlns='http://jabber.org/protocol/caps'/><delay
stamp='2018-08-10T03:02:13.862187Z' xmlns='urn:xmpp:delay'/><x
stamp='20180810T03:02:13.862187'
xmlns='jabber:x:delay'/></presence><presence
from='505c1c79-24c3-41d6-89c3-31e687ad3ab4@conference-2-
standalonecluster61f84.chat.cclfunhub.com/1248#-iOS-00689BAE-
CC73-43A3-A258-4E9F8BA160A2'
to='2811@chat.cclfunhub.com/FA8CEBAF-6EDF-4B10-8D1E-7E6AF213F07C
'><x xmlns='http://jabber.org/protocol/muc#user'><history
maxchars='0'/><item affiliation='owner'
jid='1248@chat.cclfunhub.com/E22C11CA-B399-4D9B-A3D9-
BE9C35B5A1DD' role='moderator'/></x><delay
stamp='2018-08-10T03:57:54.660208Z' xmlns='urn:xmpp:delay'/><x
stamp='20180810T03:57:54.660208'
xmlns='jabber:x:delay'/></presence>

WiFi Issues

The security of the app wasn’t the only issue in using it. I suspect that the WiFi was also overloaded; with something like 6000 people on the ship, there were several thousand devices connected at all times even if they weren’t communicating at the same time. This made using the app very frustrating; messages didn’t get through and notifications were delayed, if they were received at all. Imagine all the people annoyed that his or her significant other wouldn’t respond even though he or she actually did. I stopped relying on the app in the first few hours of using it!

Recommendations to Carnival

  • Deploy a wildcard SSL certificate that is issued by a major SSL vendor (no self-signed certificates) to each internal server on each ship.
  • Add more WiFi capacity to every ship.
  • Perform load testing of the apps (iOS and Android).
  • Perform load testing of the WiFi network.

I’m not sure if the app has been updated, but here was the information about the version:

System Name: iOS
System Version: 11.4.1
Application Version: 2.2.3 (Build 0)
Ship Name: Magic
Hostname: http://leviathan.cclfunhub.com/FHMA-leviathan
Voyage ID: MC20180804007

Conclusion

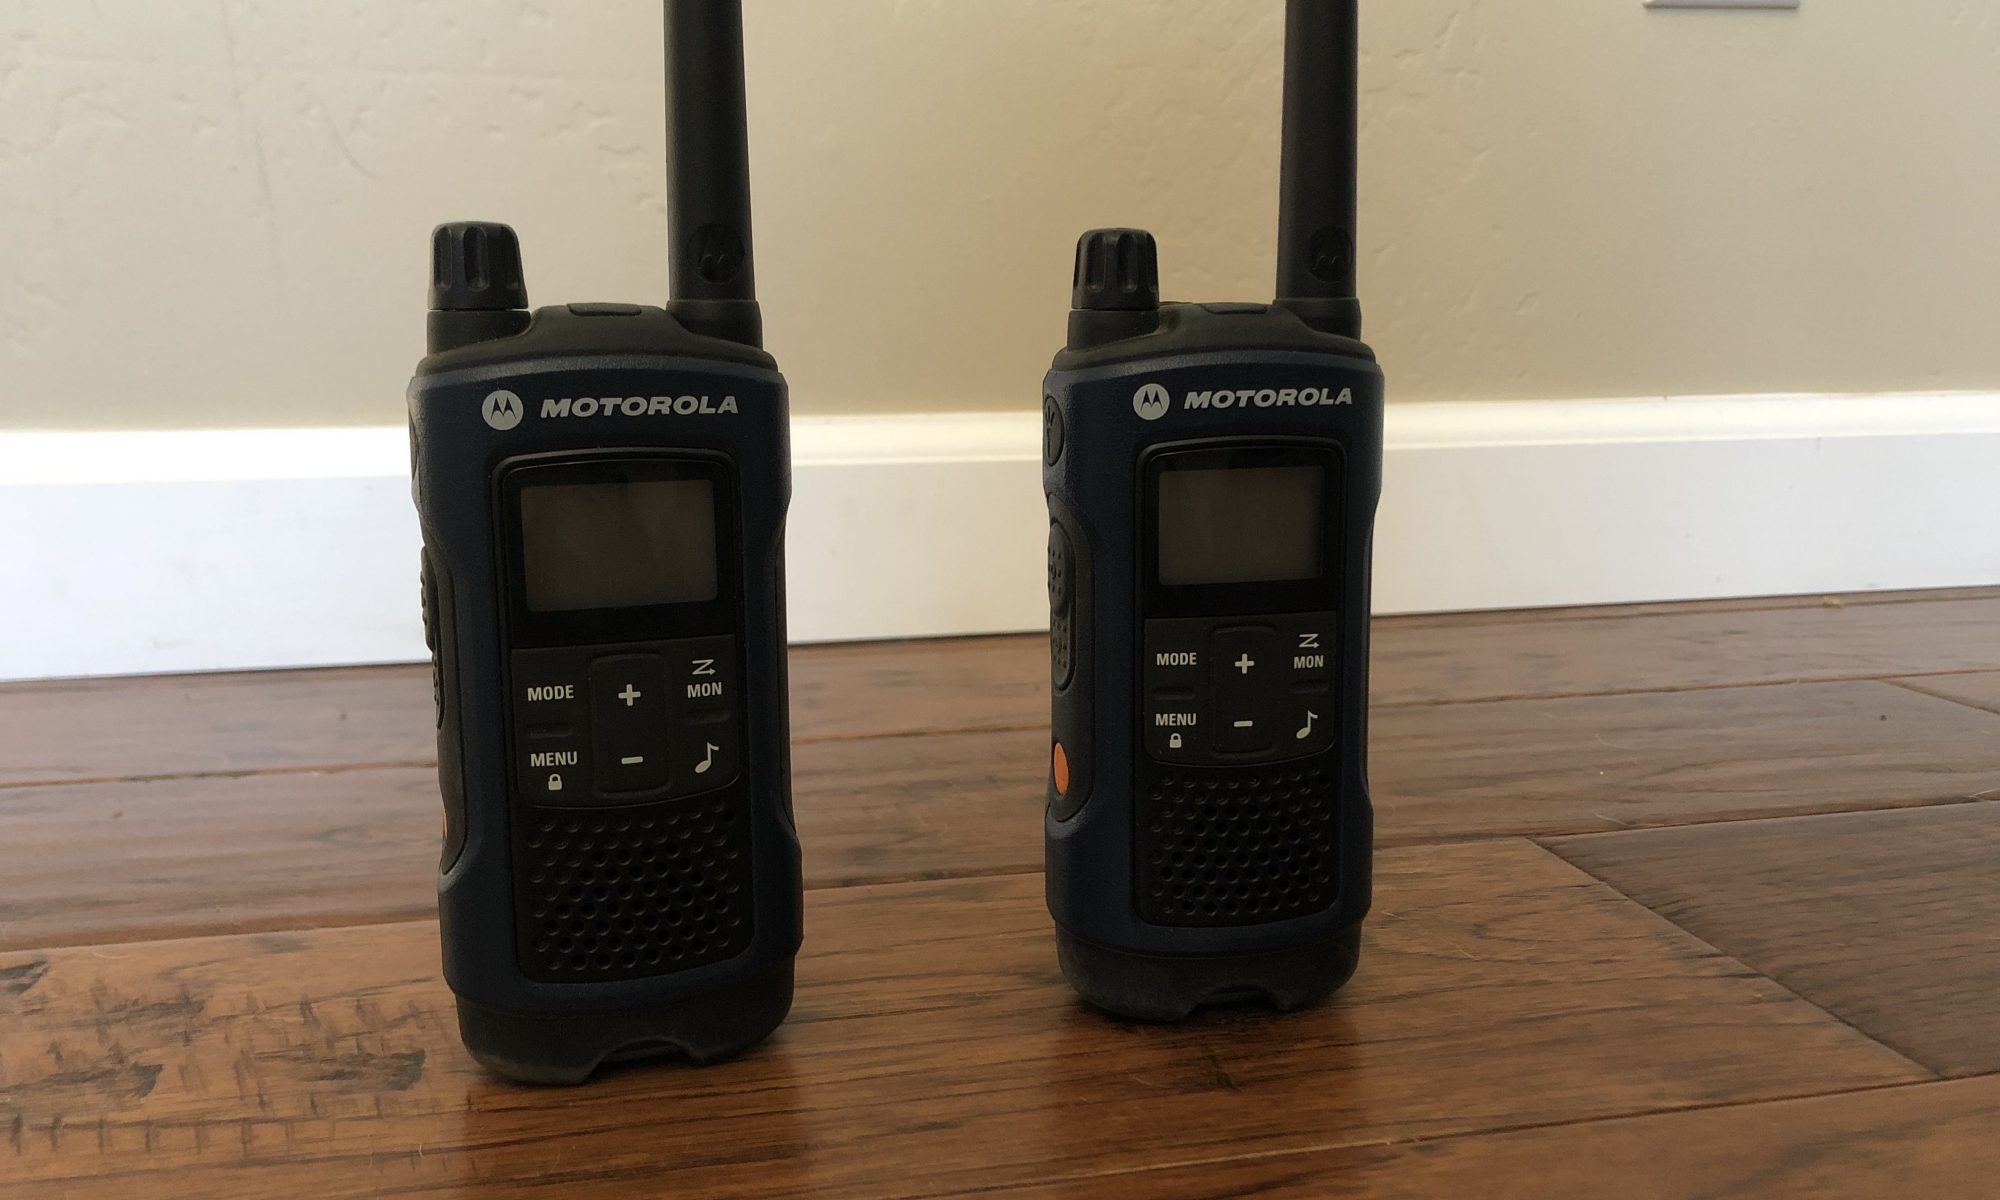
While the concept of being able to communicate with others on a cruise especially if you have a large party is great, Carnival’s implementation needs work. In the future, I’m inclined to bring FRS radios; they definitely won’t work everywhere, but could be more reliable in certain situations. Also, meeting your group each morning and going over plans even if people go their separate ways (like people did before technology!) might also be in the cards.

If Carnival wants to get in touch with me about these issues or wants help with the app, I’m available!

HDMI ARC and HDMI CEC

Several years ago, I purchased a Vizio 5.1 soundbar system. At the time, the way to get the best audio from it was to use the optical input. This worked fine, but required me to use 3 remotes for watching TV; 1 for the TV, 1 for the soundbar, and 1 more for the Roku I had at the time. When the Apple TV 4 came out, I learned about HDMI CEC which is basically a protocol that lets devices talk to each other and have some control. The Apple TV remote then let me turn on the TV and put it in standby without touching the TV remote. That brought me down to 2 remotes. The Apple TV remote could also control the soundbar using IR which brought me down to 1 remote.

This setup worked fine for years, but had a few slight problems. The first is that when I powered on the Apple TV and TV using the remote, I’d have to hit the volume up button a few times to wake up the soundbar and then would have to lower the volume. Second is that putting the Apple TV and TV in standby did nothing for the soundbar; it went into low power mode after awhile, however. The last complaint, albeit minor is that I couldn’t use my iPhone or iPad to control the volume.

I’d read about HDMI Audio Return Channel (ARC) where instead of using optical audio out, an HDMI cable could be used which would give better audio. My soundbar didn’t have this option (the TV which was older than the soundbar did have it) so I was stuck with the optical audio. In addition, if the devices supported HDMI CEC, the volume could be controlled using another device’s remote.

A few weeks ago, I finally decided to upgrade my soundbar to one that supports Dolby Atmos and purchased the Vizio SB36512-F6 which was on sale at Costco. While I have no idea if I’ll be able to hear the Dolby Atmos (I need content to support it), I’m pretty pleased with the purchase. This soundbar is connected via HDMI and allows me to use the Apple TV remote (and my iPhone/iPad) to completely control my entertainment devices. In addition, the sound on the bar seems crisper and can now hear the rear speakers much better. It may be that HDMI ARC works better than optical or maybe makes it easier to configure. I am excited to be able to try out Atmos and see if that lives up to the hype in the room I watch TV (it may not as the ceiling isn’t that high and due to the layout, it is just part of a larger room).

I love when devices work together and with this new soundbar, I may have found the perfect combination for my viewing experience.

One last thing, the iPhone app for the soundbar is a piece of garbage. I used it to upgrade the firmware on the soundbar and promptly deleted it. Why is is so hard to make a basic app for controlling the settings of a device?

Review: Anker PowerCore 26800 Power Bank

On a recent camping trip, I brought along a few small power banks to charge phones and watches (we weren’t completely out in the wilderness and having a phone for pictures and emergencies is quite important). It was kind of awkward to charge the devices using 3 separate batteries. I decided to look for larger power banks that could charge multiple devices at once. Originally I was looking for one that could also power my laptop for a little bit, but decided that the number of times I’ve had to power it have been few and far between. Since I had good results with Anker products, I purchased the Anker PowerCore 26800 Portable Charger.

This charger is close to the largest battery that you can legally bring on an airplane, but weighs just over a pound. In addition to the 3 USB ports (many power banks just have 2), it has 2 micro USB ports for input to charge it faster. With a battery this large, faster charging is nice to have. The power bank is pretty basic; charge it up with the micro USB inputs (it doesn’t come with a wall adapter, so I just use the Anker 6-Port USB Charger to charge it) and then plug devices into the USB ports.

We used the power bank a number of times this past summer during another trip. I put it in my backpack with a few cables and during the day charged up our phones (even with new batteries, our iPhones suck down batteries when using GPS). Being able to plug in 2 devices at once was quite convenient. Also since the battery is so large, I think I only had to charge it once on a 2 week trip.

This battery has performed well and I anticipate using it on camping trips, family vacations, and having it around in case of emergencies. As I’ve switched to USB charging for as many devices as possible including flashlights, this battery can also be quite helpful in an emergency or a disaster.

Pros

  • Largest battery you can take on a plane.
  • 3 USB ports for charging devices.
  • Faster charging with 2 USB inputs.
  • Not too heavy.

Cons

  • Some may consider it a bit expensive for a battery.

Summary

This power bank has allowed me to consolidate power banks on trips. While it may not be the smallest, I don’t have to worry about it running out of power even if I charge a number of devices. It just works and the 3 USB ports make it more useful to me than other power banks I could have purchased. If you’re in the market for a power bank, I’d definitely consider this one.

Never enough charging ports

This past summer my family went on a vacation to the Grand Canyon and a few other destinations in Arizona (yes, it was hot!). For the driving trip we packed a lot of devices. Between the 3 of us, we had 3 iPads, 3 iPhones (my son just uses one for its camera), 2 Apple Watches, AirPods, a mobile hotspot, and an Anker PowerCore 26800 Power Bank. After I bought and reviewed the Anker 5-Port USB charger several years ago, I realized that the Anker 6-Port USB Charger was a better device as it didn’t add much bulk to the 5 port and gave me an extra port. Since then I’ve bought a few of the chargers and put one along with cables in a small bag I take when I travel. While I don’t need to charge everything at once, 6 ports just isn’t enough to keep everything charged especially since the power bank uses 2 ports to charge faster. After we got back from the trip, I ordered another charger.

With 2 6-port chargers, I think that I’m all set for awhile. If I plug in everything at once (which I’ll rarely do), all the devices will use 12 ports! That’s kind of sad and amazing at the same time that we travel with some much technology. I just have to remember to bring enough cables to charge what needs to be charged. In my opinion, there is no reason to ever travel with smaller chargers even if they are a little more compact. I travel alone, I’m going to have 6 devices with me. Yes, I’m addicted to my gadgets.

Porting an iOS app to macOS

About six weeks ago (2 weeks or so before WWDC), my client asked me to port an enterprise app I wrote for iOS to macOS. I haven’t done macOS work for a long time, but how hard could it be? In the last few years, a number of iOS-like technologies have come to macOS; while they aren’t named the same, many things function similarly like NSViewController (UIViewController), NSTableView (UITableView), NSTableCellView (UITableViewCell), etc. All of my iOS apps for this client are written in Swift, so it made a lot of sense to use Swift for this macOS app.

Getting started with the project took about a week to get familiar with macOS again, but then things started moving. The first thing I did after the app ran was to make a version of my framework that I use across 5 iOS apps (models, networking, methods, etc.) over to the Mac which wasn’t difficult; I only had to do a few platform specific defines for the files I moved over (I didn’t move the UI pieces over). Once the basic app was running, I started the UI and had real data showing up within a few weeks from start. I took a number of pieces of the iOS app, copied the code and pasted it into the Mac app. The number of changes for these pieces were minimal (.stringValue instead of .text on the NSTextField vs UILabel), but I was quite pleased how I was able to reuse the code.

From start to basically feature parity with iOS took about 5 weeks. I’m sure that there are things that I’d change such as doing extensions on classes instead of copying/pasting code as I’ll have to maintain both apps going forward, but that could obscure how things work. I am extremely pleased with how well this project is going (it hasn’t been deployed, yet).

At WWDC Marzipan was revealed and it looks like it will allow many iOS apps to run on macOS. This, of course, would have helped me get my app up and running, but would it feel like a Mac app? While not every app is as straight forward as the one I ported, developers that want to move their apps to macOS today have nothing stopping them.

Experimenting with Home Assistant

Last week I read that Ubiquiti Networks had hired the main author of the Home Assistant home automation project. I looked at the project and at first I couldn’t understand what the project would do, but after poking at it, I realized that it is the glue that connects disparate automation systems. I wrote about putting together various pieces together and thought that maybe Home Assistant could put all the pieces together in one little box.

Over the course of a few hours last weekend, I installed Home Assistant on a Raspberry Pi 2, configured it to connect with my Vera and set it up for HomeKit and Amazon Echo. Right away Home Assistant removed Homebridge and HA Bridge from my system; fewer parts means it is easier to maintain.

Looking at the list of available components, it is clear that Home Assistant could replace my Vera and could control everything without me having to put together all the little parts. It has components for Envisalink, my Russound audio distribution units, my Squeezebox devices and everything else I could throw at it. If I put a Z-Wave stick on the Pi, Home Assistant could also natively handle Z-Wave. In order to replace my Vera, I’d have to convert my schedules and my PLEG actions over to Home Assistant which is not an insignificant task.

While I’m not ready to say that Home Assistant is the clear winner in the home automation game as configuring it is quite painful (most of it has to be configured via specifically formatted YAML files), it is very intriguing. If the author does what he has said he’s going to do to bring more of the configuration to the GUI, but leave advanced features to the YAML files, I’ll be quite happy. It isn’t for the faint of heart, but well worth a look for any home automation enthusiast.

Rebooting the Subaru Impreza 2017 Infotainment System

A few months ago in my post about a year with my 2017 Subaru Impreza, I mentioned that sometimes CarPlay doesn’t start. This is annoying and I thought the problems were gone with the recents updates. However, last Saturday it didn’t start again and I actually needed the navigation to get somewhere. I had read that opening and closing the door 3 times would reboot the car, but it didn’t work. I could wait 10 minutes, but I had to leave. That left me without navigation but luckily my son was able to use an iPad connected to my hotspot to navigate.

After this episode, I started looking for the real answer to rebooting the infotainment system. I searched and searched and found on a forum (can’t find the reference right now) that if you press and hold the power button for the radio until it shuts off and then for another 10 seconds, the unit restarts. I found this hard to believe, but went out to my car and tried it out. It actually worked! Now I had a potential workaround the next time I had a problem.

Yesterday I plugged in my phone as normal and CarPlay didn’t start. I pushed and held the power button to reset the unit. Once it was up again, I reconnected my phone and presto, it worked! This definitely should be documented somewhere as it is extremely convenient. Let’s hope that a software update doesn’t remove this functionality.