Scott’s Cyber Safety Primer

Lately the topic of cyber safety has come up a few times for me. I’m the point person for CyberChip for my son’s Scout troop. I help the Scouts earn the award which is required for the Scout and Star ranks; I’ve overseen a few Scouts complete the requirements. In addition to this, I’ve seen how something innocuous that has been posted years ago can come back and be devastating. Lastly, have seen how someone could easily get scammed.

While I don’t claim to be an expert on cyber security, I did have lunch with Phil Zimmerman to discuss working on he Mac port of PGP and had Phil Karn as a mentor teaching me about Linux! I’ve been using the Internet for over a quarter of a century and have learned a few things about “being safe”.

Using two of the points of CyberChip Internet Safety Pledge as a starting point, I’m going to elaborate on what I think is important.

I will think before I post.

This is a pretty important point as everything on the Internet exists forever. If you do a search on my name, you’ll find posts I made years ago. Luckily, most of it is innocent. Recently I learned of someone that was terminated from a position because of a post they made many years ago. Even if you post something that you think is private, send a picture to someone or send a text, there could be a data breach or the recipient could take the message and post it, blackmail you, or in other way cause you irreparable harm.

While your messages to others could be encrypted (like using iMessage), the other end can easily take a screenshot of whatever you wrote and use it against you.

Unless you want something to come back on you at some point in the future, don’t post it or send it electronically.

Also, remember that when you take photos, the location of the photo is stamped (in the metadata) on the photo. If you are on vacation or traveling and post pictures with the location data on the photo, people can know that you aren’t home. If you are home, people can know where you live. While there are a number of ways to find out where people live, you don’t want to make it easy on them. When sharing photos, remove the location data (in iOS when you share, there is an option to remove the data) and don’t post photos when you are traveling; wait until you return home.

I will protect myself online.

This point requires a little more effort than “thinking before you post” and relates to password security, fake websites and scammers.

Passwords

The common thinking on passwords is to create complex passwords that you can remember such as substituting numbers for letters and symbols for other letters. This thinking is nearly impossible to combine with the thinking that you should create a separate password for every website. The only way to reconcile this is to use a password manager such as 1Password, LastPass, or Dashlane to name a few. Each site must have a separate password and each password must be complex. Of course, you have to remember your “master” password to get into the password manager.

You cannot write down any of your passwords with the exception that some of the password managers setup a “recovery” sheet where you write down your master key and then the sheet should be placed in a safe or a safe deposit box. It is quite unlikely that someone will go through the trouble of getting your recovery sheet.

Websites

When I first registered a domain many years ago through Network Solutions, it wasn’t easy to do. This became a slight hurdle in people setting up scammy websites. Since then, getting a domain name and setting up a website can be done in minutes. There are tons of sites that rely on typos to major websites to redirect users to their sites. Luckily many browsers pick up on this and make it easy to get to the right site. People are taught that seeing the lock icon in a browser means that a site is secure. While that is true, you have to look at what that means. Obtaining an SSL certificate up until recently took a little extra effort and wasn’t particularly cheap. With the advent of Let’s Encrypt, getting an SSL certificate is now free and easy to setup. I use Let’s Encrypt and securing traffic from my browser to servers is great.

Securing traffic is only part of a secure website. You have no idea what happens behind the scenes. Years ago I worked for a company that stored credit cards in clear text in an unencrypted database along with the CVV codes. In my tenure at the company I worked to bring it into compliance with PCI DSS, but credit card numbers were still accessible to employees and they still had roundabout access to CVV codes.

So even if a site has a lock icon, it doesn’t mean that it is safe to visit the website. Securing the traffic is very different from a site being safe to visit. Even the federal government has given given bad advice on this.

One of the safest ways to visit a website is to use a trusted search engine such as Google or DuckDuckGo and click the links from there; most popular websites should be at the top of the search results. However, before clicking a link check that it is indeed the site you want to visit.

Scammers

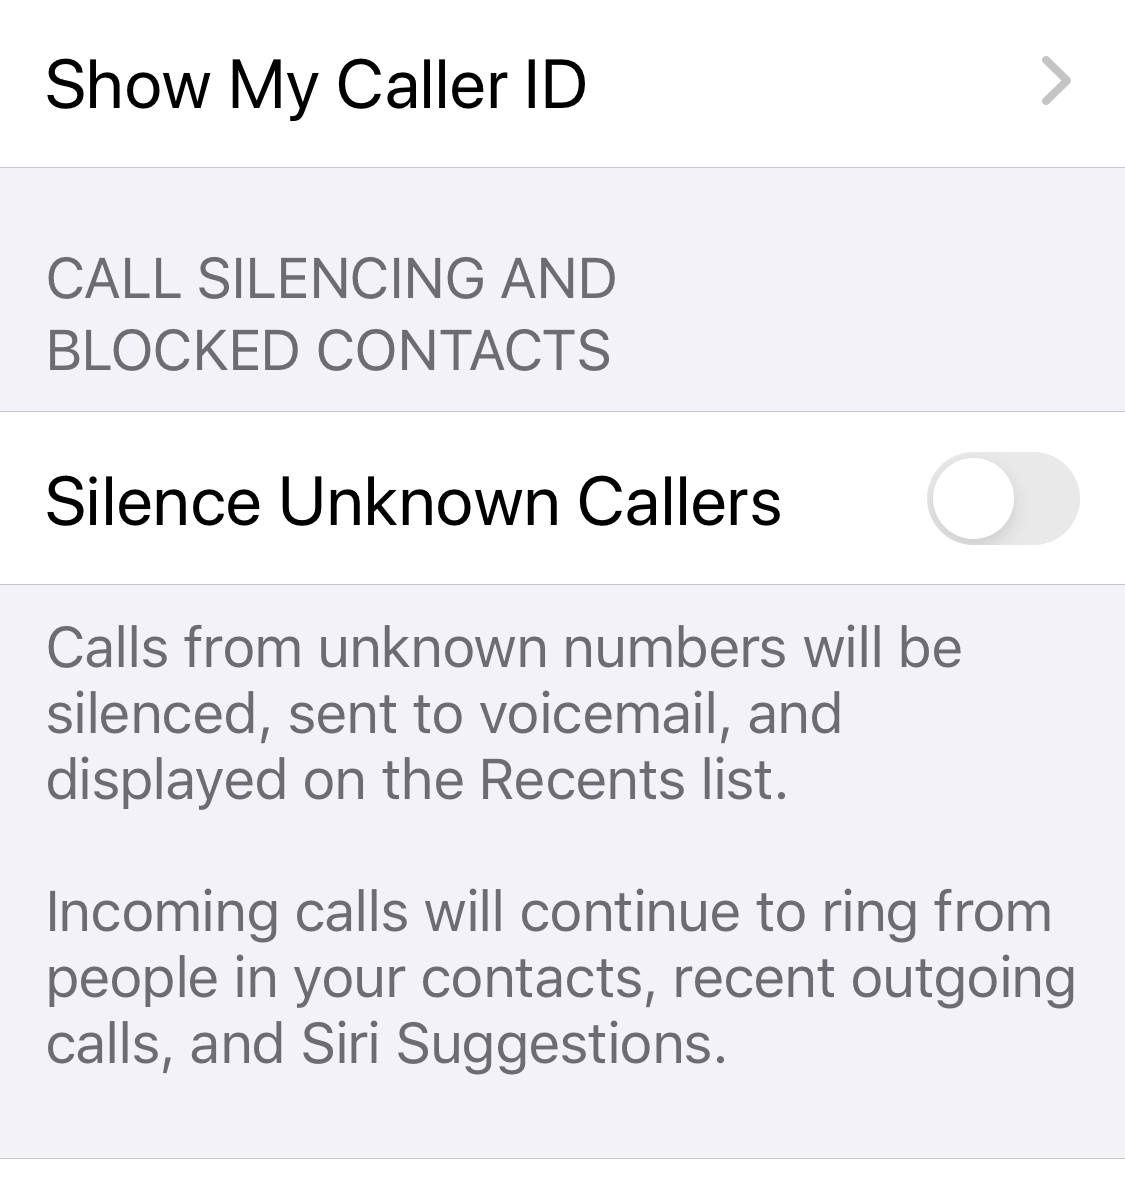
The other day I got a phone call that purported to be from Apple security saying that my Apple ID had been compromised. The call came from a Michigan number and was a recording. I pressed one and was connected to an agent. I asked for his employee ID and he responded with FUC…

Companies will not proactively call you about security issues. If you suspect there is an issue, hang up and call the company to verify the information. Also asking for an employee ID is a good way to weed out some scammers.

Never give out information to anyone that calls you; always call the company back if you have questions. Also never give anyone access to your computer remotely.

AppStores/Installing Software/Malware

If possible, always install software from an AppStore. While this doesn’t guarantee that you won’t get malware, it does reduce the possibility. Verify that software comes from a known source if you can’t install it from an App Store.

If you see messages that your computer is running slow or “click here” to get support, you may have malware on your computer. If this happens, immediately turn off WiFi and either contact your most tech savvy friend or family member for advice or take the computer to BestBuy’s GeekSquad to remove the malware.

Credit Cards

Whenever you pay for something online, always use a credit card. Never use a debit card. Credit cards have better consumer protections than debit cards. Never give a credit card number to anyone that calls you! If you make a purchase over the phone, verify that the phone number you are calling belongs to the proper company. Don’t just call any random number you find doing a Google search.

Conclusion

  • Anything you post on the Internet even in private could come back to haunt you.
  • Remove location data from photos before sharing.
  • Always use a different password for every website.
  • Use a password manager.
  • The lock icon on a website doesn’t mean the site is safe.
  • If you have to call a company, verify the number that you are calling is actually for the right company and not just some random number you found.
  • Install software from an App Store or a known source.
  • Never give your credit card number to someone that calls you. Always call a company back.
  • Never use a debit card on the Internet; only use credit cards.

Monitoring a SunPower Solar System

[Update: Here is a new Node-RED flow that works better with Home Assistant’s Energy Dashboard.]

After years of waffling on if I should install solar on my house, I finally decided that it would be a good investment. While the federal tax credit went down from 30% to 26%, I would still get a bit of my investment back. The tax credit goes to 22% next year and then goes away, so if I didn’t make the leap now, I’m not sure financially it would make sense for a long time until the panel prices come way down.

Like most major investments, I did a significant amount of research. I got proposals from 9 companies using a variety of panels and inverters. For better or worse, I went with a SunPower system. SunPower wants to make it easy for people to see how much energy they are producing and their monitoring site has a very, very simple dashboard. Apparently their older dashboard (still available via a different URL that uses Flash) showed output on a per panel basis. When I asked SunPower about this, here was their response:

Unfortunately, our monitoring website only shows production data of the system as a whole. Inverter level monitoring was only offered to dealers for troubleshooting and/or repair purposes. This was not offered to homeowners because, after lengthy evaluation, that feature offers more information than is necessary to monitor ongoing system performance, but not enough information to help identify problems (on the rare occasions when they do occur). We also had concerns about the feature’s design, in part due to negative feedback from customers.

After a bit of research, I found that the monitoring device (PVS6) actually has the ability to be queried for local data. An individual with better hacking/detective skills than me figured out the commands to send to the unit and posted information on GitHub describing the setup. That looked pretty straight forward. So I decided to figure out how to integrate it into Home Assistant and into my Grafana graphs.

First step was to configure a Raspberry Pi as basically a bridge where HTTP requests sent to one port would be redirected out the other port. I didn’t need a full fledged router for this, just an HTTP proxy. I decided to use a Raspberry Pi Zero W that I had lying around as a base. I ordered an Ethernet adapter for it and that was it for hardware. My son designed a case for both pieces and I 3D printed it.

Configuring the Raspberry Pi

  1. Download the Raspberry Pi Imager
  2. Select the Raspbian Lite image.
  3. Write the image to an SD card.
  4. Create a file called wpa_supplicant.conf at the root of the image with the following:
    ctrl_interface=DIR=/var/run/wpa_supplicant GROUP=netdev
    update_config=1
    country=US
    
    network={
     ssid="<Name of your WiFi>"
    psk="<Password for your WiFi>"
    }
    
  5. Add a file called ssh at the root of the image. This file should be empty.
  6. Assign a static IP address mapping on your router for the Pi.
  7. Boot the Raspberry Pi. Login using username: pi password: raspberry
  8. Update the OS using
    sudo apt-get update
    
  9. Install ha-proxy
    sudo apt-get install haproxy
    
  10. Modify /etc/dhcpcd.conf by adding the following so that the Ethernet going to the PVS6 doesn’t attempt to setup a gateway. If this happens, the Pi no longer responds over WiFi.
    interface eth0
    nogateway
    
  11. Add the following to /etc/haproxy/haproxy.cfg:
    frontend http-in
        bind *:80
        default_backend backend_servers
    
    backend backend_servers
        server sv1 172.27.153.1:80
    
    listen stats
        bind *:8080
        stats enable
        stats uri /
        stats refresh 10s
        stats admin if LOCALHOST
    
  12. Reboot the Pi.

Now when you issue HTTP calls to the Pi, they’ll goto the PVS6.

Setting up Home Assistant

I use Node-RED for most of my automations, so the following is how I poll the PVS6 from Node-RED.

Node-RED PVS6

Basically what I do is make an HTTP call to the Raspberry Pi over the WiFi interface that redirects to the PVS6. Using the information from the GitHub repo I found, the call is: http://10.0.3.55/cgi-bin/dl_cgi?Command=DeviceList

I then parse out the different devices that are returned (one for each inverter, one for the monitoring unit, one for the consumption meter and one for the production meter). My installer didn’t hook up the consumption meter, but I use an older version of the Rainforest Automation EAGLE-200 to connect to my electric meter and get consumption data.

This Node-RED flow generates multiple sensors that can then be used to display data right in Home Assistant or in Grafana. There is more information in the output than I need such as AC voltage, DC voltage, AC current, DC, current, etc. I use Home Assistant’s HTTP interface to create new sensors and since I have no idea how fast it can respond, I rate limit the updating of the sensors.

You can download my Node-RED flow from here.

Grafana

I’m going to leave it as an exercise for the reader to setup pretty pictures in Grafana. I’ve setup a basic dashboard and some other graphs. The per panel graphs are useful to tell me if a panel isn’t operating properly. While SunPower doesn’t really want you to know this information, it is very helpful. My system was turned on (my installer and SunPower can remotely disable my system which really bothers me) yesterday and I noticed that 1 of the panels wasn’t generating power. This amounts to about 8% of my overall system; most people wouldn’t know this which makes it even more important to be able to get status on a per panel basis.

Energy Dashboard

Energy Usage

Per Panel Monitoring

Conclusion

I’ve written up this guide to help others, but also to refresh my memory in the future to figure out what I did. My home automation system is growing more and more complex by the day and if I don’t document at least parts of it, I’ll never be able to troubleshoot it.

Feel free to ask questions or provide comments.

Printing on a Glass Bed and printing really flexible filament

When I purchased the Ender 3 Pro, I liked the idea of the magnetic flexible bed so that prints would easily come off of it. Reading on various forums, a large number of people seemed to prefer glass beds with either hairspray or a glue stick to get prints to stick to the bed. I’ve had good success with the magnetic bed, so I just filed the glass bed information in the back of my head.

As I wrote recently, I’ve been printing using flexible filament just because I think it is kind of neat. The ease with which I was able to print amazed me as I had read about people having problems left and right with flexible filament. In response to a video about a broken extruder by Chuck Hellebuyck, I commented that I had no problems printing TPU using on my Ender 3. Chuck pointed out that there are different types of TPU characterized by their shore hardness, which should have been obvious to me, but didn’t dawn on me until Chuck’s response. The SainSmart Flexible TPU filament has a shore hardness of 95A meaning it is pretty stiff and basically prints like PLA. This got me curious about printing more flexible filaments, so I purchased a roll of NinjaTek NinjaFlex which has a shore hardness of 85A and is basically light spaghetti.

My first print with it with the following settings:

  • Infill density: 10%
  • Print Speed: 10 mm/s
  • Regular Fan Speed: 0%
  • Regular Fan Speed at Layer: 1
  • Material Flow: 110%
  • Enable Retraction: Off

Seemed to work OK, but the bottom layer wasn’t the best.

After thinking I was successful, I tried printing a poop emoji for my son. No matter what I tried, I couldn’t get the TPU to stick to the bed. After a few unsuccessful tries, the filament started jamming in the extruder. Ah yes, exactly what Chuck said would happen. I ordered an EZR Struder to help with the extruding. However, that would only solve part of the problem. The other part was getting the print to stick to the bed.

I was somewhat prepared to use a glass bed as my wife had some scrap glass from a project of hers and I asked her to save a few pieces for me. She cut down the glass for me and then I beveled the edge and polished the edges. I removed the magnetic build sheet and put the glass bed on top of the magnetic layer on the bed. Since I could only find one binder clip, I used blue painter’s tape to tape the glass to the bed.

For my first test, I cleaned the glass, put down 3 layers of glue, and printed a test cube. It printed out quite well, but was a bit of a challenge getting off the glass. I really liked how smooth the bottom of the cube was compared to the magnetic bed.

For my next test after installing the EZR Struder was to print a small poop emoji. From the settings above, I increased the flow to 115%. I put down the layer of glue and printed. The print came out flawlessly and it had no problems during the print.

Lessons learned:

  • Different hardness TPU prints differently (duh!)
  • A glass bed with a glue stick makes a world of difference in adhering prints (especially TPU) to the bed
  • The EZR Struder is absolutely necessary to print more flexible TPU; if you are printing the stiffer TPU, the stock (or replacement metal) extruder works fine.

With this new setup, can I print the NinjaFlex faster? Only one way to know and that’s to try it!

I’m quite pleased with the new extruder and the glass bed. 3D Printing is definitely a trial and error process. Each change, be it large or small, can have huge ramifications. If you combine them, it makes it even harder to figure out what is good. I’m having fun with this and learning a huge amount.

3D Printing Using Flexible Filament (TPU)

Through my short journey with 3D printing, I’ve spent a lot of time reading through the 3D Printing SubReddit and something that I found interesting was people talking about printing using flexible filament (TPU). While I didn’t have a real use for printing squishy things, I was curious. A few weeks ago, I purchased a roll of SainSmart Flexible TPU filament to see if I could print.

The forums and other references indicated that printing flexible filament was difficult because pushing the filament through the printer was like pushing a wet noodle! Some people had said that they printed with the stock printer, others said that for best results they modified the printer into a direct drive system. I was up for the challenge!

Before I started, I had already made the following modifications to my printer:

  • Replaced the extruder with an all metal one

  • Replaced the Bowden feed tube with a Capricorn one. The basic gist behind this change was that the tighter tolerances on the tubing doesn’t allow the filament to wiggle around and bunch up. In addition, when switching filaments, I don’t have to purge as much filament as very little gets stuck in the tube.

  • Added a filament guide that I printed. This should create a smoother path for the filament.

  • Added a filament runout sensor with guide. The main goal with this modification was to be notified when filament runs out so I can change it during a print. It also really helps feed the filament (with the flexible filament, I have to push down the microswitch to feed it).

  • Added a filament holder with bearings. This took awhile to print, but has been great. On my first flexible print, I noticed the extruder was having trouble pulling the filament because the roll wasn’t spinning freely. I helped things along, but realized that reducing friction would be a big help.

  • Leveled the bed manually and with the BLTouch.

Other than that, I’m using the stock magnetic bed that I cleaned.

My Cura settings are pretty straightforward.

For the TPU material settings, I used:

  • Print temperature: 215°C
  • Build plate temperature: 50°C

Profile settings:

  • Infill density: 10% (I was printing something squishy)
  • Print Speed: 20 mm/s (I’m going to try increasing this as things worked well)
  • Regular Fan Speed: 0%
  • Regular Fan Speed at Layer: 1
  • Material Flow: 110%
  • Enable Retraction: Off

That’s really all there was to my settings. Since I’m sometimes not the most adult person, I thought it would be funny to print a Poop Emoji for my son. It was squishy (10% infill) and I printed it at 50% of the original size keeping the print time to about 2 hours. My son absolutely loved the print. I was amazed at the print as I did it on the first try with my cold printer.

I’m going to keep experimenting with TPU and try to figure out what else I can print. I have no need for flexible filament, but why not print more stuff!

Installing a BLTouch on an Ender 3 Pro

I recently purchased a Creality Ender 3 Pro 3D printer as an “upgrade” to my Monoprice Select Mini Pro printer. There were a few reasons I decided to do this:

  1. Larger print area. While the Select Mini Pro is a great little printer, I am limited to what I can print and I’ve started getting interested in printing lithophanes which can get a bit larger than the printer can handle.
  2. Automatic bed leveling has no fallback. The Mini Pro uses an inductive sensor for automatic bed leveling and if that fails, I either have to replace it or am pretty much out of luck (someone has posted instructions on how to level the bed if the sensor fails, but it is a tad cumbersome).
  3. No ability to switch out the build plate for glass or another material. I’ve done a lot of reading about 3D printing and people swear by glass build plates and the Select Mini Pro doesn’t make it easy to add one. A shim has to be added to the Z axis limit switch and then you have to figure out the bed leveling.
  4. Limited to what filament types can be used. The printer has a maximum build plate temperature of 70°C and limited nozzle temperature which can limit the filaments used. Also, I’ve read that while some people have had success with TPU (a flexible filament), it may not work so well.
  5. No ability to modify the firmware for different features. The Ender 3 runs the Marlin firmware which is open source and can be easily modified.

In any case, I’ve read about manual bed leveling and while doable, it seems like a lot of work and I like easy! After setting up the printer and running it for a few days, I decided to install the BLTouch automatic bed leveling probe. In the weeks leading up to setting up the printer and the probe, I had read numerous articles and watched a number of videos on the subject, so I thought I was prepared for it. Parts of the setup seemed a bit daunting, but nothing I couldn’t handle.

The first step to installing the probe was printing out a mount for it. Thingiverse has a number of options. I settled on this mount as it was adjustable. Printing it and attaching the BLTouch was quite easy; I didn’t have the right size M3 screw, so I had to cut off a longer one.

After attaching the BLTouch, I had to run the extension wires through the sleeve that had the other wires. This was a little bit of a pain. The only mistake I made here that bit me later on is that the extension cable became disconnected and the BLTouch failed to operate causing the nozzle to hit the build plate. Oops. The lesson here was to hot glue the connectors together so that any jiggling of the cables wouldn’t cause them to disconnect. The second lesson is to always make sure the BLTouch performs its self test when the printer powers up.

Fhew, I’m exhausted just writing that up! After the wires were run, I had to attach them to the motherboard. The BLTouch has 2 connections; the first is done through a pin 27 connector and is just unplug the LCD cable, plug in the connector, plug in the LCD again and attach the 3 wires from the BLTouch making sure the orientation was correct by verifying the labeled pins were attached to the correct, color coded wires. The second part of attaching to the motherboard was to replace the Z axis end stop. The extension cable I bought had a non-keyed connector that just plugged in. Unfortunately it wasn’t a secure connection so I used hot glue on it the first time I connected it. On my second poke at the motherboard (due to troubleshooting the connector that came loose as I mentioned earlier), I decided to just cut the wires on the Z axis end stop, solder on the extension cable and use some heat shrink tubing. I had to make sure the white wire was towards the front and the black wire was towards the back. This was a much better connection and has less of a chance of coming close. After I buttoned up the motherboard, it was onto the firmware.

Once I initially got the printer setup and running properly, I upgraded the firmware mostly to know that I had thermal runaway protection and had the latest changes. Compiling the firmware was straightforward and explained in various posts and videos. Most of the posts talk about installing the initial firmware with a bootloader using an Arduino board. As I don’t have any Arduino boards around, I opted for installing using a Raspberry Pi 3B that I purchased to run OctoPrint. I used this guide which was easy to follow and perform the initial install. The printer didn’t come with a boot loader which required the extra steps to install the firmware the first time; why this was done, I have no idea. Over the course of a few days, I managed to pick the options I wanted for my firmware. Unfortunately my Creality 1.1.4 board doesn’t have much space on it, so I had to disable SD card support. This wasn’t a big deal as I do all my printing through OctoPrint. Using the base Ender 3 Marlin 2.0.1 example, I made the following changes:

Old Configuration.h:

    #define SHOW_CUSTOM_BOOTSCREEN
    #define BAUDRATE 115200
    #define CUSTOM_MACHINE_NAME "Ender-3"
    //#define BLTOUCH
    #define NOZZLE_TO_PROBE_OFFSET { 10, 10, 0 }
    #define MIN_PROBE_EDGE 10
    #define Z_PROBE_SPEED_FAST HOMING_FEEDRATE_Z
    #define Z_CLEARANCE_DEPLOY_PROBE   10 // Z Clearance for Deploy/Stow
    //#define Z_MIN_PROBE_REPEATABILITY_TEST
    //#define PROBING_FANS_OFF          // Turn fans off when probing
    //#define AUTO_BED_LEVELING_BILINEAR
    //#define RESTORE_LEVELING_AFTER_G28
    //#define LEVEL_BED_CORNERS'
    //#define Z_SAFE_HOMING
    #define SDSUPPORT
    //#define NOZZLE_PARK_FEATURE
    //#define SLIM_LCD_MENUS

New Configuration.h:

    //#define SHOW_CUSTOM_BOOTSCREEN
    #define BAUDRATE 250000
    #define CUSTOM_MACHINE_NAME "Ender 3 Pro"
    #define BLTOUCH
    #define NOZZLE_TO_PROBE_OFFSET { -44, -16, 0 }
    #define MIN_PROBE_EDGE 44
    #define Z_PROBE_SPEED_FAST HOMING_FEEDRATE_Z / 5
    #define Z_CLEARANCE_DEPLOY_PROBE   15 // Z Clearance for Deploy/Stow
    #define Z_MIN_PROBE_REPEATABILITY_TEST
    #define PROBING_FANS_OFF          // Turn fans off when probing
    #define AUTO_BED_LEVELING_BILINEAR
    #define RESTORE_LEVELING_AFTER_G28
    #define LEVEL_BED_CORNERS
    #define Z_SAFE_HOMING
    //#define SDSUPPORT
    #define NOZZLE_PARK_FEATURE
    #define SLIM_LCD_MENUS

Old Configuration_adv.h:

    //#define BABYSTEP_DISPLAY_TOTAL          // Display total babysteps since last G28
    //#define BABYSTEP_ZPROBE_OFFSET          // Combine M851 Z and Babystepping
      //#define BABYSTEP_ZPROBE_GFX_OVERLAY   // Enable graphical overlay on Z-offset editor
    //#define ADVANCED_PAUSE_FEATURE

New Configuration_adv.h:

    #define BABYSTEP_DISPLAY_TOTAL          // Display total babysteps since last G28
    #define BABYSTEP_ZPROBE_OFFSET          // Combine M851 Z and Babystepping
      #define BABYSTEP_ZPROBE_GFX_OVERLAY   // Enable graphical overlay on Z-offset editor
    #define ADVANCED_PAUSE_FEATURE

Downloading the firmware after the first install was easily done through OctoPrint without having to install jumper wires and remove the motherboard. It is so easy that I made changes, recompiled, and uploaded new firmware a few times.

Was I done yet? Of course not! I hadn’t even leveled the bed! Some guides say to add a G29 command to Cura settings which runs the auto bed leveling on every print. Auto bed leveling is slow and that’s just a waste of time. So I decided that I’ll just level the bed every few days. I started up the printer, did an Auto Home, verified that touching the probe sent the hot end up (if it didn’t, I would have stopped the printer). Using OctoPrint, I sent

G28; auto home

G29 L50 R150 F50 B150 T V4

to the printer to start the auto bed leveling. This sets a bit wider grid than the default G29 command. Then I sent a

M500

command to store the settings.

M501

to read the settings back.

Was I finally done? Nope. The next piece in the BLTouch configuration was to properly set the Z Probe offset. This is the distance between the bottom of the nozzle and the bottom of the probe. The probe is, obviously, slightly higher than the nozzle (so that it doesn’t drag). Most guides say to start at zero, print a first layer, adjust the Babystep Z, use the M851 command and then store the setting. I did this and after a number of adjustments, got things printing quite well. However, after reading this manual bed leveling guide, I realized that there was a slightly easier way. Basically if I have an object of a known size, i.e. a cube that I use calipers to measure the height, raise the Z axis (using the controls on the printer), put the cube directly under the nozzle and adjust the Z axis so that the nozzle barely touches the cube, I’d know exactly the Z Probe Offset. If the cube is say 15 mm tall and the Z axis shows 15.88 mm, I’d set the Z Probe Offset to be -0.88 mm. So much less guess work in this. Don’t forget to store the settings after setting the Z Probe Offset. Since my settings are pretty good using the Babystep Z (with my firmware options simply called Z Probe Offset), I haven’t actually tried using a cube of known size to set the offset.

Lastly, I used the Level Bed Corners menu option I enabled in the firmware to manually level the bed as well as I could and then re-did auto bed leveling so that the firmware would have less to compensate. In addition, I used the OctoPrint Bed Level Visualizer plugin to see how close I got to a level bed. I know that the bed is going to warp at some point, but for now I have a pretty flat and level build plate.

Even after I had everything setup, I discovered that my bed was much higher on the right side even though when I had manually leveled it, it was pretty good. It turns out that my X gantry was loose so the right side was higher than the left. There are plenty of videos that explain how tighten this; don’t follow the Creality video as it is pretty useless.

To summarize, here are my tips:

  • Use hot glue on the extension cable connectors.
  • Splice in (and solder) the extension cable connectors (black and white wires) to the Z axis end stop.
  • Compile your own firmware so that you can get the settings you want.
  • Don’t put the G29 code in your Cura profile as that is a waste of time; level your bed every few days if needed.
  • Manually level your bed after everything is setup and then re-run auto bed leveling.
  • Check to make sure that your X gantry is tight.
  • Use a known height object, i.e. a cube to set the Z Probe Offset.

Of course, follow my directions/tips at your own risk. I’m not an expert at this and am not responsible for any problems arising from your use of this information! I thought I had everything working well until I managed to crash the nozzle into my bed (I now have a nice dent in the bed that I’ll bed around to replacing someday).

Good luck as getting BLTouch working properly isn’t an easy task, but hopefully worth it in the long run!

Addicted to 3D Printing

I wrote about 3D printing a few months ago and at the time was using a DaVinci 3D printer. Unfortunately the printer didn’t last long and despite my best efforts, I couldn’t get it to keep printing; it was making a grinding noise while feeding and the cost to replace the hot end with shipping was about 1/3 the cost of a new, low-end printer. I decided to cut my losses and purchased a Monoprice Select Mini Pro. This printer cost me about $180 and when it arrived, I was printing pretty quickly.

The Select Mini Pro, unlike the DaVinci printer, requires a bit more tinkering to go from a model to a print. Printing requires a process called slicing and one of the more popular programs is called Cura which exposes a ton of options to control the print. As I didn’t want to have to copy the files to the SD card to print, I setup OctoPrint running on a Raspberry Pi 2. This put the printer on the network and made it easier to monitor the printer.

I’ve been printing things like crazy and as I may have already mentioned, I’m addicted! I added a camera to the Raspberry Pi and can now see the progress of my prints without being next to the machine.

With all the success I’ve had, I’ve also had a number of failures. Sometimes these failures have been my fault (I ran the nozzle into the bed and damaged the bed and nozzle and when replacing the nozzle I didn’t screw it in when everything was hot leading to oozing of material) and sometimes not my fault (the coupling holding in the feed tube broke).

I’ve learned a number of things about this hobby with the first thing being that everyone has a different opinion on how to fix things! Something that is a recurring topic on Reddit is how to get the prints to adhere to the print bed with lots of different suggestions. I started using blue painter’s tape and had great success with that. Then I moved my printer to the garage and found I needed to use a glue stick in addition to the painter’s tape. The day after I was printing some whistles, the prints stopped sticking to the bed no matter what I tried. Then it dawned on me that the garage temperature dipped a few degrees; this was enough to cause a problem. I returned from Home Depot with some rigid polystyrene foam insulation and built an enclosure for the printer. With this enclosure, I decided to try printing right on the print bed without the tape; this worked quite well now that I had more control over the temperature of the print bed. With every problem, there is a solution, but it requires some research and a lot of trial and error!

IMG 2435

The bottom line is that 3D printing is a hobby and if you’re not comfortable futzing and repairing things, then the consumer grade printers are definitely not for you!

Silence Unknown Callers – Great in theory, problematic in reality

We’ve all suffered with telemarketers and scammers calling our phones and have had limited success in blocking those calls. In iOS 13, Apple added an option to “Silence Unknown Callers” which sounds like a great feature on the surface. I turned the feature on and then quickly turned it off as I realized that there are a number of cases where I need to receive calls from unknown callers. Some might be thinking that it is fine to let them goto voicemail, but it’s not that simple.

A few months back, we stopped at the scene of an accident to help out. The injured party wanted to call a friend, but her phone battery was almost depleted, so a bystander let the person use her phone. The friend would have gotten a call from an unknown number and with the silence option, it would have gone to voicemail and potentially ignored. Granted some people ignore unknown callers anyway, but the option wouldn’t have given the friend the opportunity to answer the phone.

If the emergency situation is too extreme in your thinking, another case arose for me this past Wednesday. My son went on a field trip and the bus bringing the students back to school was late, so he used his teacher’s phone to call me. I received the call from an unknown number right as I was about to get to his school to pick him up. If I hadn’t gotten the call and my son didn’t leave a message, I would have been sitting around wondering where he was. Eventually I would have gone into the school office to see what was up, but that would have been after waiting awhile.

Without using this feature, I unfortunately have to live with the telemarketers and scammers. Who knows if the STIR/SHAKEN will work to block many of these calls. We can only hope. One thing that could definitely help which I have no idea why it never got implemented is caller name as part of caller ID on cell phones; I’ve wondered this for years.

Fixing a broken printer

Yesterday my wife came home and said she picked up a free, broken printer and wanted to know if I could take a look at it as she’d love it for her classroom. It was an EPSON ET-4750 which is the big brother to the EPSON ET-2750 that we’ve had for a year and been quite happy with the purchase.

Of course, I said sure I’d take a look and asked if I got it going could I swap out printers? She didn’t hesitate and agreed. The problem, I was told, was that the printer wouldn’t feed the paper. I opened up the back of the printer which has the feed mechanism and saw some broken plastic. Upon further inspection, I saw the broken gear where the plastic was supposed to go. Uggh, I thought. I looked at the back of our printer and it had a similar door to get to the feed mechanism, so I took it off in hopes that I could just replace it and be done. No such luck. However, looking at the broken gear I saw that our printer had the same gear on the feed mechanism. I was able to pull off the gear and put it on the broken printer and it fit! So at least I got a new printer for me 😀 That, of course, wasn’t going to help my wife.

As I indicated in my post about 3D printing, I’ve always envisioned just being able to print spare parts and be able to prolong the life of things. A search online didn’t find the gear I needed, but I did find sites that could generate gear files. I asked my wife to count the teeth on the gear and I started playing around with a site that let me enter parameters and made the gear. I tried a few parameters and tried to make the gear look what I had. I printed a test gear (the site gave me an STL file that I needed to modify a bit) and while not perfect, I thought I could make it work.

After a bit of work with TinkerCAD, I printed a working gear. While it isn’t an OEM part and could be a little more precise, I’m pretty impressed with what I made. Part of the issue may just be that the 3D printer isn’t precise enough to make a true replacement.

Gear on paper feed

Gear

I’ve published my work on TinkerCAD for others to enjoy.

If you find this helpful, please let me know. Also if there is a way to start convincing companies to publish STL files for parts and you have ideas on this, let me know.

3D Printing comes to my home

Years ago when 3D printing started to become mainstream, I thought the technology had its place for prototyping, low volume manufacturing and printing replacement parts for appliances and other things. In my ideal world, instead of companies selling replacement parts for say a refrigerator, they could license their designs and parts could be printed at a local hardware store or the like using a variety of materials. Companies could still make money on the parts, but they wouldn’t have to stock them or ship them. In addition, parts for discontinued products could be made prolonging the life of products.

As the price of 3D printers came down and became easier to use, they started appearing in schools and homes. My son started making trinkets in a class he took and I dismissed the low end 3D printers as toys. While they may have been relatively inexpensive and easy to use, I couldn’t imagine a real use for one despite my son asking if we could get one a few times.

A few weeks ago, a neighbor/friend of mine gave us a 3D printer that he had for awhile, but rarely used. He gave us a XYZ Printing DaVinci Jr. 1.0. This printer is a very consumer friendly printer with very few settings to mess up, I mean configure. One downside of the printer is that you have to purchase the filament for printing from the company as there is an NFC chip in each spool that tells the printer some parameters about the filament (yes, there are hacks to get around this). For someone just starting in 3D printing, I saw that as a plus. Getting it setup should have been easy, but was quite frustrating. I made an adjustment to the Z offset and my son suggested we use blue painter’s tape on the bed which worked quite well.

Now that we had a 3D printer in the house, I didn’t want to make trinkets; I wanted to design and make things that we’re useful. My son showed me TinkerCAD that he uses to make things and I took to it pretty quickly. The last time I touched a CAD program was 25 years ago in college and that was quite painful. TinkerCAD is easy to use and I got used to looking at designs in 3D.

I’ve spent a few weeks designing things and printing them; my skills are getting better and I’m not sure there is an end in sight! I didn’t know that I could solve so many problems by making parts. I also didn’t know that I had so many problems before I started looking for them!

The sky is the limit and I’m going to keep designing and making things!

Here are a few pieces that I’ve made:

Eagle Scout Award Holder

With my new Scout uniform, I didn’t want to put holes in it with pins. On formal occasions, I wear my Eagle Scout pin and I wanted a solution so that I didn’t have to pin it to my uniform (I can never get the holes right when I put things back on). This design has a place for me to put the pin through and then I put a magnetic name tag backing on it.

EagleAwardHolder

Knife Sheath

When we go camping, I have a separate knife I use for cooking. I had this wrapped in cardboard, but I wanted something more permanent.

KnifeSheath1

KnifeSheath2

Outdoor Light Stake

On our front walkway, I have low voltage landscape lights. One of the lights I’ve knocked over a few times breaking off the stake that holds it. The lights aren’t made any more and getting a replacement stake could be hard. I’ve fashioned a few holders, but they haven’t worked well. So I decided to make my own. I printed this with filament that I’m sure will breakdown at some point (it isn’t outdoor rated), but I can print another one later with the correct filament when that happens. This is exactly one of the uses I described at the beginning of this post; replacement parts. Instead of pounding the stake into the ground, I dug a hole, put it in and then packed dirt around it. It seems to be holding up.

LightStake1

LightStake2

Subaru Impreza Phone Cable Holder

My car has the USB ports for connecting my phone in the center console where I think they expect you to place your phone. This isn’t convenient for me and I’ve always put my phone in front of the gear shift and snaked a cable from the console to that spot. In order for the cable to stay there when my phone isn’t plugged in, I had a wire that I jammed in between two pieces of plastic. I could have glued a holder there, but I didn’t want to do that. So I designed a hook that I was able to push into the spot where I had the wire. It’s been holding up quite well and almost looks like it belongs.

SubaruCableHolder2

SubaruCableHolder1

Luminoodle Light Hooks for a tent

I purchased a Luminoodle LED strip light for camping and found that there weren’t enough hooks to easily set it up in my tent. I came up with a design to hold the lights and attach it to my tent. It took several iterations to get exactly what I wanted, but this may be my best work yet. The design is simple, but works quite well. I printed a bunch of them and put them in my 2 tents so that they just stay with the tent.

LuminoodleTentHooks4

LuminoodleTentHooks3

LuminoodleTentHooks2

LuminoodleTentHooks1

Fixing the Vizio SB36512-F6 Soundbar

For a number of years, I’ve had a Vizio 5.1 soundbar which worked reasonably well. It was connected to my TV via an optical cable. The only real issue I had with it was that I had to use an IR remote to control the volume. Luckily the Apple TV remote has the ability to send IR commands to control the volume. This worked OK, but always required me to aim the remote at the soundbar and press multiple times if I wasn’t aligned with it. Last year when Apple said it was adding Dolby Atmos to the Apple TV 4K, I was intrigued. While the room my TV is in isn’t ideal with Atmos, I wanted to give it a try. My current soundbar, of course, wouldn’t handle Atmos. I saw the Vizio SB36512-F6 on sale at Costco and picked it up.

Setup of the soundbar was simple; plug the HDMI cable from the Apple TV into the soundbar and then the soundbar into the TV via ARC. This would allow the soundbar to handle Atmos. In addition, since it was connected via HDMI, I could use HDMI-CEC to control the volume without the need for setting up IR on the remote (I could also use the Apple TV remote control center widget on my iPhone or iPad to control the sound which is kind of neat). For the most part, this setup worked and when Atmos support came to the Apple TV and Netflix, I was able to use it; I couldn’t tell much of a difference as there is still not a lot of content that supports it. However, we kept having problems where no audio would come out of the soundbar and it required us to power cycle everything or quit an app and start over. It was annoying to say the least. I went through a number of firmware upgrades and patiently waited for Vizio to fix the issue, but it never happened.

I reached out to Vizio support and they gave me some suggestions, but all of them would result in not having the ability to use Atmos (which was one of the reasons for the soundbar). After dismissing their suggestions for awhile, I finally decided to try one of the options. In the Apple TV’s audio settings, instead of automatic, I chose Change Format to Dolby Digital 5.1. Ever since I did that, audio has worked perfectly. While I lost Dolby Atmos, I also lost the frustration of not having audio. What I suspect is happening is that when change format is selected, the Apple TV is always outputting the same audio stream type and the soundbar doesn’t have to figure out how to decode the audio; with automatic, the soundbar is sometimes unable to properly decode the stream when a show or movie starts. It then gets confused and just doesn’t play anything.

If you have an Apple TV 4K and are having audio problems with a soundbar, I’d suggest trying the Change Format setting. It is really too bad that Vizio can’t figure out how to fix this issue as I’d like to sometimes play Atmos content without having to switch the setting.