Review: Logitech K760 Wireless Bluetooth Keyboard

I haven’t been a huge fan of Bluetooth keyboards because most of them require you to change batteries periodically and they generally lack a number pad. In May, due to changes at work, I was faced with having 2 computers on my desk. While both computers were MacBook Pros, I didn’t want 2 keyboards, 2 trackpads, and didn’t have the room to really leave one laptop open all the time. Ideally I wanted a KVM switch, but I was attached to my Apple Bluetooth Trackpad and my Apple Thunderbolt display can’t be used with a KVM.

So where did that leave me? I had a second trackpad, so now I had 2 trackpads on my desk. I could easily unplug my Thunderbolt display and plug it into the other computer. I could keep my USB keyboard plugged into the Thunderbolt display and have it go along for the ride when I switched computers, but decided to look at keyboards that would switch between multiple devices. I settled on the Logitech K760 wireless keyboard. The keyboard allows me to pair 3 Bluetooth devices (2 Macs and an iPad), recharges via solar, and resembles a Mac keyboard. The only thing I was giving up was a numeric keypad.

I quickly got used to the lack of a numeric keypad as the MacBook Pro’s built in keyboard doesn’t have one. Being able to switch between devices is easy and not having a wire was like a light shining down on me that I should have done it sooner! Even moving the keyboard slightly is less of a hassle as the cord isn’t coming with it.

In the 3 months that I’ve had the keyboard, it has been fantastic. I haven’t had any problems with it, it feels just like my Apple keyboard did and the addition of an off switch allows me to easily clean it. There isn’t a whole lot to say about a keyboard; I type on it and it works.

Pros

  • Wireless
  • Supports up to 3 Bluetooth devices
  • Recharges via solar panels on it

Cons

  • No numeric keypad

Summary

If you’re looking for a wireless keyboard, this keyboard is definitely worth a look. Not having to change batteries alone could be the deciding factor. The multiple device support may seem like a gimmick, but I find I use it all the time even for my iPad. This keyboard rivals Apple’s Bluetooth keyboard, in my opinion.

Review: Jarvis desk

I’ve been reading about how bad sitting is for your health and basically ignored it by saying that I get up enough and I run. Lately there have been even more studies saying that exercise doesn’t help the situation. I still wasn’t convinced.

A few months ago, my hip starting hurting and it seemed to be worse when I was sitting, so I thought about a standing desk, but the cost made me put it on my list, but postpone the purchase. About 3 weeks ago, I bought some tall legs for my desk from Ikea and put them on; I was extremely excited about this as I would be able to stand all day. Two things I didn’t consider with this move. First off, standing for a long time hurts my feet and the second is that my son likes to be at my desk sometimes and with the desk so high, he couldn’t sit with me.

So I started researching adjustable height desks. The cost range is huge and I didn’t really want to replace my current desk with some several thousand dollar desk. I refinished my desk last summer and put lots of coats of urethane on it; the desk has held up quite well. Several reviews pointed me to the Jarvis Desk. I looked at the specs and was impressed; the cost was reasonable, it had a motor to raise and lower it, and it had a memory to remember the positions. The final piece that convinced me to make the purchase was that I could order just the frame without the top; this shaved some money off the cost and I got to continue use the desk top that has treated me well for years.

I ordered the frame from Amazon and it arrived in 2 days; the price was the same as direct from the company, so I figured I’d go with the faster shipping. The box was heavy…74 pounds. I managed to get it downstairs into my office and assembled it all in about 45 minutes in between working. It wasn’t complicated to assemble, but had a lot of steps. When my wife got home, she helped me flip over my old desk and put the desk frame on my top. Attaching the frame to the top was straightforward and quick with the use of an electric drill.

After flipping over my desk and setting it into place, I plugged it in and raised it up. The speed was pretty amazing. The rated speed is 1.5″/sec unloaded. My standing position is only about 11 inches higher than my sitting position, so it takes less than 10 seconds to change position. I’ve programmed an up and a down position for it.

The first week I had the desk, I was standing as much as possible. Now that I’ve had it for a bit, I’m finding that I’m alternating between sitting and standing throughout the day. The change is extremely easy.

I’ve found that my hip isn’t hurting as much (I’ve combined some stretching with the standing to help) and standing allows me to concentrate more sometimes.

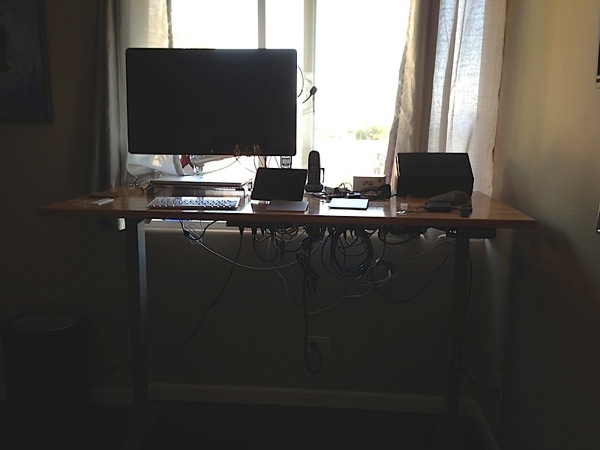
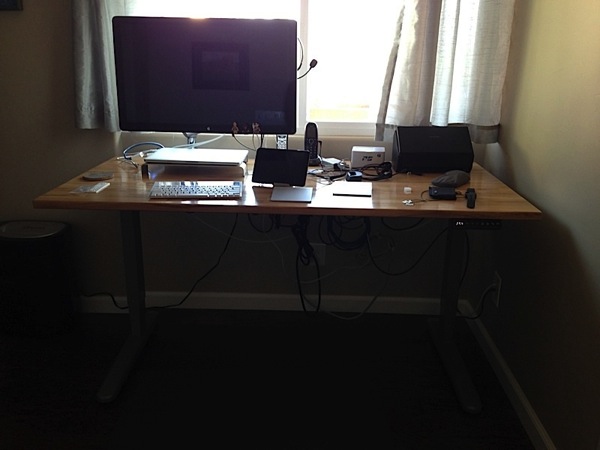
While these pictures aren’t great, I’ve attached an up and a down picture.

IMG 3590
IMG 3591

Pros

  • Affordable
  • Quiet mechanism
  • Fast
  • Appears well built
  • Very stable

Cons

  • Time consuming to setup

Summary

I should have made this purchase a lot sooner; there should be no price tag on my health. I don’t know the quality of the tops that they sell, but the frame was an excellent choice for me. I’m not sure what the more expensive options would have offered me as the concept of the desk is simple; go up and go down. I also picked up an anti-fatigue mat as standing on your feet all day can hurt; I’d definitely recommend a mat to go with this as well.

Some people have commented that a desk with two legs as opposed to the four I had previously make the desk less stable; I haven’t found that the case. I have, however, found that my monitor arm makes the screen jiggle a bit when I type. This is minor and is unrelated to the Jarvis Desk.

I don’t know the long term reliability of this unit, but I am hopefully that it lasts a long time even with me adjusting it a few times a days.

Review: Freedom Arm for iMac

I’ve been sitting on an exercise ball for two years instead of a chair at my desk and have grown used to it. However, lately my hip has been hurting me, so I decided to look into a standing desk. I wasn’t quite sure I wanted to commit to a standing desk, so I started looking at what pieces I could use to test the theory. I was a little too quick on the draw and bought a Freedom Arm for iMac to allow me to raise my monitor up off my desk. I was expecting it to raise the display high enough that I could stand, but its rise was a maximum of 8″ where I needed about 20 inches off the top of my desk.

After I made the “mistake”, I realized that having the ability to move my monitor around wherever I wanted would be useful even if I didn’t like a standing desk.

I received the arm last Friday and thought installation would be pretty straightforward. I was, of course, wrong. The first tricky part after taking off the stand on my Apple Thunderbolt display was locking the connector (meant for a VESA adapter). You have to use a card to push a lever in the display. This isn’t a knock on the monitor arm, but something that was a bit difficult.

After locking the connector, I screwed in the adapter plate that came with the arm into the display. When it came to attaching the arm to the plate, I ran into problems and ended up taking off the plate. Turns out the holes for the screws were messed up and the screws were difficult to turn. I tried my best to screw them in, but wound up snapping the head off one of the screws. So now I had a mess on my hands and really wanted to get the arm setup. I spent a few hours trying to get the screw out and managed to simply cut off the head and drilled out the screw. I was going to have to wait until Monday to contact the company.

I was giving up and had to get the stand on my display back on; this proved to be another problem and I took apart the display to see what I was trying to press to get the locking connector to retract. That was successful and I was back to square one.

Not being content on waiting, I decided to take the adapter plate to Home Depot and see if I could get a tap for the screw and re-tap the hole. A very nice associate helped me figure out the screw size (it was an M6 screw) and found me a tap kit that included a hardened drill bit and the tap. Once I got home, I was able to re-drill the holes and tapped the holes without a problem.

I continued putting the arm together and was done in a relatively short amount of time. After the initial problem, I didn’t encounter any other issues with it.

Now that I’ve been using it for a few days, I’m very pleased with the flexibility of the arm and how sturdy it is. Any type of monitor arm is going to have some wiggle to it when typing, but that is expected due to it being cantilevered.

Even if this doesn’t work out for my standing desk, having the arm and being able to position the monitor will be worth it.

Pros

  • Sturdy
  • Comes with adapter plate for older iMacs and the Thunderbolt display
  • Reasonably priced
  • Highly adjustable

Cons

  • The screw holes in the adapter plate I received weren’t tapped well.

Summary
If you have an iMac or a Thunderbolt display and want a little more space on your desk or want to be able to easily position your display, this arm will easily meant your needs. There are other monitor arms out there and if you put a standard VESA mount on the display, your choices grow even more; however, for the cost, the arm is a great value. My only caution is that if you have problems with the screws, stop and contact the company; don’t do what I did and cause myself more work.

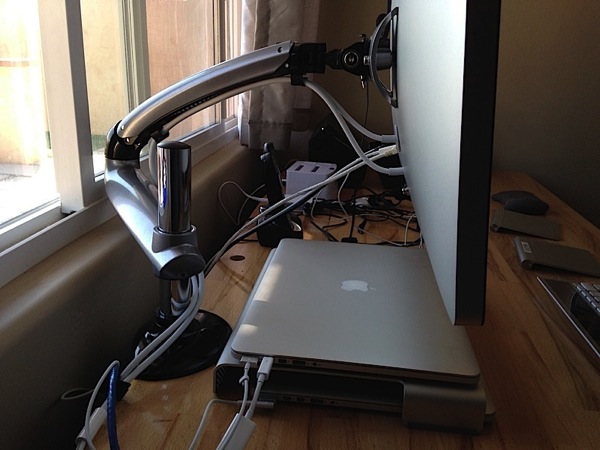
Rear View
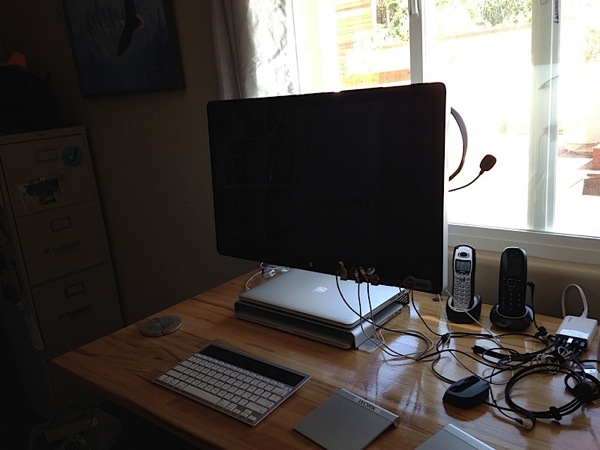
Front View

Review: Harry’s Razors

About a month ago on the MacBreak Weekly podcast, I heard an advertisement for Harry’s razors and decided to take a look. I was intrigued that the cost per blade was about half of what I was paying for my Gillete Fusion even when I bought them at Costco. The starter kit included a handle, 3 blades and shaving cream for $15 (I opted for the polymer handle). They also offer a 30 day money back guarantee which meant I couldn’t pass it up.

I’m all about saving money in particular on recurring expenses, so I was hoping for a shave that was as good as the Gilette Fusion. When I started my first shave, I put on the shaving cream and thought that it was way too thick, but shaved anyway. The shave seemed much closer than my Fusion; I didn’t clean how I shaved, I just changed the razor and the cream. After about a week, I returned the unopened package of blades I bought from Costco ($52 for 14 blades) and ordered 16 blades for $25 (free shipping on orders over $10). I was hooked.

I tried another shaving cream with the razor and realized that even though the shaving cream is thick, it works quite well. I’m going to order some more shaving cream as I think the combination works quite well.

I was so pleased that I bought my dad the Winston set (aluminum handle) for father’s day. Like me, he was impressed with the shave. However, unlike me, he doesn’t shave as often and already has a stash of Fusion blades, so he’s not going to be a convert for awhile.

Pros

  • Fast shipping
  • Very cost effective after initial handle purchase
  • Shaving cream works well.

Cons

  • Shaving cream is a bit thick
  • Requires some planning so that you have blades on hand

Summary

While my initial reason for purchasing was to save money, the shave is so much better than what I’ve had in the past. I’m not turning back on this and it is my hope that they stay in business. The major razor manufacturers have had such a monopoly that they have been charging exorbitant prices for far too long.

For anyone (mostly men, I guess), that use a razor like a Gillette Fusion, I’d definitely give it a try. No risk and you may just be impressed with the results; at a minimum, you’ll be impressed with the cost savings.

(The link to Harry’s is an affiliate link; if you order through it, I get free blades, but no one has paid me to write this.)

Review: Studio Neat Cosmonaut Stylus

A few weeks ago, my wife were in the dollar store (I needed a bag of salt to mix in with vinegar to try to kill some vines) and I saw that they had touchscreen styluses. I haven’t used a stylus on a device in years and decided for $1 to give it a try. I started using it and was surprised (not sure why) that it required pressure to use due to a capacitive touchscreen versus a resistive touchscreen. I was intrigued enough to purchase a Studio Neat Cosmonaut stylus based on a number of reviews.

The stylus is big and thick and is more like a big piece of chalk than a pen when makes it easy to grip. Like the cheap one I tried out, it does require you to apply some pressure when using. This means that my iPad has to be on a solid surface or grasped well in order to recognize the movements. It doesn’t work so well if my iPad is on a stand and I lightly touch it.

I know that the iPad wasn’t designed with a stylus in mind, but using the stylus is great for reading articles (my iPad is mostly a consumption device). I can keep my dirty paws off the screen and easily browse.

The stylus isn’t cheap by any means, but feels solid. Only time will tell if the springy tip lasts. It looks like it could get punctured, but as long as I don’t do anything crazy with it, it should be fine.

Pros

  • Solid feel
  • Comfortable grip
  • Tip works well

Cons

  • Cost
  • Unsure about the reliability of the tip

Summary

Not everyone needs a stylus for an iPad, but if you primarily use your device for reading/consumption, a stylus brings an interesting experience to the device. Even though I’m mostly using the stylus for reading, I’ve been working on a presentation built in Keynote on my iPad and using the stylus isn’t bad, but doesn’t help when I need to use 2 finger gestures. If a stylus interests you, I’d definitely try out some less expensive options before this one. I am please with the purchase and am using it daily, it seems like more of a luxury item than a necessity.

Review: Dyson DC44 – An expensive vacuum that really sucks

When we were picking what to put in our house, we decided to go with an engineered hardwood floor as it would look nice and wouldn’t trap allergens like the carpets we had in the past did. We had a Shark vacuum that we brought to our new house and found that we were using it a few times a week because one thing that you don’t realize with a dog is just how much it can shed! Our dark hardwood was constantly covered with dog hair (he’s a light colored dog), so it started driving me crazy. The corded Shark sucked up a lot of hair, but the cord didn’t make it convenient to use.

One day when I went to Costco (it is now my job to goto Costco as we’re literally 2 minutes away from one and my wife hates going), I was browsing the aisles and saw the Dyson DC44. It was quite expensive, but I was willing to give it a try. When I got home, I told my wife that if we didn’t like it or thought it wasn’t worth the cost, it would go back. The Dyson’s main selling point for me was that it was cordless; while there was another cordless on display at Costco, the Dyson looked more powerful.

I hung up the charger in the garage (this is absolutely key to using it as it makes it very convenient to grab). My son loved it and wanted to vacuum. We started vacuuming about every other day as there was tons of dog hair. Was the amount we were vacuumming just because it was a novelty to use a cordless vacuum or would we keep it up? Our house isn’t that big (just over 1600 square feet), so vacuuming the entire house can basically be done on one charge (it gets about 20 minutes on a charge). About a month after I bought it, I knew it was a keeper as my wife offered our Shark to her parents. Yeah!

Now that we’re 4 months into having it, I still vacuum a few times a week and sometimes just grab it when I see a large clump of hair around (we can never completely eliminate the hair). It’s easy to use, but a little on the heavy side for my son. The canister is far too small for having a dog as I have to empty it 3-4 times when I do the entire house; it is adequate for quick cleanups, but a pain for the full cleaning.

Pros

  • It is easy to use.
  • Cordless makes it very convenient.
  • Charging base is well designed and makes it easy to grab the vacuum out of it.
  • Has enough power to pick up dog hair.
  • Lots of attachments; we tend to use the attachment that spins like a vacuum and a pointed one.
  • Battery is big enough for our use; using it on carpets or a bigger house, it would be too small.

Cons

  • Charger cord is too short. The base has to be mounted very close to the outlet which won’t work for everyone and barely works for us.
  • The canister for the debris is too small for a family with a pet.
  • Very expensive.

Summary

So far, this is proving to be a good investment. We are vacuuming regularly and don’t just put it off to a bi-weekly task like we’ve done in the past. I believe that this will help us live in a cleaner house (not sure how clean a house can be with a dog in it). I would like to see it have a larger canister to hold debris and a larger battery wouldn’t be bad, either.

Overall, I have no regrets about buying this. Without this vacuum, I imagine that we’d have dog hair around all the time and make our house look dirty. Cordless vacuums have come a long way and I’m not sure I’d go back to a corded one even if it offered me more power. The cost is the biggest hurdle in me recommending this product to others, but if you have some spare change, this is well worth a look.

Review: SecuritySpy

In our last house, I considered adding security cameras as my wife was a teacher in the area and some of the students knew where she lived. We all know that not every student is perfect and we wouldn’t be surprised if a student toilet papered our house. This, luckily never happened. However, neighborhood kids did toilet paper our house once and someone (or a group of individuals) graffitied a number of houses including ours with anti-Semitic words and symbols. I never got around to installing cameras and it is probably best that I didn’t as the technology has gotten so much better, that the quality of cameras and systems from just a few years ago doesn’t compare with what we have today.

Some people may think I’m a bit paranoid, but I think that knowing who is around my property while it is being remodeling as well as down the line knowing if solicitors come to the door or a package gets dropped off is invaluable.

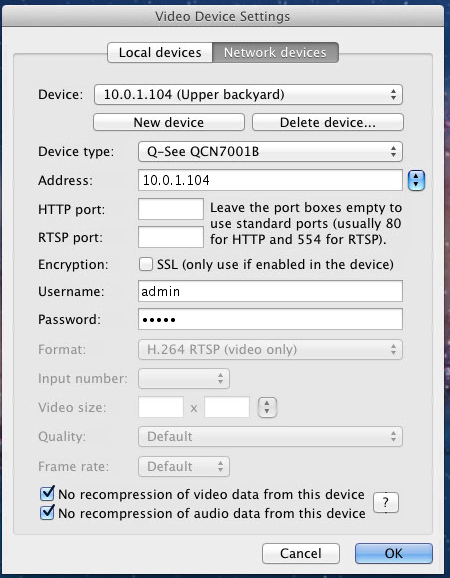
When I started investigating camera systems, the reviews on full featured systems were so mixed that I didn’t know what to believe and what not to believe. The most common theme among reviews on systems was that the fans in the DVRs was noisy and that the boxes were power hogs. That quickly changed my thinking and I decided that since my Mac Mini that acts as my media center runs most of the time (6 am to 11 pm), I was probably better off having it run 24 hours a day and have it handle the recording. The latest Mac Minis use about 85 W and are super quiet. With that decision made, I had to go with networked, IP cameras. I’ll cover the Q-See cameras I got in another review. So the last decision to be made was the software to handle the recordings. Unfortunately, there aren’t many options for the Mac.

After playing with the 2 leading candidates, I decided that SecuritySpy was the only option. The other candidate crashed while I was testing it, which made it unreliable for a 24/7 system.

SecuritySpy grew out of a product called BTV which I had played with a number of years ago when I first started experimenting with video on the Mac at about the time I wrote a program called PhotoCapture, if I recall correctly. (As an interesting side note, PhotoCapture was effectively a security program for capturing still images, but was either triggered on a timer or when someone hit a web page.)

SecuritySpy has a few main functions that I have used; the first is time lapse recording that gives you a new recording every day for each camera. The second is to do something when it detects motion. For the first week that I used SecuritySpy, I had time lapse recording turned on and it recorded lots and lots of video. I had the cameras set to output H.264 video at 15 fps. For each camera, SecuritySpy was recording over 30 GB of data per data. With four cameras, this amounted to about 120 GB of video a day. SecuritySpy will remove old video or keep a certain amount of free space, so space was only a slight issue (my test Mac Mini is a Core 2 Duo 2.0 GHz machine with a 500 GB drive; when I eventually move, my main Mac Mini will take over the duties). The big question really is, what will I do with so much video?

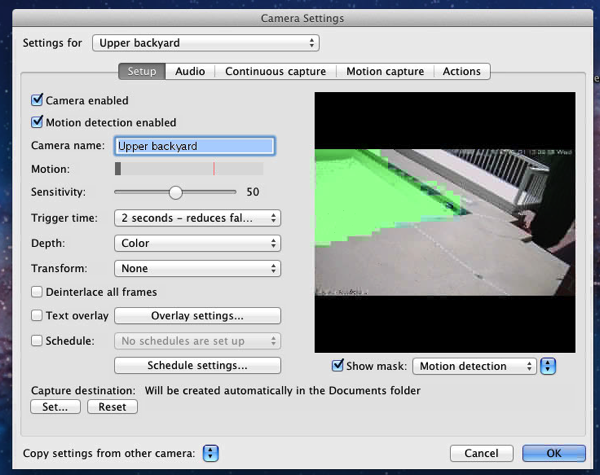
The second main feature of SecuritySpy is the motion detection triggers. I’ve set it up to record 15 seconds of video before and after an event as well as capture still images once a second during that time and email me the images. This feature is where the power of SecuritySpy lies. Quickly I realized that I had to mask off some areas of the image to ignore as the shimmering of the pool kept triggering the motion. I’ve been receiving images all week long of the mailman coming to the door, a contractor pulling into the driveway, as well as my smiling face when I’ve approached the front door! I still need to tweak my settings, but now I know who is approaching the house (I also have cameras in the back as well).

Configuration of SecuritySpy, however, is a bit cumbersome. In my case, my 4 cameras are identical with the exception of the IP address and I want the same motion capture settings. For the setup, I have to add each camera individually, select the camera from a list and set a few settings. After that setup is done, you have to navigate to each camera individually and set it up; there is an option to copy all the settings from another camera which helps, but there is likely an easier way to configure all cameras at once.

Another neat feature is that it has a built in web server so that you can view from anywhere. With a change to port forwarding on your router and the built in dynamic DNS for SecuritySpy, it is easy to access your machine remotely. However, if you want to use HTTPS to securely access it, the process is a bit cumbersome as it requires setting up the web server built into OS X (in Mountain Lion and maybe Lion, there is no longer a checkbox to turn on the web server in System Preferences), setting up a rewrite rule and installing a certificate. I would have preferred to have this built into SecuritySpy with the ability to either have it generate a self-signed certificate or allow the user to select his own (I use StartSSL for free certificates that work with a wide variety of operating systems; I’m not sure I’d use them for anything other than my personal use, however). The web interface for SecuritySpy feels quite dated and reminds me of the kinds of things I setup in 1994 when working with my PhotoCapture program. It definitely could use an overhaul, but it is quite functional.
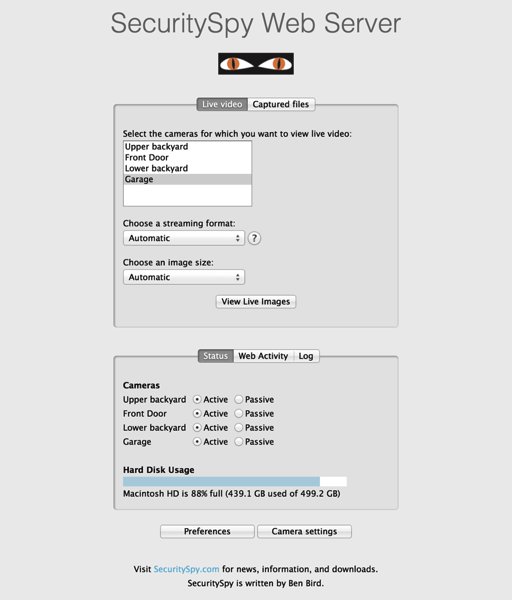
SecuritySpy  20130501

Like the web interface, the entire user interface feels quite dated. The dialogs, windows, etc. look very Carbon like and show the roots of the program dating back almost 20 years. While I am definitely not a user interface designer, basic Cocoa apps look a lot fresher than SecuritySpy. I know it is quite hard to transition a UI and if you’re a one man shop, you may not have the resources to revamp the UI.
Screenshot of Finder

2Screenshot of Finder

1Screenshot of Finder

On my Core 2 Duo Mac Mini, SecuritySpy has had no problems keeping up with 15 fps video on 4 cameras. It uses somewhere between 40 and 60% of the CPU (total between both cores) which is what I expected. When I switch it over to my quad core i7 Mac Mini, the Mini should have no problems acting as my regular DVR and security setup. This was on version 3.0.2; I am still testing the latest 3.0.4 version, but preliminary testing shows an issue indicating that there are network errors and the machine may not be able to keep up with the 15 fps.

Pros

  • Works with a variety of cameras.
  • Very robust.
  • Motion capture works well.
  • Full suite of actions on motion.
  • Built in web server works well for remote access.

Cons

  • User interface feels dated.
  • Web interface feels dated.
  • Configuration could be a little easier.
  • HTTPS isn’t built into the web server.

Summary

SecuritySpy is an excellent alternative to standalone surveillance systems. The website has estimates on hardware requirements and those should be looked at closely so that you’re not disappointed with performance. The price for the 4 cameras is about $120 which I consider quite reasonable as I compared it to a standalone system (incremental cost since I already had a Mac Mini; some standalone systems cost maybe $100 more when bundled with 4 cameras). Setting up a video system is not for the faint of heart; adding a Mac Mini to the equation makes it even more complicated. However, I believe that SecuritySpy and using a Mac Mini was a wise choice for me. I did contact support about compatibility with a camera I tried out before the Q-See ones and got a very prompt response about it; so if you run into problems, help is out there.

Review: Fujitsu ScanSnap ix500

As many people who read my blog know, I’ve been working with consumer scanners for over 6 years and have had more scanners than I care to count. Six years ago I purchased a Fujitsu ScanSnap fi-5110eoxm scanner. It was quite expensive for a consumer scanner, but it was one of the best investments I’ve made in computer hardware. The scanner served me well, and I’ve been recommending that scanner and its successors for years. Everyone that I’ve recommended the scanner to has been pleased with it.

Yesterday, the FedEx guy dropped off a package for me, and I quickly opened it. Inside was a Fujitsu ScanSnap iX500. I was given the heads up that a “black and shiny” object would be showing up at my door, so it wasn’t a complete surprise.

The first thing I did with the scanner is take a stack of loan documents (105 pages), split it into 3 and scanned it in. The stack had some letter sized pages and some legal sized pages. The scanner cranked through the pile pretty quickly without a single misfeed. In fact, I scanned the stack 3 times, the first time, it scanned to my iPhone (it has WiFi and an iPhone app), the second I didn’t turn on OCR, and the 3rd time was a charm. It was significantly faster than my old ScanSnap and didn’t misfeed (my old ScanSnap misfed all the time).

The feeder on the scanner works better than the old version, as well. The software is typical hardware manufacturer software in that it works, but is, in general, pretty poor. I have, however, gotten used to the software over the years and try to interact with it as little as possible. In fact, I use Mariner Software’s Paperless which integrates directly with the ScanSnap so that I can just click the Scan button in Paperless and it kicks off the scan.

The cost of the scanner may deter some people, but for anyone that wants to go paperless, a good scanner is an absolute necessity. Once you use a ScanSnap, you will think that multi function devices are toys.

Pros

  • Very fast scanning.
  • Excellent ability to prevent misfeeds.
  • Scanning quality is good and automatic setting works well.
  • Abbyy Integrated OCR is fast and produces good results.

Cons

  • Expensive.
  • Software is usable, but not pretty.

Summary

This scanner reaffirms my recommendation of ScanSnap scanners. It improves on my 6 year old scanner, but I don’t think it would be worth spending the money if you already have a ScanSnap scanner. The scanning to WiFi seems more like a bullet item than a useful feature, but time will tell.

While people try to eliminate paper, it is amazing how much still comes into our house. A scanner is absolutely necessary to reach the goal of going completely paperless. I’ve been scanning in documents and going paperless for the last 6 and a half years. If you don’t already have a ScanSnap scanner, this is an excellent choice.

Review: Mophie Juice Pack Air for iPhone 5

One of the problems with any battery operated technology is that it is completely useless when the battery runs down. This, of course, has lead to a huge industry of aftermarket battery packs and charging mechanism for every gadget we use. While I’m not a huge user of my iPhone, I have found that when I travel, I am a little more cautious about using my phone for fear that I’ll run out of juice on my phone and not be able to make an important call or will miss a message from home at the end of the day.

Last year, before WWDC, I bought a Mophie Juice Pack Plus for my iPhone 4S and used it on all my trips. I don’t travel all that often (on average about once a month), but I felt a lot better knowing that my phone would last all day. There are lots of tips for extending the battery life of a phone, but they all require futzing with settings and reducing the utility of the phone (one tip is to turn it off as the battery is getting low so that you can turn it on later to make an important call; it’s hard to receive a call or check email when it is turned off!). The Mophie case was an excellent solution and served me well until I got my iPhone 5.

I’ve travelled a few times with my iPhone 5 and haven’t had much of a problem with battery life, but have topped it off before dinner on trips as it usually got quite low. When Mophie announced their latest cases for the iPhone 5, I knew I had to get one as WWDC is coming up again and I have a few more trips as well. In addition, now that I have a Pebble, I have to leave Bluetooth on all day which drains my battery a bit without doing anything. It was a no-brainer to order the case; it just was a matter of timing. I finally bit the bullet last week and with an estimated shipping time of 7-10 days, I figured I wouldn’t receive it in time to give it a whirl on my next trip. However, Mophie’s super fast shipping got it to me in a 3 days.

I hadn’t read the details on the Mophie site close enough to catch a small gotcha with the case; it wasn’t until I heard the case as a “pick” on MacBreak Weekly that I learned of this gotcha. The pass through connector used for charging only charges and doesn’t allow for syncing. As I don’t use the case all the time and it is easy to remove, it isn’t a huge issue.

The other quirk is that the headphone connector is so far recessed and small that Mophie provides an extender cable. The Apple supplied headphones fit fine, but are a bit difficult to plug in and remove.

I gave the case a test drive on my most recent trip, but somehow, my phone didn’t drop below 15% even with talking on the phone for 1.5 hours, getting a bunch of email, receiving a few text messages and having Bluetooth on. So, while I was prepared to flip the switch on the case to recharge the battery, I didn’t have to do it. Does this change my review? Well, not really, the only part I didn’t test was “would it charge” and I have to assume it will otherwise I have a dud.

Pros

  • It charges the battery.
  • It provides some protection on the side.

Cons

  • Adds weight and bulk to the phone.
  • Pass through connector only charges and doesn’t do data.
  • Pass through connector isn’t a lightning connector. (I don’t like micro USB as it is hard to insert correctly on the first try.)

Summary

If you find that your iPhone 5 drains its battery during the day, then having a battery case is extremely useful. Is it worth the $99 cost? That is really going to depend on your usage. I’m glad I bought it so that I don’t have to worry about having a charge. While I have another external battery that lets me plug in a USB cable, it just isn’t convenient. It is a lot cheaper, but when I’ve tried to use it, having it in my pocket with my phone and cable was too cumbersome to be a real solution. I won’t use it all the time, but now I have it just in case. I’m sure that on longer trips it will come in handy. This first test trip ended up being a short day with me leaving my house around 6:30 am and arriving home around 7:00 pm.

First Week Review: Pebble Smart Watch

Two summers ago, the battery on my watch stopped, so I replaced it, but then found that my watch stopped again within a few days. I gave up on my watch and decided that I didn’t need a watch as I have my phone with me all the time. Fast forward to last April when the Pebble smart watch appeared on Kickstarter. I was getting tired of having to pull my phone out of my pocket, so I became interested in it. The watch had 2 features that interested me; one it tells time and second, it would tell me when the phone rings. I’ve found that when my phone is in my pocket, I miss calls; people don’t call me all that often, but I like to answer the calls. These 2 features sold me on the watch.

When iOS 6 came out, it added a Bluetooth profile called MAP which allows messages from the phone to the watch. This sold me even more on the watch.

So with these 3 features promised, I waited and waited (just like everyone else) for my watch to be delivered. Before receiving it, I read mostly positive reviews, but some negative comments. For me, I just wanted these 3 features and almost didn’t care about anything else. From reading the specs and what people had to say, they indicated that the watch was big. I wasn’t too concerned about this as I actually wore a Fossil Palm OS watch which was huge!

Now that I’ve had the watch a few days, I have mixed feelings about it. It does everything that I wanted it to do in terms of telling the time, letting me know when a text message arrives and when I receive a phone call. I’ve gotten some other notifications and now I want more; it appears that iOS only consistently notifies for messages, but inconsistently with other notifications. Pebble has documented a dance to get other notifications working, but that doesn’t seem like a very good answer. Given that MAP support in iOS 6 is new, maybe Apple will add options to specify exactly which notifications will get passed through to MAP in the Bluetooth settings for the device as seen below.

Screenshot 2013 02 14 14 27 18

The watch isn’t the prettiest or cheapest watch on the market, but for the moment, it is fulfilling a need for me.

Pros

  • It tells time.
  • It lets me know when I get SMS or iMessages.
  • It lets me know when the phone rings.

Cons

  • It’s big.
  • Notifications other than SMS/iMessage/Phone are inconsistent (apparently an iOS 6 bug/issue).
  • Drains the iPhone’s battery a bit by having Bluetooth connected all the time.

Summary

If style is a main concern of yours, don’t get this watch. If you want a completely bulletproof product, don’t get this watch. The Pebble team is releasing updates fairly often to work out kinks and I think it will still be awhile before everything is worked out and issues settle down (like getting Apple to figure out what to do with notifications and MAP; there is a jailbroken hack that fixes this, but I’m not jailbreaking my device). The jury is still out of the watch’s battery life, but it doesn’t negatively affect my iPhone such that I’ll probably be buying a Mophie juice pack Helium.

I’ll definitely be wearing the watch while I wait for something better to come along; the rumors of an iWatch are interesting, but don’t sound like a product Apple will bring to market anytime soon.