Review: ShimoVPN

Ever since I started working, I’ve had to connect back to an office network either occasionally or full time. First there was AppleTalk Remote Access and then there were a variety of VPN solutions that different companies employed. While macOS has gotten better at supporting VPNs natively, it really only handles Cisco and IPSec VPNs. This has worked for some of my connections, but for others, I’ve had to have a separate VPN client. Those VPN clients have ranged from bad to worse in terms of quality. Why they are so bad, I have no idea.

Several years ago, I tried out ShimoVPN to connect to my companies network as the native Mac client didn’t have a feature I wanted (I can’t remember what). Shimo worked, but the native client was good enough and I forgot about Shimo.

Now that I’m self-employed again with several clients, I decided to take another look at Shimo. In particular, I didn’t want to run all my traffic over a client’s VPN and I also wanted to be able to connect back to my own OpenVPN server (the native Mac client doesn’t handle OpenVPN and the free OpenVPN client didn’t work). After I installed ShimoVPN, it imported my configurations and I was quickly able to get things setup. At that point, it didn’t buy me anything for my clients over the native Mac client.

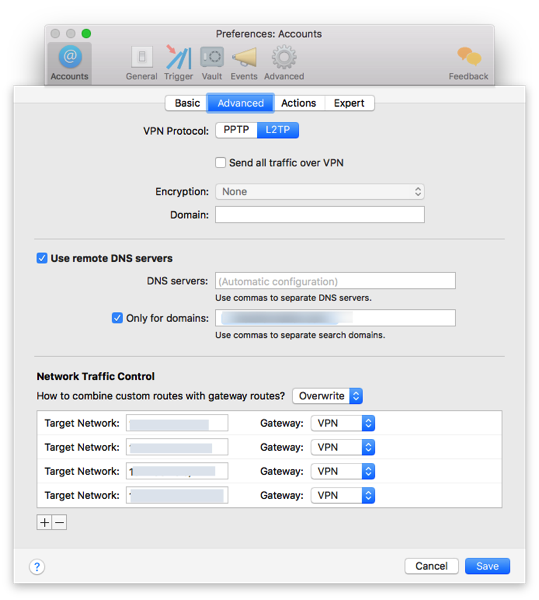
The power of ShimoVPN comes into play in how it can setup specific routing. I only want certain traffic to go over the VPN and Shimo lets me configure that on a per VPN basis.

Screen Shot 2016 12 18 at 7 47 57 AM

I set this up for 2 of my clients and am able to have both VPNs up at the same time and connect to sites on both without having to disconnect and connect to a particular VPN. This feature alone is worth the money for Shimo!

Shimo has one additional feature that make it a must use application for me. The first is that it automatically reconnects to the VPN when my machine wakes up. This, of course, works best when 2FA isn’t used as I’m not prompted. Another feature it has is the ability to setup triggers to connect and disconnects from certain VPNs based on WiFi SSID, location, and other conditions. I haven’t used this feature much, but the potential to simplify things is great.

Pros

  • Handles OpenVPN connections.
  • Allows custom routing.
  • Has triggers for certain events.
  • Reconnects automatically upon disconnect.

Cons

  • Cost (built in macOS client is free).
  • Powerful features require some networking knowledge to setup.

Summary

ShimoVPN is a utility that most people won’t need, but for those that do, it will pay for itself pretty quickly. VPNs are necessary and while ShimoVPN won’t me on anyone’s holiday wishlist, it is definitely going to remain a tool in my toolbelt.

Review: Plantronics BackBeat Fit Headphones

It seems that every year I look for better headphones for running. The last 4 or 5 years, all the headphones that I’ved used have been wireless, but something either happens to the headphones or there is something that I don’t like about them. This summer was no different than past summers in that I wasn’t satisfied with the headphones I had. My previous pair were the Plantronics BackBeat Go. They performed adequately, but I was never able to keep them in my ears and spent time on my runs adjusting them. Sometimes they stayed in and required little adjustment, but most of the time, they just kept falling out. I initially liked them and was able to have them properly positioned, but that might have just been a fluke. I had bought them at Costco so that I could try them out and if I didn’t like them, they’d go back. However, they worked OK and I ended up keeping them for about a year.

Flipping through the Costco magazine recently, I saw that they were selling the Plantronics BackBeat Fit with a $20 discount. Like last year, I decided to give them a try. With Costco’s generous return policy, I had nothing to lose. (I used to hate going to Costco, but now I go on an almost weekly basis.)

Like most Bluetooth headphones these days, pairing was pretty easy; granted not as easy to pair as Apple’s AirPods, but easy enough. I paired the headphones and the sound is decent. I’m not an audiophile and when I’m running, it almost doesn’t matter as long as they play. The controls on the side are fairly easy to work, but the volume up/down button (it is 1 button) is a little small. Skipping tracks requires a double tap of the button on the left ear. I would have rather that button just require a push and hold as I skip tracks fairly often when there is music I don’t want to hear.

One of the things I’ve noticed on the headphones is that there has been a firmware update for them; this is a first for me on running headphones. The one feature I noticed with the update is that when I goto the next track by double tapping the button is that a voice says “next track”. Also, when I power them on, a voice gives estimated play time which is great instead of just high, medium, or low battery charge.

The headphones fit well over my ears and don’t move when I run. They left small marks on my ears where they rested, but I barely noticed them. They were comfortable and I didn’t feel like I spent time futzing with them while running.

Pros

  • Comfortable.
  • Don’t move when running.
  • Voice prompt for battery usage is useful.
  • Decent play time.
  • Can be paired to multiple devices.

Cons

  • Volume button is a little small.
  • Advancing tracks requires 2 taps which is sometimes hard to do while running.

Summary

Many times when I get something new like this, I write the review during the “honeymoon phase” and have very little critical to say about it. While that is true here as well, the design of these headphones is what will keep me using them. They are similar to a pair of Motorola headphones that I had a few years ago, but those had a stiff piece of plastic connecting the sides which dug into my head. I liked the design on those as they stayed in my ears. I’m quite hopeful that these live up to the hype.

At the discounted price I got at Costco (they were on sale), buying them was a no-brainer. At regular price, I can say without a doubt that they are better than the JayBirds I had before that I couldn’t get to stay in my ears. I wouldn’t hesitate to recommend these for anyone that wants wireless headphones for use when running or working out.

Review: Feit 48ft. LED Outdoor String Lights

Recently my neighbor has been redoing his backyard and I saw that he put in low voltage lights around the perimeter of it. This made me a little jealous as I only put in low voltage lightning under parts of our deck and not around the perimeter. While I do have floodlights in the backyard, they are for security lightning and not really lighting the backyard when we use it. So, my choices for adding lights were quite limited.

I remembered that Costco had some string lights, so I looked online and found some Feit LED string lights. I ordered 2 sets of these and they arrived last week. I chose these over the cheaper incandescent ones because of the lower power consumption, plastic bulb covers, and ability to dim them. After getting the lights, I strung them up without reading the instructions (what could they say besides plug them in?). They looked nice, but there was a lot of tension in the wire and the connection between the 2 sets had a lot of stress that didn’t make it secure.

So, I decided to glance at the directions and it said that for spans over 24 feet, that the lights should be secured to a cable or wire. That made a lot of sense. This past Saturday, I prepared my parts list, went to Home Depot, and went about securing the wire rope to a pole, my house, and our deck. It was a clean install, just a bit time consuming. I then used small black zip ties to attach the string lights to the rope. One huge advantage of using the wire over just supporting the lights from the ends was that they didn’t sag.

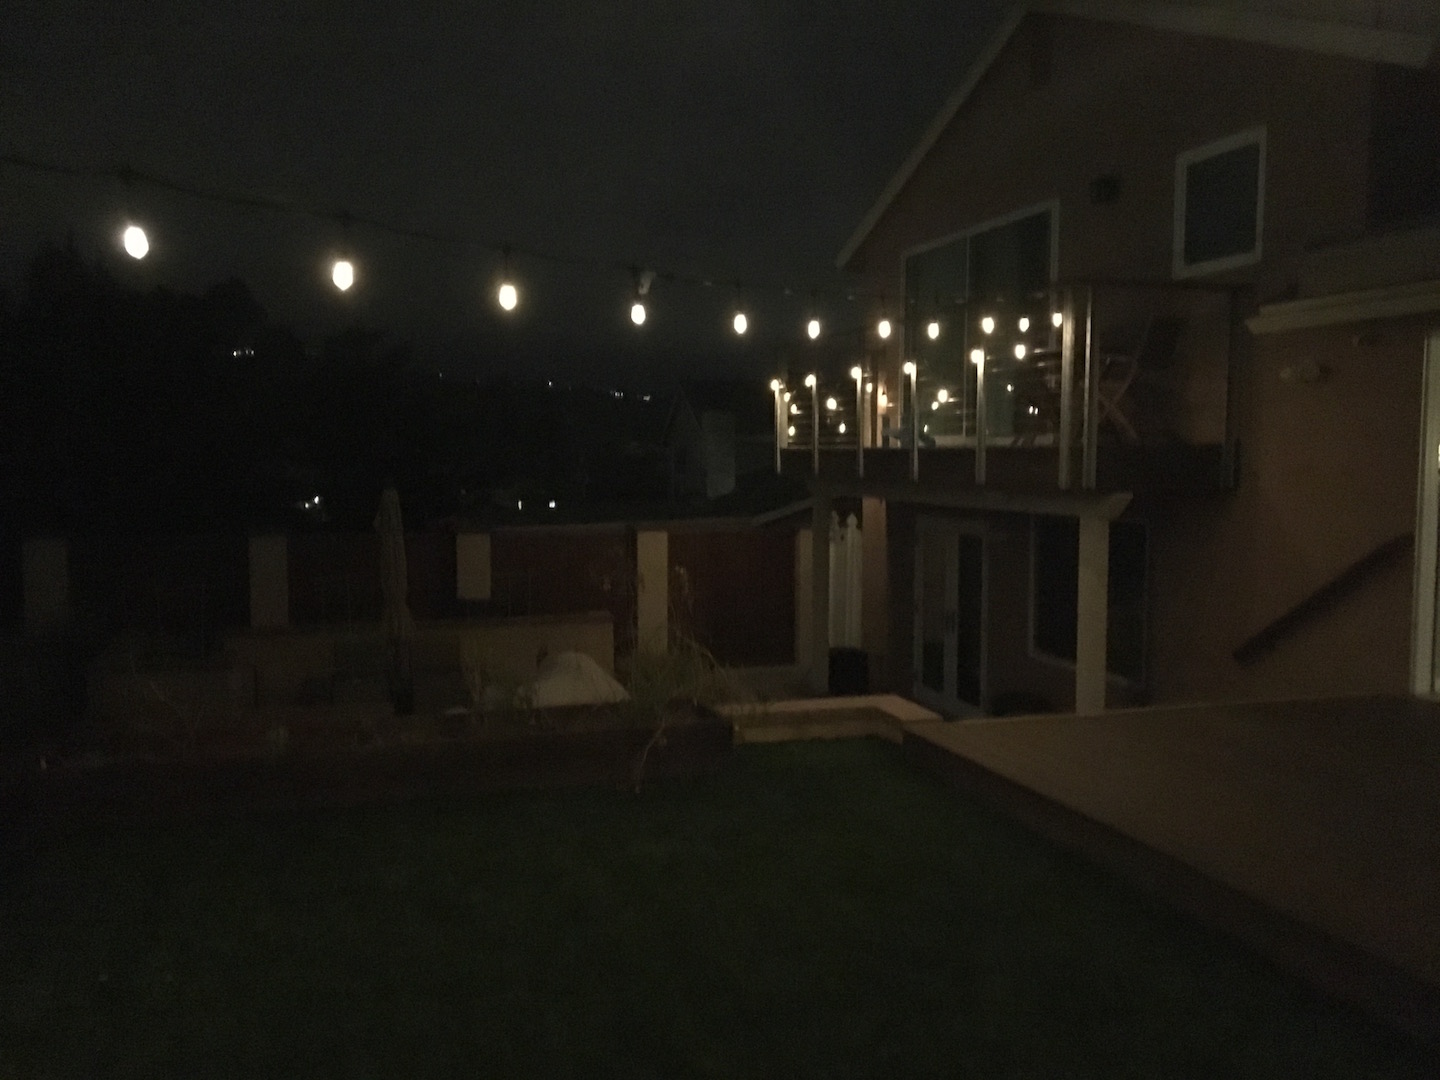
When it finally started getting dark, I turned on the lights and lit up the backyard. Even though the lights are about 15W each strip, they put out a significant amount of light. My wife loved them and I was pretty pleased with my work. The next evening we had friends over and we got positive comments about the lights which made me feel like putting up the lights was another good decision.

The lights appear well constructed, are UL listed (the transformer/rectifier is UL listed for being rainproof, but I have it in an outdoor box with a cover).

Pros

  • Put out a lot of light.
  • Dimmable.
  • Can choose from a few colors. (Not sure that is a pro.)
  • Wireless remote to turn the lights on or off.
  • UL listed.
  • Low power consumption.

Cons

  • For longer spans, an extra wire/cable is needed which adds to the expense and makes installation harder.
  • Wireless remote seems a bit flakey.
  • Colors other than the white are pretty useless.

Summary

If you’re looking for a way to light up a backyard (or even a front yard), these lights should do the trick. I noticed yesterday that Costco sold them in the warehouse which would have saved me $10 shipping. Of course with anything plugged in outside, make sure it is UL listed. This set of lights meets that requirement for me. I’m quite pleased with the results and am not sure why I didn’t think of it sooner. Buying them from Costco made the purchase a no-brainer because of Costco generous return policy; there is nothing to lose by trying them.

Final Result

Review: UniFi Switch 16

As my loyal readers have probably been able to tell, I’ve become a huge fan of Ubiquiti Network’s UniFi line of access points and switches. I’ve previously written about the UniFi Switch 8 which Ubiquiti sent to me for testing. Over the last few months, the switch has continued to perform well and I decided to see about simplifying my network and get a UniFi US-16-150W to replace a Cisco PoE switch and a common place Ethernet switch. While the 16 port switch and the 8 port switch would mean a loss of total ports (with SFP modules, I could get 4 more ports yielding a total of 26 ports; 1 port on each for connecting switches), all my devices would just barely fit.

I didn’t need the switch, but moving to more UniFi gear would make management easier on my network. The main features I use on the switch are PoE for my cameras and bandwidth monitoring on each port. They don’t justify replacing working equipment, but simplification can’t be overstated.

My one hesitation on getting this switch was that it has 2 fans unlike the 8 port version. The ambient temperature in my server closet ranges from about 76° F to 86°F which is a bit warm for equipment. I have 6 PoE cameras attached to the switch (drawing very little power) and I expected the fans to come on repeatedly. To my delight, I’ve only heard the fans at startup. Granted I’m not home all day, but when I have been home, I haven’t heard them. Other than that, the switch performs as well as the 8 port switch.

Moving to the UniFi switch for the rest of my network caused 1 problem that didn’t occur in the previous configuration; 2 of my 3 Squeezebox devices weren’t connecting to the network. This had me quite concerned, but after some futzing, I set the ports for the devices to be 100 Mbit (instead of auto negotiation) and turned PoE off on those ports. These changes fixed the issue.

There isn’t a whole lot to say about the switch except that it is easy to manage, but for most home networks it is overkill.

Pros

  • Integrates well into the UniFi line
  • Powers all the UniFi access points (802.3af or passive PoE)
  • Controller software is easy to use (but utilitarian)
  • Rack mountable

Cons

  • No combo RJ-45/SFP Ports
  • A little pricey
  • Fans could make it noisy

Summary

Just like the UniFi 8 port switch, I’m quite happy with this switch. It isn’t for everyone or even most home users. However, if you’re standardizing on UniFi gear, this switch will fit well into your network. The price is decent for a managed PoE switch, but if you don’t have a bunch of PoE devices and don’t have a use for a managed switch, I’d keep looking for network gear.

I purchased this switch from Ubiquiti’s store and judging by my other UniFi gear, this is going to serve me well.

Review: Fenix UC30 Flashlight

For many years, I’ve had a fascination with flashlights. Don’t ask me why, but I’ve thought they were cool. Maybe it is because I camped as a Boy Scout and never had great light on the trips. Since I was a scout, the technology in flashlights has changed dramatically and made them much more powerful than they were years ago.

Last year, I did some research on flashlights and decided to buy a Fenix UC35 tactical flashlight. One of the features that stood out to me was USB rechargeable as I didn’t want yet another way to charge something. I’ve been quite happy with the flashlight that I decided to get the smaller version of it, the UC30 this year. This is considered an EDC, everyday carry, flashlight. The flashlight works a bit different from the UC35 in that the UC35 has a tail switch for on/off and the UC30 uses the main switch for on/off and for controlling the light level.

The flashlight gives off a very, very bright light which, combined with a long run time are the main features I need in a flashlight. In my limited testing, the flashlight performs well. I’m considering another one to put in my backpack as I always like to be prepared.

Pros

  • Small size
  • USB Recharageable
  • Multiple brightness levels
  • Bright light on highest setting
  • Appears durable
  • Waterproof (according to the specs)

Cons

  • Not the cheapest flashlight
  • Unknown durability

Summary

The Fenix UC30 is a compact flashlight that puts out an extremely bright light. I really like that it is recharageable via USB as I have USB rechargers all over the place which makes it quite easy to ensure that it is always charged. Time will tell how well it lasts, but so far, it looks like it is well built and will be very useful.

Review: Plantronics Voyager Focus UC

When I started my new job, I was issued a MacBook Pro, an Acer monitor, an Apple wired keyboard, a cheapo mouse, and a few other things including a USB headset for use with Lync, i.e. Skype for Business. There was also a desk phone next to my computer that I haven’t figured out the purpose as Lync lets me make phone calls. I brought in my own trackpad to replace the mouse and I was pretty much set. However, after a few conference calls with the USB headset, I asked my manager for something better; he and others had the Plantronics Voyager Focus UC. He ordered me one and it arrived this week. The headset isn’t cheap (list price is $299), but I soon began to understand the high cost.

I quickly setup the headset, plugged in the Bluetooth adapter, installed the Mac software (it’s kind of mediocre), reconfigured Lync to use the headset and I was off and running. I also paired it with my phone to play music. After a few hours with the headset (including a conference call), I was hooked. When you take the headset off, the music pauses; when you’re on a Lync call, the LED on the Bluetooth adapter turns red; if you try to talk when the headset is on mute, you get an alert on the computer telling you that you are trying to talk and the most important feature is the active noise cancelling (ANC). When I put on the headset and turned on the ANC, all the noise of the office were drowned out and I had some peace and quiet.

For the first few weeks of work, I didn’t listen to music and suffered through the noise. Since I got the headset, I’ve been listening to music almost all the time and have been able to get in the “groove” of my work even forgetting how long I’ve been sitting (good thing my Apple Watch reminds me to stand up!). In addition to listening to music, the conference calls have been crystal clear. I’m not quite sure what I would need in a headset.

Pros

  • Active voice cancellation works well.
  • Integrates well with Lync/Skype on the Mac. (Look for the -M version)
  • Pairs easily with my iPhone and switches between Mac voice and iPhone music.
  • Sound quality is very good for voice calls and music quality isn’t bad.
  • Controls are easy to access on the sides.
  • When you remove the headset, music pauses; when you put them back on, the music continues.

Cons

  • The cost is much higher than any headset I’ve ever used.
  • The Mac software is subpar; there is a menubar item, but you have to hide the main window otherwise the menubar item goes away.
  • If you set the output from the Mac to be the headset and are playing music, the music stops and plays alerts and then plays the music again. I expected the music to “duck” and then come back, but it is abrupt.
  • Extended wearing of the headset causes slight discomfort.
  • Sometimes a little static that seems to go away despite being less than a foot from the Bluetooth adapter.

Summary

After only a few days of using the headset, I’ve been contemplating buying a pair for my home office (at some point I’ll be able to work from home sometimes). Even though I could move the headset home, the convenience of having one would be worth the money. Without having used the headset for a few days, there is absolutely no way that I’d plunk down this kind of money on something unseen. However, now that I’ve had time to use the headset, I should have bought this headset even if I just wanted to use them with my phone. I was on so many calls at my last job, that having these would have been a huge win for me. When I was told to buy a good headset for calls, I bought a cheap Bluetooth headset that crackles; I should have spent company money on something like this!

If you spend a lot of time on calls in an office, I’d definitely recommend this headset. If you’re using Lync (Skype for Business), even better.

Review: UniFi Switch 8

Three years ago when we bought our house, I decided I wanted to put in surveillance cameras. When selecting the cameras, I decided that the cameras had to be powered by PoE (Power over Ethernet) so that I could change out the cameras later on if I wanted to and didn’t have to worry about dragging a separate wire for power which could be different for different cameras. At the time I was looking, the number of small, fanless switches that did PoE was quite small. I decided on a Cisco SG300-10P which is a 10 port managed switch with 8 of the ports being PoE.

The managed switch was definitely overkill for what I wanted, but an unmanaged gigabit PoE switch without a fan was nowhere to be found. The switch has worked fine for my needs. Since then, I’ve experimented with other unmanaged PoE switches (a 16 port one with 8 PoE ports) as I needed more ports. The Cisco switch works fine, but I really didn’t do much with it.

Last year after I tried out Ubiquiti’s UniFi AC Access Points, they asked if I wanted to test their new UniFi Switch 8 port switch that was coming out. Of course, I said yes! The switch, like other products in the UniFi line is controlled by the UniFi controller software. As I’ve mentioned before, the software is quite utilitarian, but works well. The switch easily integrates with my access points and is simple to setup.

One of the things I dinged the UniFi access points for (not the Pro) was the lack of 802.3af PoE requiring the use of a power injector. Well, like other switches in Ubiquiti’s line of switches, the 8 port switch provides passive PoE to individual ports if configured which will power the UniFi access points. So now that I had a UniFi switch, that negative point of having to use a power injector no longer applied.

My needs of a switch are pretty minor; I just need PoE provided to cameras and I need it to pass VLAN traffic for my guest WiFi network. The UniFi Switch 8 easily does that and a whole lot more. The controller interface works and I love being able to see statistics and have control over much of my network from one screen.

I really would like 10 ports and the switch has 2 SFP ports. Normally SFP ports are used for fiber connections, but they also support copper modules. I’m in the process of trying to get working copper modules from Fiberstore which is proving to be difficult; of the 6 I ordered, only 1 worked. Their support is good, but being in China, it takes a long time to get replacements. I would rather have had a combo RJ-45/SFP port like the Cisco switch has, but the SFP modules will eventually work.

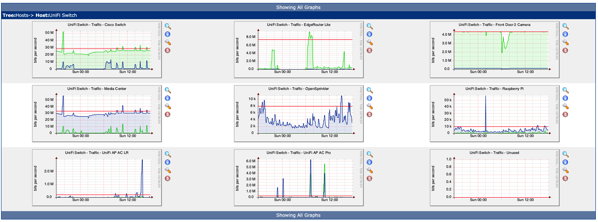
One of the things I’ve overlooked until recently in a managed switch is the ability to use SNMP and monitor traffic. There is no real use for watching the traffic, but I find it interesting. I have monitoring for my access points and my Cisco switch as well.

Cacti

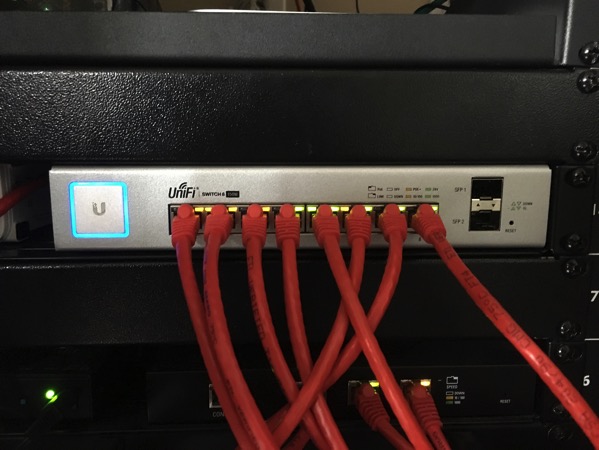
With a retail price of $199, who should buy this switch? For most home users, there is no reason to purchase this switch. However, if you’ve bought into the UniFi line of products (which I’m quickly doing as unified management is excellent and gives me lots of control), then getting a UniFi switch should be a no brainer. To me, multiple 8 port switches beat out the 24 port switch due to the lack of fans. Yes, it would cost more, but in my setup, I try to keep noise at a minimum.

IMG 5572

Pros

  • Integrates well into the UniFi line
  • Silent operation
  • Powers all the UniFi access points (802.3af or passive PoE)
  • Controller software is easy to use (but utilitarian)

Cons

  • Not rack mountable; the Cisco switch I have has really long ears to mount it which Ubiquiti could have done. In my case, I put it on a Raxxess RAX Rack Tray
  • No combo RJ-45/SFP Ports
  • A little pricey

Summary

While the UniFi Switch 8 isn’t for everyone, I’ve been quite happy with the Ubiquiti products and plan to purchase one of the 8 port switches to replace my Cisco switch (I’m waiting until the SFP modules work properly as I actually need 19 ports between my 2 main switches). The unified controller makes things very easy to manage. The Cisco switch has lots more options exposed, the UniFi switch can do a bunch with the command line; however, I haven’t had to touch it.

Standardizing on UniFi switches will also allow me to possibly use their UniFi Video cameras including their new 1080p as those are powered by 24V passive PoE which the switch will provide (if you’re listening, Ubiquiti, I have 7 cameras and would need an NVR to go with it :-)).

If you’re going all in on Ubiquiti products, getting one of their switches should be a no-brainer.

Note:The UniFi Switch 8 was provided to me by Ubiquiti at no cost for testing and review. It should be clear that my review is not biased by this as I plan on purchasing another switch with my own money.

Review: UniFi AP AC Lite and AP AC LR

I’ve been using my EdgeRouter Lite for more than 6 months now and couldn’t be happier with it. After posting my review, Ubiquiti contacted me and asked if I was interested in testing out some new hardware. As I love playing with new hardware, I couldn’t say no. I was actually eyeing the 802.11 ac access points, but the price tag put me off as I didn’t need a new wireless access point; my Time Capsule has been working fine in bridge mode providing coverage throughout my house pretty well.

Ubiquiti sent me a UniFi AP AC Lite and UniFi AP AC LR for testing. Both units are basically identical with the LR providing better range and potentially better throughout on the 2.4 GHz range. I’m going to focus on the LR device as the price difference ($89 vs $109) is so low, that for the home and small business use, the LR is a no brainer when compared to the Lite (the Lite is also a bit smaller which could make it fit in better on the ceiling in a home).

Most home users purchase an off the shelf router such as the Apple Time Capsule which includes a router as well as a WiFi access point. This serves most people’s needs, however some people find that they need additional access points to fill in the dead spots in their homes. In order to do this, they either use repeaters or additional routers in bridge mode. This is basically wasting a large portion of the router. While this isn’t what I’m doing because I didn’t need to fill in gaps in coverage, I was quite intrigued about a WiFi access point that simply did WiFi. In addition, the UniFi access points are Enterprise grade access points which means (to me) that they’re highly reliable and highly configurable.

When I first opened the AC Lite (I tested it first), it had the access point, a mounting bracket, and a PoE injector in it. A PoE injector allows power to be supplied over Ethernet; this means that only 1 Cat6 cable goes to the access point and the injector is placed close to the switch and plugged into a power strip. The first thing that disappointed me about this access point is that it didn’t use the 802.3af PoE standard which would have allowed me to connect it directly to my Linksys PoE+ Switch. When I asked Ubiquiti about this, I was told that a lot of their customers are price conscious and when deploying a lot of devices, the cost difference can be significant. In these cases, their customers use the UniFiSwitch which provides passive PoE (like the injector). For my testing setup, I simply turned the access point upside down (nose pointing down) on a high shelf. For permanent installation they should be mounted on a ceiling (the docs indicate they can also be wall mounted, but based on the antenna design, ceiling mounting will be better). If I had known about access points that were this cost effective and could be PoE powered, I would definitely have run extra Cat 6 to central places in the ceilings. Anyone that is remodeling and putting in Ethernet cable should throw in a few extra runs in the ceilings to mount access points; even if they aren’t UniFi access points, some type of PoE access point could easily be installed.

The second step was to install the UniFi Controller software on my server. The software is used for initial setup (they also have an Android app and an iOS app that onfigures the access point), monitoring and ongoing maintenance of one or more access points as well as some of the other products in the UniFi line. The controller is a Java app and installed without too many problems. If installing on OS X Server, I recommend modifying the ports that it uses by going to ~/Library/Application Support/UniFi/data/system.properties and change the ports; OS X Server likes to run the web server on the standard port even if you turn off websites. Note that you have to run UniFi Controller once to create this file. In addition, when modifying the file make sure that there is nothing on the line following the port such as a comment as that will prevent the file from being read. (After spending 30 minutes trying to figure this out, I found a forum post with this information in it.)

I don’t like Java apps for daily use, but for server use, I have no objections to them (I also run Jenkins and it runs well without bogging down the machine). After installing the controller, I wanted to use my own SSL certificate (I’m not a huge fan of accepting self-signed SSL certificates). I setup an internal hostname for the machine and then using my SSL certificate in a pem file:

openssl pkcs12 -export -in server.pem -out ~/Desktop/mykeystore.p12 -name "unifi"
cd /Users/mediacenter/Library/Application Support/UniFi/data
keytool -importkeystore -srckeystore ~/Desktop/mykeystore.p12 -srcstoretype PKCS12 -srcstorepass aircontrolenterprise -destkeystore keystore -storepass aircontrolenterprise

(This requires restarting the controller software.)

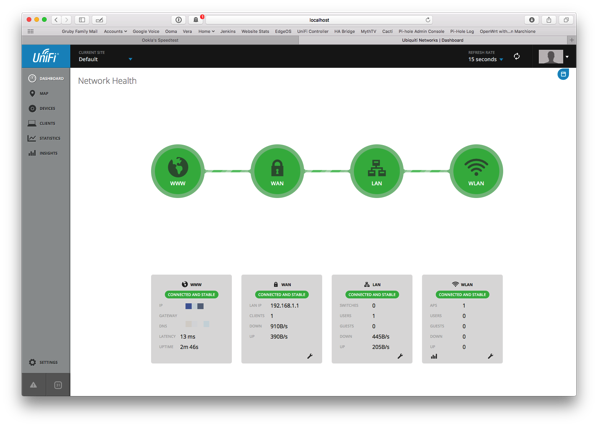
Once I had the controller software installed, I went to a browser and connected to port 8443 on my server. The controller software walks you through the simple setup and the access point is up and running. I don’t recommend stopping here as there are a number of options to setup to take full advantage of the access point.
Unificontroller

The controller interface is very utilitarian, but in my opinion is not easy to use. For the basic access point, it shows a lot of stuff that is irrelevant and can’t be turned off. The good news is that the controller software isn’t used all that often. I spent a bit of time experimenting with the interface to get what I wanted. First off, I wanted separate 2.4 and 5 GHz networks. If you have one SSID for both 2.4 GHz and 5 GHz, Apple devices pick the frequency with the better signal and this tends to be the 2.4 GHz and won’t jump over to 5 GHz automatically. I found a reference to an Apple technote describing the behavior. By separating out the 2.4 GHz and 5 GHz networks, you can explicitly select the frequency. (Apparently the band steering option in the UniFi access points is supposed to help with that.) Next up was a guest network. While the controller can setup a guest network and portal mode, this turns on QoS (Quality of Service) and actually degrades performance even if no one is connected to the guest network. This was not acceptable to me, so I just created a separate SSID and told it to use VLAN 1003 and used what I wrote about before to separate out the traffic. While I would have liked to use the built in guest network and play with the portal, I rarely have people using the guest network so the tradeoff wasn’t worth it for me.

There are also settings for controlling power and bands for the router, but the default settings work for me.

So now that everything was setup, the next question was “do they work?” Well, it’s pretty hard for access points not to work! I setup the networks separate from my Time Capsule so that I didn’t subject my household to my testing and put my devices on it. Would my devices stay connected? Did the access point have hiccups and require rebooting? How was the performance of it?

I’ve been testing with my 2012 MacBook Pro, iPhone 6 and iPhone 6s, and iPad Mini 2. The iPhone 6 and 6s do 802.11ac, the iPad Mini 2 does 802.11n, and the MacBook Pro does 802.11n. I’ve found that the MacBook Pro consistently stays connected on the 5 GHz network (preferred network) and usually negotiates at 300 Mbps. Using iperf connecting to a local server, I get 150-200 Mbps. That’s not too shabby. The connection is rock solid and I don’t see the MacBook Pro switching to the 2.4 GHz network. Using the iPad Mini 2, I can stay connected to the 2.4 GHz network, but the Mini seems to require me to toggle WiFi periodically to see all the networks including the 5 GHz network. I have no idea why, but not an access point issue. When I use the 2.4 GHz network, I can get 50-60 Mbps and on the 5 GHz network, I can get 110-140 Mbps. My iPhone has no problem with the 5 GHz network and gets 100-110 Mbps. (I used iPerf3 on iOS to do the measurements. iPerf3 has an awful user interface, but it does work.) I saw similar, if not better performance with my Apple Time Capsule. Indications from reading the forum is that these access points have trade offs for supporting more users vs higher performance on a small number of users like in my situation. However, the performance is more than acceptable given that I currently have a 100 Mbps Internet connection and the only time I could exceed that is hitting my internal network.

While I don’t live in a condo or a multi-unit dwelling with units stacked on top of other, I do live in an area with crowded airwaves. The 2.4 GHz frequency as you can see below has a few peaks (my networks) and a lot of access points. Performance on the 2.4 GHz is acceptable and since I don’t normally run speed tests is more than adequate for my 50 Mbps downstream cable modem connection (for now until I get 200 Mbps hopefully next month).

2 4GHz

The 5 GHz frequency is a lot less crowded which is why I try to get my devices on it at all costs (I’m tempted to have the devices forget the 2.4 GHz network, but I suspect that will cause more problems).

5Ghz

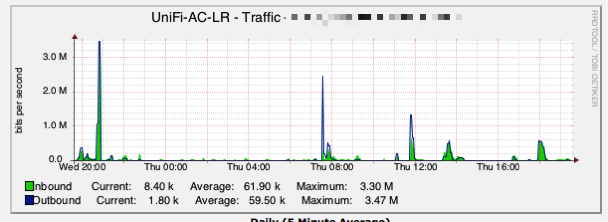
Since I love statistics, I turned on SNMP in the UniFi controller (it actually tells the access point to turn on SNMP and monitoring is done by connecting to the AP and not the controller), and setup Cacti to monitor traffic. There, of course, is very little use in me monitoring traffic on my network, but I’m always curious about network performance and utilization. However, the graphs do tell me that very, very rarely do I ever see bandwidth spikes above 50 Mbps.
Catci

This access point is definitely a step up from consumer grade router/access point combos. It is extremely flexible, cost effective, and unobtrusive (I forgot to mention that it looks like a smoke detector). I’ve been so happy with my EdgeRouter Lite and this access point, that I have already purchased a UniFi AP AC Pro to see how that will perform.

Pros

  • Highly configurable
  • Easy to install
  • PoE for placement with just an Ethernet cable
  • Unobtrusive
  • SNMP capable
  • Decent performance in the single user environment
  • Low cost

Cons

  • Lite and LR units use passive PoE instead of 802.3af
  • Controller software is a bit cumbersome to use
  • Not all advertised features are currently available such as band steering and airtime fairness
  • Guest portal and rate limiting options drastically affect performance

Summary

While the UniFi access points are designed for enterprises, they are a great addition to the EdgeRouter Lite. If anyone has a little time to setup an access point and can deal with the not so consumer friendly controller software, I would definitely recommend this line of access points. If you’re OK with the 3×3 MIMO on 2.4 GHz and 2×2 MIMO on 5 GHz vs 3×3 on 5 GHz, than the LR access point is probably the better bang for your buck. The Lite for the home network where $20 isn’t going to break the bank may not a great choice, unless the smaller size is attractive due to mounting. In my case, I’ll be mounting 1 access point behind my TV and 1 in my office, so no one will see them. If you’re like me and the lack of the 802.3af PoE bothers you, than the Pro access point is the way to go. Since I already have a PoE switch (actually 2 of them and neither is a Ubiquiti switch that provides passive PoE), having to use an unsightly injector (which uses an extra power outlet) doesn’t excite me.

The Ubiquiti forums provide a wealth of information for the tinkerer. Ubiquiti staff is very helpful and provide lots of answers (as do community members). The controller software and AP firmware is being updated all the time which is very exciting; I don’t need new features, but a fresh UI and more options (such as being able to turn off the LED not just using a command line) would be nice.

For better coverage, getting at least 2 access points would go a long way to having full coverage in a house. While 1 will get me coverage bars all over my house, a second one will give me better performance and not just bars of coverage. Once I get the Pro unit, I’ll be able to space out my access points.

Most home users just accept mediocre WiFi coverage and buy into the marketing of many router/access points that say that they’re access points perform better than others. The problem really is that the access point can have higher transmit power (based on the maximum allowed), but really if your device can’t connect or have good WiFi performance, it doesn’t help. More access points are going to provide better, more consistent coverage. The UniFi access points do that quite well at a reasonable price.

NOTE: Test units were provided to me at no cost from Ubiquiti Networks. However, that didn’t influence the results of this review and no conditions were placed on what I wrote about the units.
Review: Amazon Echo

[19 Jan 2015, 7:38 AM – Minor Edits]

When Apple first announced HomeKit, I was excited for an easy to use system for home automation. Unfortunately or fortunately, they left the actual implementation to the manufacturers. The first HomeKit devices that came out were pretty simplistic and would allow you to turn lights on and off. To me, this was a bit useless. In order for automation to be truly valuable, there had to be rules for different things to happen based on inputs that worked even if my phone wasn’t around (what good is automation if it can’t turn on lights in the middle of the night when you’re not home to scare someone away?). Now that more manufacturers are getting into automation, we’re seeing hubs such as Insteon incorporate HomeKit; I’m not exactly sure what it does, but it is a start.

I glanced at the forums for the Vera hub that I use periodically and saw that someone had created a Vera HomeKit Bridge. I had some time one day and installed it and picked up one of the apps on the iOS app store that had an Apple Watch component and gave it a whirl. Telling Siri on my watch to turn a light on and off was interesting, but due to the speed of Siri, it was more of a gimmick than anything else.

I was now intrigued with voice control of my automation, but it had to be more seamless and work even when I didn’t have my watch on my wrist (raising my wrist to yell at Siri to turn on a light was pretty lame). I saw that someone created a Bridge Application for Amazon Echo and I started looking at the Amazon Echo. The Echo looked very gimmicky with a lot of promise. This bridge, if it worked better than the HomeKit bridge, could be the next step in my home automation. The cost of the Echo was a bit more than I was willing to spend on an experiment, so I put it on my wishlist.

Much to my surprise, one Saturday evening, the Echo arrived (someone bought it for me off my wishlist) and I quickly set it up, told it to discover devices (the Echo Bridge emulates a Hue Bridge), and I was ready to start experimenting. I was turning lights on and off in no time. My son got a bit too excited about the Echo and basically annoyed my wife to no end; the Echo was banished to my office. After a few days, my wife let me put the Echo back in our kitchen (we have a split/tri level house with the kitchen/living area in the middle). My son soon learned to not annoy my wife and I started routinely using the Echo to turn lights on and off. For instance, when I go out back to put compost in the bin, I tell the Echo to turn on the back lights (unfortunately due to some choices I made, the switch for the back lights is not near the door).

So now I had a “toy” to control my automation. In a few short weeks, the “toy” became a tool where I routinely told the Echo to turn off lights that my family had left on around the house. It wasn’t until one day my wife walked upstairs, sat on the couch and used the Echo to turn off the downstairs light, that I knew the Echo was a keeper. Since we have an open floor plan with our living room adjacent to our kitchen, the Echo can “hear” us anywhere in our main living quarters which is about 500 sq feet. (Our house isn’t all that big and the light switch was literally 5 feet from the couch.) While I initially thought that turning lights on and off was too simplistic, it is really something that is done all the time in a house that can’t be automated.

Other than the Echo controlling my automation, I use it occasionally to hear news and weather and we sometimes ask it questions.

The Amazon Echo has tons of potential and if it wasn’t for the Echo Bridge, it would be an expensive, seldom used gadget. The bridge makes the Echo an excellent addition to my home; however, the price is a bit much for what it does. Developers are adding more “skills” to it all the time and maybe it will make sense for it to be used by more than just early adopters.

Some people have privacy concerns over an always on microphone. As far as I understand it, the trigger word processing “Alexa” is all done locally and doesn’t transmit until the trigger word is heard. To me, this is fine to have the processing done remotely after the trigger word is said; nothing I say to the Echo is all that interesting.

Pros

  • Voice recognition works well.
  • Microphone picks up voice from across the room.
  • Easy setup.
  • Developers are extending built in functionality.

Cons

  • Limited utility for most people.
  • High cost for a gadget.
  • May have privacy concerns.
  • Doesn’t integrate well into iOS ecosystem (tasks and reminders need IFTTT to get to the device).
  • Current skills are pretty mundane.

Summary

For me, the Amazon Echo has been an excellent addition to my home automation system. I don’t think a day goes by that we don’t use it. However, without the bridge to my Vera automation system, the Echo would not be used. The current price is a bit much without a particular use. I wouldn’t recommend purchasing the Echo unless you have a particular use in mind and are willing to get used to using your voice to control things. The Echo Bridge is a great piece of software that completes the Echo; while it was designed around the Vera, anything you can control via a URL can be controlled via the Bridge.

At this point, I think I’d feel like one hand was tied behind my back if I didn’t have the Echo!

Review: Aeon Labs Minimote

As some can probably tell from my writings, I’m very into home automation and have my whole house setup so that it basically runs itself (OK, not really). I have lots of “scenes” programmed to respond to various triggers such as wall switches, motion detectors and time of day. The way our house is setup, we have a very large sliding glass door leading to the backyard which makes it hard to mount any switch near it. At night we let the dog out and turn the light on for him; if the door was closed, opening the door at night causes the light to turn on. If the door was open like it has been all summer, the light only comes on when the dog passes the outside motion sensor.

Since I’m lazy (why else would I automate so many things?), I wanted an easy way to turn the lights on and then turn them off without getting off the couch. I saw a special on the Aeon Labs Minimote, so I bought 2. This is a Z-Wave remote that integrates into Z-Wave automation systems. This version was an older model that could have its firmware flashed to the new model; only difference being the markings on the buttons and possibly the plastic.

I was quite excited to get these remotes as I’d be able to put one near the couch and turn the outside lights on or off. My excitement was tempered as the version of VeraEdge that I was running didn’t work with the remote. The newer version of the firmware did, but reports were that there were issues with it. So when newer firmware came out, I upgraded my Vera Edge, crossed my fingers and paired the remote. Setup of the remote was quite simple and I assigned “scenes” to the buttons. The remote has 4 buttons and each button responds to a short and a long press giving me 8 possible scenes to run. I setup each button with an on scene (short press) and an off scene (long press) and put the remote by the couch.

Within a few days, I found myself regularly using the remote. The remote responded quickly and I haven’t had any problems with it. I knew I had a hit on my hands when my wife used it to turn the lights off; I haven’t labelled the buttons yet (that’s on my list), but she remembered that I said button 1 was for the backyard lights (button 2 is for the front lights; still trying to figure out what to do with the other buttons).

The remote is powered by a rechargeable battery and I have an Anker charger right next to the couch, so once it is time to charge, I just have to plug it in and won’t have to figure out where I put it.

Pros

  • Compact
  • Rechargeable
  • Easy setup
  • Works with the Vera Edge

Cons

  • Feels cheaply made; I suspect the newer model feels a little better based on the pictures I’ve seen.

Summary

If you have a Z-Wave automation system, buying this remote is a no brainer as there are times that you want to control some scene, but don’t want to go over to the wall to a hard wired controller or you don’t want to pull out a phone to run an app. The only real problem I have with this is I have no idea what to do with the second one as there are so many possibilities!