Review: iDealizer Pro

After I started using River of News to read RSS feeds on my iPad, I wanted to grab more and more feeds as it was so easy to read the feeds. This, of course, causes information overload. One of the sites I found is called Deal of the Day Tracker which has RSS feeds for daily sales on stuff (like Woot!, eBay, etc.). (I didn’t know that so many sites had one day deals and it’s hard for me to resist looking to see if there is the off chance that something will catch my eye.) The problem with the feeds is that there are well over 100 deals a day and scrolling through them with River of News was a bit painful (see my review where I commented that the loading was an issue).

So how was I going to handle my desire to get a good deal while still using River of News? I discovered an app called iDealyzer. For $2.99, I decided to give it a try as the free version gave me a taste of how useful it could be. So while I haven’t used it to buy anything, yet, it has quenched my thirst to see daily deals. The free version doesn’t let you prune the list of deals, so that’s why I spent the big bucks on the Pro version. Is the app a winner? It is quirky and crashes every now and again. Its utility is definitely questionable. If I buy something, I guess it will be worth it, but so far, it’s just a curiosity.

Pros

  • Ability to customize which deals to display.
  • Push notifications for deals (I don’t use this).

Cons

  • Could use some stability improvements.
  • Images are a bit slow to load.
  • Settings to configure which deals are on/off is awkward.
  • Some of the buttons look ugly.
  • Limited selection of deals. (Deal of the Day Tracker shows a lot more.)

Summary

I can’t really recommend this app. If you are completely addicted to daily deals, then this might be for you. Download the free version and check it out. I’ll keep this on my devices and am periodically checking it, but I could live without it.

Review: River of News (Google Reader app for iPad)

The other day I was listening to MacBreak Weekly and during their “Picks” Leo Laporte recommended River of News, a Google Reader app for the iPad. About a year ago, I wrote that I was done with RSS readers that had to synchronize with Google Reader and was satisfied with the web interface. However, I decided to take a look at River of News. It was only $2.99, so buying it didn’t break the bank.

When I first started it up, I was amazed at how well it worked. After playing with it for awhile, I started wanting to read my RSS feeds on it instead of on the desktop; now that’s saying a lot! I’m not sure how it is talking to Google Reader, but it didn’t seem that there was a “sync” process to mark feeds read/unread and the flagged of articles worked flawlessly. It makes reading my feeds (OK, maybe information overload) a pleasure.

The only issue I have with the app is that it’s a bit slow when you scroll down and it has to retrieve a few more articles. While I realize that the trigger for fetching new articles is when the user hits the end of the page while scrolling, it would be nice if the developer changed it so that when you were done with a few articles, it would go fetch the next batch in the background so that there is no waiting.

Pros

  • Inexpensive
  • Easy to use interface
  • Integrates well with Google Reader

Cons

  • A little slow at loading new articles

Summary

If you read RSS feeds, this is currently my reader of choice. It’s a no brainer to spend the $2.99 on this, even just to see how it works. Now if the developer addressed (fixed is highly subjective), the slow loading, I’d be in reader heaven.

Review: Charles Proxy – Useful development tool; ugly interface

During the testing of one of my projects, our QA folks mentioned a tool called Charles Proxy that they used to throttle the connection speed down to 3G speed as some issues can only be reproduced on slow connections. I pretty much ignored the product as I wasn’t assigned any bugs related to this. A few weeks later, I was assigned a bug dealing with 3G. As I really didn’t want to try to reproduce the issue on a device over 3G (the iPhone simulator makes it easy to reproduce issues, but as Apple points out, there is nothing like testing on a real device), I downloaded Charles Proxy and gave it a whirl. Unfortunately the limitations in the demo quickly required me to cough up the $50. As much as I was reluctant to cough up the money for an app that doesn’t look like a Mac app, it has already paid for itself.

Throttling down the connection speed seems to be one of the small features of Charles Proxy. It is a full tool for analyzing web traffic. When developing iPhone applications that talk to web services (which is pretty much everything these days), being able to look at the packets, headers, responses, XML results, and JSON results. In addition, it gives timing results for the requests so that I can see where slowdowns exist.

I’ve used it to determine that a client’s server was slow (they reported poor performance), that a different client’s web server wasn’t doing compression on text/plain files, and to see where I made incorrect requests to the server.

The major downside of the software is that the interface doesn’t look like a Mac app. As I’ve written before, I really dislike apps on the Mac that don’t look like Mac apps. Cross platform apps just aren’t my cup of tea.


Pros

  • Extremely useful for iPhone app development involving web services.
  • Lots of information about web requests; requests, responses, headers, etc.
  • Easy setup; it auto-configures the Mac proxy settings when it starts and changes it back when it quits.
  • Ability to throttle down the connection speed.
  • Lots of settings.

Cons

  • Ugly Mac interface.
  • A bit costly. (Maybe not for a developer tool.)

Summary

If you’re developing iPhone (or even Mac apps) that involve web services, Charles Proxy is an absolute necessity. If you ignore the ugly interface (I’m not talking about the layout, just the interface elements don’t look very Mac like), the app works well and gets the job done. It could be prettier, but the tool is extremely useful.

Review: PixelSkin HD Case for iPhone 4

Today I received the PixelSkin HD case for my iPhone 4 through the Apple case program. I had been using a $0.99 case I purchased off eBay and was relatively happen with it. It’s really hard to review a case as it does so little, so I’ll mostly compare it to the $0.99 cases I bought off eBay.

First off, this is a hard plastic case (the one I was using was rubberized). This makes the phone feel more solid and it has a slight lip that may prevent the phone from being scratched if I put it face down on a surface. Second, the case is pretty tight fighting and doesn’t add much bulk to the phone. Next, the fancy pattern on the back definitely helps with gripping it as the plastic as a little slippery. Finally, the case is rigid enough that the small piece of plastic on the bottom connecting the sides near the dock connector doesn’t feel flimsy.

When I started looking for cases, I thought that since all the cases are made in China anyway, what was the difference between one off eBay direct from China and a name brand. Well, there are plenty of differences and the PixelSkin HD case feels like a solid case. If I didn’t get the case for free, however, I wouldn’t have known there was a difference (not that $20 is a lot of money to spend on a case, but cheaper seemed better).

Pros

  • Solid feel
  • Pattern on back makes it easier to grip
  • May offer some protection to the iPhone

Cons

  • On/off button feels hard to press

Summary

If you didn’t already receive your free iPhone 4 case from Apple, this could be a good case. I’d goto the Apple Store and give it a try. Cases are very personal and some like this type of plastic while others like rubbery cases. Some people just are too upscale for plastic cases and go for leather or some other material; in that case, this is definitely not for you.

Review: On The Job – Time Tracking for the Mac

Before I became self-employed again. I looked for a time tracking application. I tried one on the iPad which was a complete waste of money. So, I decided to go back to time tracking on my Mac. At least I could evaluate the programs before buying. Over the years, I never found a program that I liked and eventually wrote my own little app. For various reasons, I was tracking time outside of QuickBooks (which I was using for account for my family’s LLC) and always ended up recording time and then generating invoices in QuickBooks. At that time, I didn’t need an app that also did invoicing, so finding a simple app was difficult. Now that things are different and I wanted to do invoicing in the time tracking app, finding the right tool became easier.

One evening I sat down and downloaded something like 10 Mac time tracking applications and gave each one a quick evaluation. I was willing to spend up to about $50, so that gave me a lot of choices. I settled on a program called On The Job. The interface is very utilitarian and Mac like, but its ability to create very professional looking invoices makes it a huge time saver for me.

You create clients and then jobs for the clients. Like many good Mac applications, you can organize things however you want. I created folders under each client for year, month and project (some clients have multiple projects that need to be tracked separately). I also created folders for the invoices (I do 1 invoice per client no matter how many projects). It allows you to round your time to the nearest 15 minutes (and a few other options). So far none of my clients has had issues with the way the invoices come out; I had one minor issue that I alerted the developer about and he said he might consider it for the future. The feature is that I work on the same task over many days and I’d like to just be able to record the task, start and stop the timer, and when the invoice is generated, have it create separate line items for each day. Say I work on bugs for 3 days straight, in the main view, I’d like to see Hours: 24, Start Date Monday, End Date Wednesday, but on the invoice have 3 lines.

The template editor for customizing invoices is very flexible and easy to use. I created a template, made a few tweaks and now I just crank out invoices every month with a few clicks. It also has this slick idle timer so if I start the timer and then walk away, when I come back, it asks me if I want to subtract my idle time.

Pros

  • Idle timer acts as a reminder when you forget to turn off the timer.
  • Flexible invoicing.
  • Ability to organize client and projects in pretty much any way you want.
  • Easily handle multiple clients with different rates.
  • Can setup rounding separately for each client.

Cons

  • Timer button from menubar is kind of useless for me due to my hierarchy of client, year, month, project. (At least the part to select a task.)
  • Timing Sessions aren’t that useful to me as it lumps all the sessions for 1 task into 1 line item on the invoice; if it separated it out, it would work better for me.

Summary

On The Job is almost perfect for me. I’ve been using it every work day for the last 3 months and other than a few nits here and there, the app works flawlessly and is out of the way. I have it running just about all the time and it definitely works better (for me) than any other solution I’ve found. I know that other people have more complex time tracking and invoicing needs, but On The Job was well worth the $39 I spent on it.

Review: Syma S107 RC Helicopter

As a child, I had RC (radio controlled) cars a few times and enjoyed playing with them. However, they ate batteries like no tomorrow and since they weren’t rechargeable, play time was quite short. Years later, the battery technology has gotten a lot better and rechargeable batteries are in almost everything. As an adult, I’ve owned an RC Hummer and an RC hovercraft, but have never owned a helicopter. I’ve always been fascinating with them; however, I never made the leap into owning one.

Last week I was looking for something on the Internet and came across an advertisement for a company that sells RC helicopters. After a little research, I found a very beginner helicopter, the Syma S107, for about $30. I decided to give it a try knowing that it was a toy and I didn’t expect a whole lot from it given that some helicopters I saw cost significantly more.

Once I received the helicopter, I plugged it into USB and charged it for 45 minutes or so. My first few tries were not very good and had hard or crash landings. The blades are quite durable and seemed to handle my poor flying (however, I did order some additional main blades and tail blades off eBay).

Flying a helicopter is definitely not like driving an RC car; once you take your finger off the throttle, it immediately falls to the ground and crashes. Also, hovering isn’t as easy as just making it lift off the ground and leaving it there. You have to continuously adjust it to keep it in one place. I’m now 3 days into it and am starting to make progress at controlling it. My office is quite large and allows me some room to fly, but I keep hitting my desk chair (yes, I should move) or the base of my punching bag.

This little helicopter has definitely piqued my interest in RC helicopters and I’ll be going to a hobby store later this week to start drooling (I’m looking at the Blade mCX2).

I’ve been searching for a hobby for years; my hobby has always been writing software. However, I’m not really sure I can consider my work a hobby! I’m excited enough, that this little helicopter may have opened my eyes to something I didn’t know could be fun.

Pros

  • Inexpensive
  • Durable main blades
  • Durable body and landing skids (haven’t broken then, yet)
  • Easy to charge with USB
  • Replacement parts are cheap and readily available on eBay

Cons

  • Infrared remote; you basically can’t fly it outside and fluorescent lights could interfere with control.
  • Short flight time
  • Manual is poorly translated from Chinese
  • A little difficult to master
  • A lot of drift even with no wind; this could be all RC helicopters, but from what I’ve read, the better ones are easier to hover in place
  • Tail rotor is easily broken (it comes with a spare, but I’m already using it)

Summary

For $30, this is definitely a fun toy. However, I wouldn’t consider it a child’s toy as it isn’t easy to control. My 3 year old son drives my RC truck, but I wouldn’t consider handing him the controls to the helicopter. If you’ve never flown an RC helicopter before, don’t expect to be flying perfectly on the first flight. It will take some time to learn the controls and master flight.

The biggest downside I can see to this is that after the first taste of flight, you’ll want to get something better!

Review: JetPhoto Studio

Last August when I received the i-Got-U 120, I started looking for software to compliment the device. I found a number of products to make geotagging easy, but didn’t find many applications to actually do something with the geotagged data. One product that I found which could do something interesting with the photos was JetPhoto Studio and the accompanying JetPhoto Server. Up until now, my only experience with the software was under test conditions. This past weekend, I finally got to put the software through its paces when I got a chance to actually do something with geotagged photos.

The first thing that had me a little nervous about the software is that there are more Mac and Windows versions. In a lot of cases, the Mac versions are ports of the Windows version. As I’ve written about before, I’m not a huge fan of software ported to the Mac. The user interface doesn’t strike me as a Windows port, but doesn’t strike me as a potential winner of the (former) Apple Design Awards. I did a bit of digging into the application package, into the company, as well as the developer information on their site and it looks like the Mac version is the primary version and the Windows version is the port. Perfect, this lets the program pass the first cut and stay on my machine.

I decided to take the pictures from my recent ride on an airship and put it into the software. I noticed that I had to import the pictures into a new JetPhoto Studio album; I had already put them in iPhoto and had to copy them somewhere else. Unfortunately this eats up more disk space (this album is about 250 MB, so now I have 2 copies of all the pictures on my machine). I selected about 50 pictures and “starred” them so that they would be part of what I uploaded. I wanted to simply delete the pictures I didn’t want to recover some disk space, but couldn’t figure out how to do it, so I starred them. I had already geotagged the photos using PhotoLinker and some open source software for the i-Got-U, so I didn’t give the geotagging part a go. In addition, since I wanted my original photos geotagged, I had to do it outside of JetPhoto Studio (as I mentioned before, JetPhoto Studio copies the pictures into its own albums).

Now that I had an album put together, I had a few options for doing something with the pictures. I could export the photos as a Flash gallery, Lightbox gallery, Cover Flow Web Gallery, Google Map Gallery, or sync it to JetPhoto Server. The first options would effectively create a static site that if I wanted to modify, I’d have to re-upload the gallery. So, I went ahead and installed the JetPhoto Server. This was a simple installation that required creating a MySQL table, unzipping the server, and configuring a few items. I’ve installed so many Linux programs, that the whole process took under 5 minutes. I selected the Web Sync option, entered the credentials, and boom, the site was ready to go.

One of the features that I find extremely compelling is the “Google Maps” mashup which shows the GPS locations and when you click on a pin, it shows the picture at that location. This is almost exactly what I envisioned when I wanted to geotag my photos. This resembles what iPhoto does on its map; however, this method allows you to publish your photos on a Web site. In addition, the server lets you choose how you want the photos viewed (Lightbox, Flash Gallery, etc.) without having to re-upload the pictures.

I’m pretty impressed with the results of JetPhoto Studio, but the management interface is a bit awkward. If you wanted to store all of your photos in JetPhoto Studio instead of iPhoto, then maybe this would be less of an issue.


Pros

  • I really like the different output options for the web galleries.
  • The Google Maps gallery is a great way to handle geotagged photos. Once I get more geotagged photos from other areas, I think it will be more useful.
  • Installation of the server was quick and easy.
  • Web Sync worked with no hassle and worked well.

    Cons

    • Adding images to albums copies them using up extra storage.
    • The user interface could use a bit more polish.
    • If the application focused on just creating the output and less on the management of the photos, I think it could simplify the interface.

      Summary

      If I put on my blinders and simply use the software to upload certain albums, I can definitely see myself using it again as I really like the results. In most cases, I don’t overlook user interface, but I haven’t seen another application (maybe I need to look harder) that quickly and easily produces similar results. I’m not sure what the differences between the Pro version and the free version, but for ease of use, the $25 for the Pro version is likely worth it as Web Sync isn’t part of the free version. The developer’s blog indicates that some new features are coming to JetPhoto Studio; I can’t wait to see them.
       

      Review: Eye-Fi Explore X2

      My 3 year old son loves playing with our digital camera which is fine, but I’m afraid that he’s going to accidentally delete pictures. I’ve tried giving him an old camera, but he wants to use the camera that mommy and daddy use. There are really only a few ways to prevent accidental erasure of the pictures. First, download all pictures immediately after taking them. This is a bit impractical. Second, put in a second memory card that he can use. A bit impractical and he likes to see the pictures we take. The last option is the Eye-Fi series of SD cards.

      In decided to purchase the Eye-Fi Explore X2 and give it a go. It isn’t a cheap solution, but my hope was that it would be a fool proof way to keep all our digital memories.

      Out of the box, the card was pretty easy to setup. However, I went to the Eye-Fi Web site and downloaded the software first which may have been a mistake. They offered 2 options; newer software and older software. I chose the older software as it looked like it would be a pure Mac application. I installed the software and basically it checked for an update and downloaded the newer software. After that, setup was pretty easy. I configured it to use my WiFi access point and also to use my MiFi in case we were out and about.

      I snapped a few pictures and then fired up iPhoto. iPhoto imported the pictures and wow, that was cool. After some poking, I determined that the Eye-Fi software uses an undocumented feature of iPhoto to import the pictures (it drops them in an Auto Import folder in the iPhoto Library). I changed the settings to import to a folder as it would be more reliable (I think I lost a photo in the transfer process because of the Auto Import hack). My wife and son have been taking pictures and almost instantly I see a preview on my machine and the pictures get downloaded; very cool.

      I haven’t had a chance to take pictures outside and then come home to see what happens, but that should happen this week.

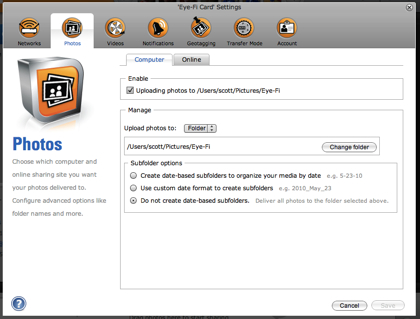
      The software on the Mac, frankly, is awful. Luckily it is only needed for setup. Instead of doing a web interface or even a full Mac application, they chose to do the background part as a Mac application and the foreground application as an Adobe Air application.


      Eye-Fi Center.jpg


      Pros

      • Easy to use and setup.
      • Automatic operation to upload locally or to sharing sites.
      • Automatic rollover of the card deletes old photos when card fills up.
      • Ability to control what goes to photo sharing site via camera’s “protect” feature.

      Cons

      • Unable to work with Gallery 3 (OK, Gallery 3 isn’t done, yet, but I wanted to use it for sharing).
      • Uses a hack to integrate with iPhoto which could cause data loss if Apple removes the feature and/or iPhoto is open.
      • Expensive (about $100 for 8 GB vs. about $15 for a regular 8 GB card).
      • Geotagging may not always work especially if you’re not near WiFi access points.
      • Geotagging may present privacy concerns if you upload to a photo sharing site.
      • If you use a photo sharing site, the Eye-Fi uses their servers as a proxy. Paranoid people may not want their photos going through their servers.
      • If the company shuts down in the future, the online sharing feature will stop working.

      Summary

      While the Eye-Fi cards are not cheap, they are an excellent way to easily transfer photos from your camera to your computer or a photo sharing site. This will help prevent data loss and make it more convenient than plugging in a card. If you have some extra cash or are very concerned about losing the data on your camera, I’d definitely recommend getting one. However, just transferring the photos to your computer only partially solves the problem about preventing data loss. If you don’t backup your photos, you could still experience loss. On one podcast I heard recently, they recommend 3-2-1; 3 copies of important data, 2 different media, and 1 offsite backup. I do 3 and 1 as 2 different types of media is getting harder and harder with the amount of photos I have. Data backup is a topic for another post.


      Review: HandShoeMouse

      One of the things I enjoy about going to Macworld Expo is finding something I didn’t know I needed. A few weeks back, I was diagnosed with tendonitis in my right arm. I’ve been wearing a brace on it and trying to do some exercises to help it. At Macworld Expo, I stumbled upon a booth for an ergonomic mouse.

      I’m not a huge mouse person as I have been using trackballs for many years. However, I listened to the HandShoeMouse pitch, put my hand on a mouse and within minutes, I bought one. This mouse was not cheap (it cost $89 which apparently is a $40 savings), but how much is my health worth? I use a computer all day long and if I have pain, it will seriously impact my ability to earn money, so it is a small investment.

      I’ve been using the mouse for about 2 weeks now and am pretty used to it by now. The only quirk I’ve had is that it goes to sleep and you have to press a button on the mouse to wake it up. The developers of this mouse have really put a lot of time and thought into it. It has a rechargable battery that recharges via USB when it gets low; and the light on the scrollwheel lights up when you need it to recharge. They were also very insisitent that they didn’t want it to have any drivers which sold me even more; plug and play.

      Time will only tell if this mouse will help me, but it is definitely worth looking at if you use a computer for long periods of time which these days is just about everyone I know.

      Pros

      • Glides smoothly on my desk.
      • Very comfortable.
      • Wireless.
      • Very accurate tracking (I got the BluRay Track version.
      • May prove to help with RSI.

      Cons

      • High cost.
      • Feels weird using a mouse having used a trackball for many years.
      • Scroll wheel sometimes feels like it is slipping.
      • Takes a second or two to wake when it has gone to sleep; you have to wake it by pressing a button as moving it does nothing.

      Summary

      I’m pretty pleased with this purchase and am hopeful that it will help with my current injury and help prevent future ones. I still need to look into getting a very smooth mousepad as my desk is a little rough and I’d like a bit less friction when moving the mouse; maybe they could have included one, but I guess mousepads are a dime a dozen these days (maybe not the real smooth ones).

      Review: Samsung Reclaim

      Last week, I finally bit the bullet and got new cell phones for my wife and me. (The batteries weren’t holding charges and I’ve been unable to get replacement batteries that hold a charge.) I was very cautious to pick phones that wouldn’t affect my plan, so that pretty much ruled out phones such as the Pre or HTC Hero. As I liked the slider on the Pre I have for work, I decided on the Samsung Reclaim for our new phones (we already had unlimited data for both our phones; unlimited data being EVDO Rev. 0 data).

      Some may think that this is a step down for me as I’ve had a smartphone pretty much all the time since I first got a Treo 180 on Cingular. Every smartphone I’ve had has been for work and paid for by a client or by work. In addition, I swore off smartphones as my primary phone since the Treo 300 when its battery drained itself on a number of occasions due to OS crashes.

      In any case, I’ve had my Reclaim for about a week and my wife has had hers for a day. The primary use of a phone for me is to make phone calls and the Reclaim does that fairly well. I paired the phone with the Bluetooth car kits in both our cars (both car kits are aftermarket, one is a Parrot CK3100 and the other is a Raytel Tellphone 4200) and it works well. As a phone, so far it lives up to what I need.

      Battery life is a major concern for me and even playing around with it throughout the day, the battery hasn’t completely drained, so in that regard, it is looking good.

      While the phone isn’t a smartphone, its email and web browsing capabilities are quite respectable. Email can’t show HTML, but I don’t see that being a bad thing. I was able to setup my Gmail account quickly and reading email isn’t half bad. The keyboard is small, but usable. If you don’t have big fingers, you can text and compose email with very few mistakes.

      Pros

      • Speaker independent voice recognition. (Only some smartphones have this which is surprising as my 3 year old Motorola RAZR had it.)
      • Battery life appears to be good.
      • Keyboard is usable despite it’s small size.
      • Decent email client.
      • Good value for the money (phone was free with a 2 year contract renewal; I just had to pay taxes on it).
      • Very compact size.
      • Easy to navigate using one hand.

      Cons

      • I’m unable to use Google Maps even though there is an icon for it; I’m getting a SAX error when I download the handler. I’ll need to contact Sprint about this.
      • Sending a bunch of contacts over Bluetooth from my Mac resulted in 1 entry, so I had to send them one at a time and I’m not quite done with this.
      • Sending contacts from my wife’s RAZR to the Reclaim failed when it got to an entry with a / in it. I’m not sure if this was on the sending or receiving end, but I tend to blame the receiver as it gave the failure message.
      • Email can’t display HTML messages.
      • Web browser isn’t a full browser.
      • Only a limited number of J2ME applications can be loaded onto the phone and most aren’t very exciting.
      • The Sprint network can’t do voice and data at the same time; it’s a minor inconvenience.
      • Dialing phone numbers that aren’t contacts is a little harder than on the RAZR.
      • Contacts and calendar don’t sync with Google where I store all my info.

      Summary

      While I’ve only had this phone a short time, I don’t plan on returning it. It looks like it is going to more than adequately meet my needs. It is a basic messaging phone that I think can meet the needs of many users. Many of the features of a smartphone will go unused and paying extra for features that you don’t need doesn’t appeal to me.

      If you’re on Sprint and looking to replace a phone, the Reclaim is a good phone. The “green” aspect may appeal to some, but to me, it’s just a gimmick. My wife has never had any type of messaging phone and is really enjoying the phone. While she wanted a BlackBerry, I couldn’t justify adding the BlackBerry plan and then text messaging on top of that. For her needs, this phone is comparable to the BlackBerry.