Honey Mustard Kebab Recipe

I’m not a great cook, but in order to help out my wife I’ve been cooking at least 2 days a week for the last year or so. I’ve found a few recipes that work and pretty much stick to them. Yes, this is quite boring but it works for us. However, when I ask my wife if she likes it, she says she likes not cooking those nights which isn’t a big encouragement! Last week I got the idea that I was going to make kebabs and when I went to the store to get ingredients, a bottle of brown mustard called my name.

I went searching for a recipe that had brown mustard in it that met my dietary needs and didn’t require me to go back to the store. Unfortunately there wasn’t an easy way to take an inventory of what we had and get a recipe, so my searching came up with a recipe that was kind of in the ballpark of what I wanted. I don’t experiment in the kitchen and tend to follow recipes, but I decided to go out on a limb and make some modifications. When I cooked the chicken the following night, my wife said it was excellent which was a huge relief to me! I guess I’m starting to understand what ingredients make what flavors and what we like. Who knows, I might take a cooking class one day!

In any case, for my own records here is the recipe I ended up using:

Ingredients

  • 1/4 cup honey
  • 4 tablespoons sweet brown mustard (no added sugar)
  • 1 tablespoon coconut aminos
  • 1 tablespoon coconut sugar
  • 1 tsp parsley flakes
  • 1 tsp paprika
  • 1 tsp salt
  • 1 tsp minced garlic (we have a big container from Costco)
  • 1/4 teaspoon black pepper
  • 1/8 teaspoon cayenne pepper
  • 3 tablespoons olive oil
  • 1/2 green bell pepper
  • 1/2 red bell pepper
  • Other vegetables to grill
  • 1 to 1.5 lbs chicken

Directions

  1. Combine all ingredients (except for the vegetables and chicken) in a small metal bowl.
  2. Whisk ingredients.
  3. Cut chicken into chunks.
  4. Cut peppers and other vegetables into chunks
  5. Put chicken and peppers in quick marinator (not sure this really does anything, but I did it anyway).
  6. Pour marinade over chicken and peppers.
  7. Completely cover everything with marinade.
  8. Refrigerate for 24 hours.
  9. Place chunks on metal skewers.
  10. Grill to perfection!

Enjoy!

Review: Anker PowerCore 26800 Power Bank

On a recent camping trip, I brought along a few small power banks to charge phones and watches (we weren’t completely out in the wilderness and having a phone for pictures and emergencies is quite important). It was kind of awkward to charge the devices using 3 separate batteries. I decided to look for larger power banks that could charge multiple devices at once. Originally I was looking for one that could also power my laptop for a little bit, but decided that the number of times I’ve had to power it have been few and far between. Since I had good results with Anker products, I purchased the Anker PowerCore 26800 Portable Charger.

This charger is close to the largest battery that you can legally bring on an airplane, but weighs just over a pound. In addition to the 3 USB ports (many power banks just have 2), it has 2 micro USB ports for input to charge it faster. With a battery this large, faster charging is nice to have. The power bank is pretty basic; charge it up with the micro USB inputs (it doesn’t come with a wall adapter, so I just use the Anker 6-Port USB Charger to charge it) and then plug devices into the USB ports.

We used the power bank a number of times this past summer during another trip. I put it in my backpack with a few cables and during the day charged up our phones (even with new batteries, our iPhones suck down batteries when using GPS). Being able to plug in 2 devices at once was quite convenient. Also since the battery is so large, I think I only had to charge it once on a 2 week trip.

This battery has performed well and I anticipate using it on camping trips, family vacations, and having it around in case of emergencies. As I’ve switched to USB charging for as many devices as possible including flashlights, this battery can also be quite helpful in an emergency or a disaster.

Pros

  • Largest battery you can take on a plane.
  • 3 USB ports for charging devices.
  • Faster charging with 2 USB inputs.
  • Not too heavy.

Cons

  • Some may consider it a bit expensive for a battery.

Summary

This power bank has allowed me to consolidate power banks on trips. While it may not be the smallest, I don’t have to worry about it running out of power even if I charge a number of devices. It just works and the 3 USB ports make it more useful to me than other power banks I could have purchased. If you’re in the market for a power bank, I’d definitely consider this one.

Never enough charging ports

This past summer my family went on a vacation to the Grand Canyon and a few other destinations in Arizona (yes, it was hot!). For the driving trip we packed a lot of devices. Between the 3 of us, we had 3 iPads, 3 iPhones (my son just uses one for its camera), 2 Apple Watches, AirPods, a mobile hotspot, and an Anker PowerCore 26800 Power Bank. After I bought and reviewed the Anker 5-Port USB charger several years ago, I realized that the Anker 6-Port USB Charger was a better device as it didn’t add much bulk to the 5 port and gave me an extra port. Since then I’ve bought a few of the chargers and put one along with cables in a small bag I take when I travel. While I don’t need to charge everything at once, 6 ports just isn’t enough to keep everything charged especially since the power bank uses 2 ports to charge faster. After we got back from the trip, I ordered another charger.

With 2 6-port chargers, I think that I’m all set for awhile. If I plug in everything at once (which I’ll rarely do), all the devices will use 12 ports! That’s kind of sad and amazing at the same time that we travel with some much technology. I just have to remember to bring enough cables to charge what needs to be charged. In my opinion, there is no reason to ever travel with smaller chargers even if they are a little more compact. I travel alone, I’m going to have 6 devices with me. Yes, I’m addicted to my gadgets.

Porting an iOS app to macOS

About six weeks ago (2 weeks or so before WWDC), my client asked me to port an enterprise app I wrote for iOS to macOS. I haven’t done macOS work for a long time, but how hard could it be? In the last few years, a number of iOS-like technologies have come to macOS; while they aren’t named the same, many things function similarly like NSViewController (UIViewController), NSTableView (UITableView), NSTableCellView (UITableViewCell), etc. All of my iOS apps for this client are written in Swift, so it made a lot of sense to use Swift for this macOS app.

Getting started with the project took about a week to get familiar with macOS again, but then things started moving. The first thing I did after the app ran was to make a version of my framework that I use across 5 iOS apps (models, networking, methods, etc.) over to the Mac which wasn’t difficult; I only had to do a few platform specific defines for the files I moved over (I didn’t move the UI pieces over). Once the basic app was running, I started the UI and had real data showing up within a few weeks from start. I took a number of pieces of the iOS app, copied the code and pasted it into the Mac app. The number of changes for these pieces were minimal (.stringValue instead of .text on the NSTextField vs UILabel), but I was quite pleased how I was able to reuse the code.

From start to basically feature parity with iOS took about 5 weeks. I’m sure that there are things that I’d change such as doing extensions on classes instead of copying/pasting code as I’ll have to maintain both apps going forward, but that could obscure how things work. I am extremely pleased with how well this project is going (it hasn’t been deployed, yet).

At WWDC Marzipan was revealed and it looks like it will allow many iOS apps to run on macOS. This, of course, would have helped me get my app up and running, but would it feel like a Mac app? While not every app is as straight forward as the one I ported, developers that want to move their apps to macOS today have nothing stopping them.

Review: RTSystems ID-51APlus2 Programmer for Mac

[Update 04/21/17: I did receive an email back from the company on Tuesday wanting to assist me; unfortunately this message went to spam. Their support is definitely responsive and if I implied that they weren’t, I do apologize.]

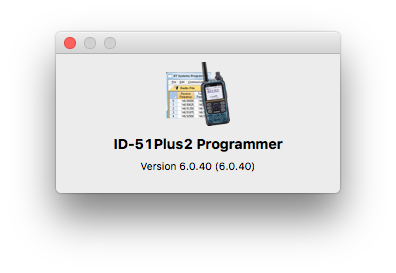
When I purchased my Icom IC-7100, I knew that I’d need software to program it as entering information for hundreds of memory locations would be impossible. There were 3 choices; one was expensive from ICOM, a free one (CHIRP) and the one that people seem to rave about from RT Systems. I had read that CHIRP didn’t work properly with the radio, so I went with the one from RT Systems. I bought the Windows version as no Mac version currently exists for it. The software was adequate, but nothing I’d write home about.

Since I wanted to use the same software (or similar) to program my new Icom ID-51A Plus2, I went with RT System’s new Mac version of the software.

The first thing that I had to get over with the software is that there is a different version for just about every radio. The cost for each radio didn’t bother me ($25 per radio); it was how the software was packaged. I would have expected to purchase one application and then pay a fee to unlock different radios. Instead, the company/author has chosen to do one application for each radio. Having used the software for two different radios, I can sort of see the reasoning as each radio has different options and some just don’t overlap. However, I still believe that having plugins would be a better experience for the user.

The second thing that annoys me a little is that I have to purchase a cable from the company. The IC-7100 is an exception as it has a USB port and the company supports it directly. My ID-51APlus2 came with a USB cable, but it won’t work with the software. I can understand that for radios that don’t come with a cable the company doesn’t want to have to support cables with crappy USB to serial chips, but if the cable comes from the manufacturer, they should support it.

I installed the software last week and was underwhelmed by the experience. The application is a Java application complete with a Java installer. I use a Macintosh for many reasons, among them is that I like the user interface and cross platform user interfaces just look bad. I received the cable last Saturday but didn’t get a chance to play with the software until Monday. I plugged in the cable and tried reading data from the radio, but the software said it couldn’t find the cable. I moved the cable to a different USB port (I tried with a USB-C to USB-A Apple dongle, a USB-C to 4 port USB-A hub, and a USB port on my Thunderbolt Display) with no change. I saw that there was a /dev/tty. port registered and the cable showed up in System Profiler indicating that the driver loaded properly. I sent email to the company and didn’t hear back. Yesterday I called the company and was transferred to Rob in technical support (Rob is also the lead developer; maybe Rob is the R in RT Systems). He wanted to connect to my computer using Team Viewer, but I declined and gave him all the information he needed (in a past life I wrote USB to serial drivers so I know my way around drivers). After a few minutes, Rob said that this particular cable seems to give them problems and he told me to check for updates. I did that and after installing it, the software saw the cable. Excellent! I hung up and let the software finish reading from the radio. Unfortunately the progress bar never moved, but the radio thought it was done. I called again and talked to a different person in support. The woman gathered information, then chatted with Rob and said that they were able to reproduce the problem. She said she’d call back when an update was available. Later that afternoon, I checked for updates and was finally able to read from the radio. (I did receive a callback this morning telling me about the update.)

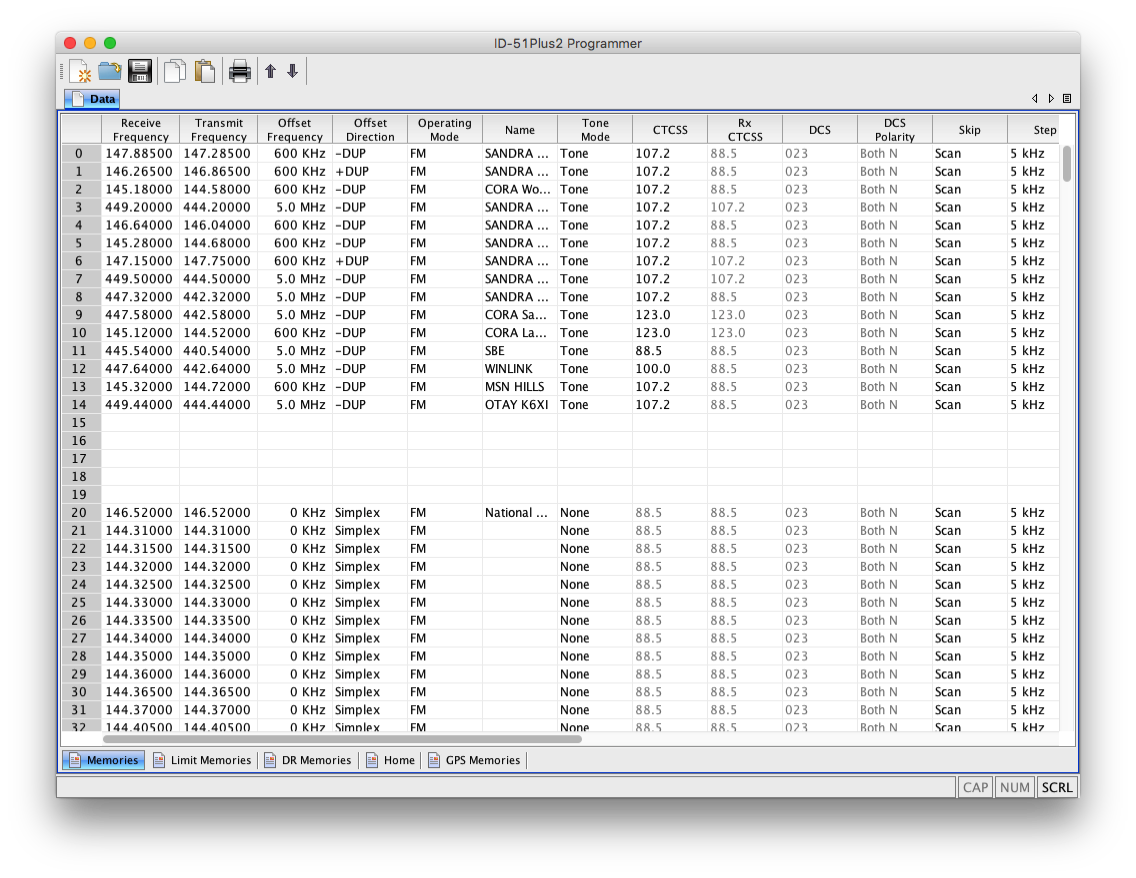
Now that I was able to actually use the software, I exported memory locations from my IC-7100 (on Windows) in CSV format and imported them into the ID-51APlus2 programmer. Given that the software is made by the same company, I would have expected an easier way to transfer ALL the memory locations (I had to transfer 1 bank at a time) to a new radio. In addition, the software uses non-standard open and save dialog boxes which don’t allow dragging and dropping of files adding some hoops to import the memory banks. I wrote the data to the radio and that worked fine. As I worked on adding memory locations, I realized I wanted to move a bunch of locations to a “memory bank”. Normally I’d expect to be able to select a bunch of locations and change them all at once. Unfortunately that didn’t work and I had to go through roughly 200 memory locations one by one to change the bank.

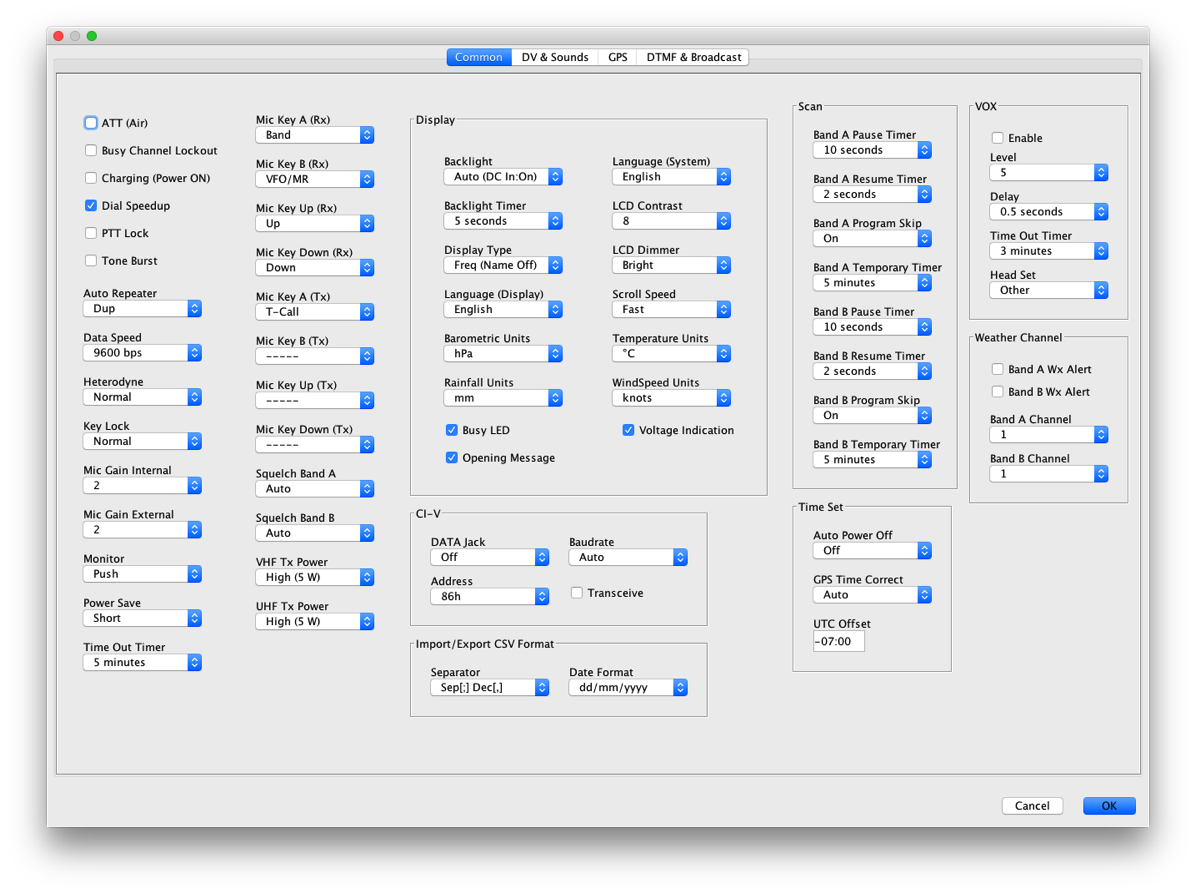
I am impressed that the software covers lots of settings on the radio, some that I haven’t even discovered yet. This software is functional, but is definitely not a joy to use. Luckily it isn’t a program that is used daily.
Main Screen
Settings

Pros

  • Allows you to easily configure all features of the radio including memory banks and settings.
  • Allows importing and exporting of memory locations to move data between radios.
  • It works on a Mac.
  • Extremely responsive telephone support.

Cons

  • The user interface is just awful. There is no way to sugar coat this.
  • Non-standard user interface. The tabs aren’t Mac tabs. There are indicators for CAP NUM and SCRL which don’t do anything or affect current state.
  • No tooltips.
  • No way to change one option for multiple memory locations at once. For instance, if I want to mark a bunch of memories to skip or move them to a bank, I can’t.
  • There is no undo.
  • It is unpolished; I can seize a modal dialog box and various controls overlap.
  • Doesn’t work with the cable that comes with the ID-51APlus2 radio.
  • Initial problems getting started which required 2 updates to work.

Summary

I’m not sure if HAM radio operators are just happy to have any software or if they truly have not used good looking software, but so far I’ve only seen one application that looks like a quality piece of software. The RT Systems programmer for the Mac is barely usable as are most cross platform programs, in my opinion. If the software had cost a little bit more in order to cover the costs of a really polished program, I don’t think I’d hesitate to purchase it. Aether costs $40 and I didn’t hesitate to purchase it because it was heads above the competition in design and usability.

If you’re a Mac user and need to program a radio, CHIRP might work, but you’ll find that the RT Systems software does more. You really don’t have a choice in the matter besides using Windows and then you’d use the Windows version of the software. I understand that the market to sell the software is quite limited and dying off (literally), but I really expect more when I purchase software. I can’t recall an application on my Mac that has a worse user interface.

As much as it pains me to do so, I have to recommend this software as the easiest way to program the ID-51APlus2 radio and probably other HAM radios.
Experimenting with Home Assistant

Last week I read that Ubiquiti Networks had hired the main author of the Home Assistant home automation project. I looked at the project and at first I couldn’t understand what the project would do, but after poking at it, I realized that it is the glue that connects disparate automation systems. I wrote about putting together various pieces together and thought that maybe Home Assistant could put all the pieces together in one little box.

Over the course of a few hours last weekend, I installed Home Assistant on a Raspberry Pi 2, configured it to connect with my Vera and set it up for HomeKit and Amazon Echo. Right away Home Assistant removed Homebridge and HA Bridge from my system; fewer parts means it is easier to maintain.

Looking at the list of available components, it is clear that Home Assistant could replace my Vera and could control everything without me having to put together all the little parts. It has components for Envisalink, my Russound audio distribution units, my Squeezebox devices and everything else I could throw at it. If I put a Z-Wave stick on the Pi, Home Assistant could also natively handle Z-Wave. In order to replace my Vera, I’d have to convert my schedules and my PLEG actions over to Home Assistant which is not an insignificant task.

While I’m not ready to say that Home Assistant is the clear winner in the home automation game as configuring it is quite painful (most of it has to be configured via specifically formatted YAML files), it is very intriguing. If the author does what he has said he’s going to do to bring more of the configuration to the GUI, but leave advanced features to the YAML files, I’ll be quite happy. It isn’t for the faint of heart, but well worth a look for any home automation enthusiast.

Mounting a HAM UHF/VHF Antenna

Anyone that knows radio knows that a good antenna is key to success in transmitting and receiving. Once I decided to get a radio, I knew I had to buy a decent antenna and mount it as high as possible. My wife said I could get an antenna as long as it didn’t block her view, so I decided on an antenna that wasn’t too big and might provide me with decent communication. I decided to get a Diamond X50A antenna which is about five and a half feet tall. After getting the antenna, I temporarily mounted it to a deck we have outside our bedroom on the second floor; I fashioned a mounted out of some plywood and 2x4s such that I sandwiched the railing supports between the wood. I was pretty impressed with myself for coming up with a working solution out of scrap material.

While this worked, I wanted to mount the antenna higher. My options were to put it on the roof or to mount it to the side of the house. As I believe we have a 30′ height restriction where I live (imposed by the city) and I didn’t really want to get on the roof, a roof mount was not my preferred option. I asked my father for some help and we spent about 45 minutes looking at how to mount it and came up with a plan that involved various brackets, drilling into the house, and being up on a ladder (neither of us was keen on the ladder). Once we came downstairs and were looking at the backyard, my dad noticed the dried bamboo I have lying around and starting thinking about how we could use the bamboo as a pole. After a few minutes of discussion, we came up with a plan that involved a trip to Home Depot to get $4 in parts. Yes, our solution involved parts that I already had.

Installation was pretty straightforward as I already had the basic mounting setup. I am pretty pleased with the result and the antenna is performing quite well. Of course mounting it higher would yield better results, but this solution was quite easy, didn’t put any holes in the house or roof and can easily be removed if need be. This mount is also not too noticeable that it would raise concern with my neighbors.

IMG 0219

IMG 0220

IMG 0221

Antenna Over House

Rebooting the Subaru Impreza 2017 Infotainment System

A few months ago in my post about a year with my 2017 Subaru Impreza, I mentioned that sometimes CarPlay doesn’t start. This is annoying and I thought the problems were gone with the recents updates. However, last Saturday it didn’t start again and I actually needed the navigation to get somewhere. I had read that opening and closing the door 3 times would reboot the car, but it didn’t work. I could wait 10 minutes, but I had to leave. That left me without navigation but luckily my son was able to use an iPad connected to my hotspot to navigate.

After this episode, I started looking for the real answer to rebooting the infotainment system. I searched and searched and found on a forum (can’t find the reference right now) that if you press and hold the power button for the radio until it shuts off and then for another 10 seconds, the unit restarts. I found this hard to believe, but went out to my car and tried it out. It actually worked! Now I had a potential workaround the next time I had a problem.

Yesterday I plugged in my phone as normal and CarPlay didn’t start. I pushed and held the power button to reset the unit. Once it was up again, I reconnected my phone and presto, it worked! This definitely should be documented somewhere as it is extremely convenient. Let’s hope that a software update doesn’t remove this functionality.

Review: Irwin Self-Adjusting Wire Stripper

Like many people, I like to have the right tool whenever I do household projects. So when I see a tool that may come in handy, I think about purchasing it for my collection. While I might not have a need for it today who knows when it will come in handy in the future.

In December I saw the IRWIN VISE-GRIP Self-Adjusting Wire Stripper on sale and it looked interesting. The theory behind this tool is that you put in any gauge wire and it strips it without nicking the wire. If it worked as advertised, this tool could have saved me countless hours over the last 20 years of being a home owner. I’ve installed outlets, switches, ran Cat 6 cable, installed landscape lighting, ran speaker wire, and numerous other projects that required me to strip wire.

When I received the stripper, I looked for scrap pieces of wire in my random collection of parts. I tried the stripper on different stranded and solid wire. I put the wire in the tool, squeezed the handles and the wire was effortlessly stripped. After I got used to the tool (it didn’t include instructions and I was at first confused as to how it worked), all I wanted to do is find wire to strip! Whatever wire I threw at it, it did a flawless job at taking off the insulation and not touching the wire. I was in awe that the tool worked so well; it was almost too good to be true.

I do have to tug on the side that isn’t getting stripped so that the wire doesn’t move, but other than that the tool is simple to use. I’m working on putting all my HAM radio equipment in a transportable box (more on that another day) and everything I’ve read says to use Anderson Powerpole connectors. Just about every installation video for these connectors uses a tool similar to these self-adjusting wire stripper; I am very excited to actually use the tool in a project and not just testing it!

Pros

  • Easy to use.
  • Fast.
  • Strips wire without nicking the wire.
  • Works on every gauge wire I’ve tried.

Cons

  • Didn’t purchase sooner.

Summary

If you don’t already have this tool or a similar one, I’d recommend purchasing it even if you don’t have a need for it today. The current price is about $20 and after using it, I would gladly pay the current price. Any homeowner that does any type of work with wire will wonder how he or she lived without this.

Review: SyncWire USB-C Ethernet Adapter

Now that I have a MacBook Pro with only USB-C ports and no USB-C peripherals, dongles are the only way to connect devices. I wrote about dongles last year and have been happy with just a USB-C to Thunderbolt and a USB-C to USB-A dongle. I haven’t seen the need for additional dongles, yet, but with the hopes that Apple will release its own display instead of promoting the LG UltraFine display I’ve been revisiting that.

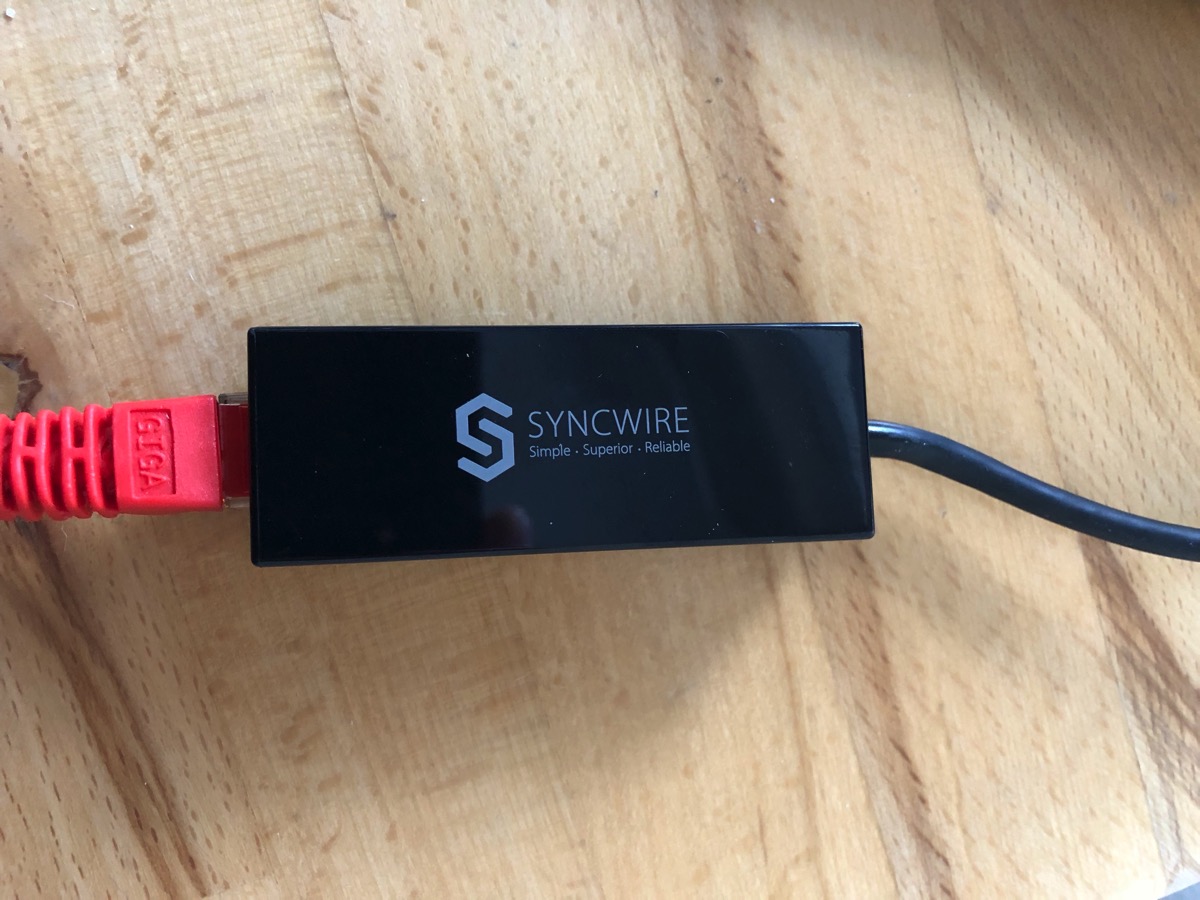
With my current Thunderbolt Display, I have Ethernet, FireWire (I don’t use it), Thunderbolt and 3 USB-A ports. If Apple follows LG’s lead on a new display, the display will only have USB-C ports. If and when I purchase this magical display that doesn’t exist, yet, I’ll have to figure out how to connect my array of devices. Currently I am connected to the network through the Ethernet in the display which would go away with a new monitor. I always prefer wired networking over wireless networking, so when I was offered a SyncWire USB-C to Ethernet Adapter to review, I jumped at the opportunity.

An Ethernet adapter is pretty basic; plug it in and it works. That was definitely the case with the SyncWire adapter. There were no drivers and it was instantly recognized by my Mac.

IMG 0155 3

There are only a few thing that I care about for Ethernet:

  1. Does it work?
  2. Is it reliable?
  3. Is it fast?

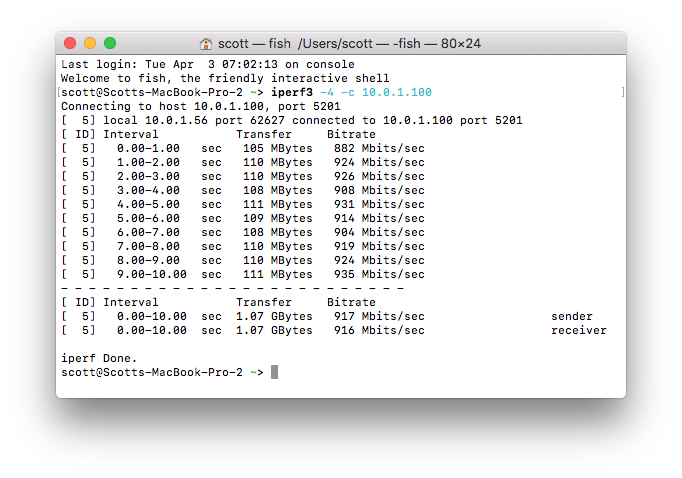
For the first two, I’ve been using the adapter for 5 days now and I haven’t seen any hiccups. I disconnected the Ethernet from my display and turned off WiFi. I do regular backups and transfer a decent amount of through it which should put the adapter through its paces. For the last one, the test I used was iperf3 running between my MacBook Pro and my Mac Pro on the same LAN connected via a Ubiquiti UniFi Switch. The result is that the adapter could transfer data at over 900 Mbits/sec. This is definitely not bad. On WiFi, I can get about 360 Mbits/sec. When my MacBook Pro is connected to the Thunderbolt Display, I see about 935 Mbits/sec. I would have expected better throughput with the adapter, but in the real world I’ll likely never see sustained speeds anywhere close to this.

Screen Shot 2018 04 03 at 9 23 58 AM

So far the adapter meets my three basic needs for a network adapter.

Pros

  • Compact size
  • Reasonable price point
  • Appears reliable
  • Decent transfer speeds

Cons

  • Unknown long term reliability

Summary

While I wasn’t looking for a USB-C to Ethernet adapter right now, this would probably have been on my shopping list when I get monitors that only have USB-C ports. When I purchase equipment for my computer, I tend to goto brand names that I have heard of before as I don’t like messing around with shoddy parts just to save a few dollars. I chose SyncWire for a few Lightning cables as they were MFi certified and were on sale. Prior to that, I had never heard of SyncWire and definitely wouldn’t have bought their adapter. Now that I’ve had a chance to try out their USB-C to Ethernet adapter, I’m not sure I can recommend the product. While the price is right and it performs well, the big unknown is how reliable is the adapter in the future. If I was going to spend my money on an adapter, I’d probably look at a more dock like adapter that had USB-A ports in addition to Ethernet.

The purchase price of the adapter was refunded to me in exchange for writing this review. However, it didn’t influence what I wrote.

I was asked to post a review of this product on Amazon, but it is against Amazon guidelines to post incentivized reviews, so I posted this review here.