Ryobi 18V ONE+ HP Compact Brushless Drill and Impact Driver Review

I’ve written a number of times about how much I like my Ryobi tools. This summer one of my small 1.5 Ah batteries died, so I looked at getting new ones. While many people prefer the larger batteries that last longer, my projects typically are short and don’t require a lot of power. The small batteries are lighter and make the tools easier to use. Home Depot (the exclusive seller of Ryobi products), has a version of 1.5 Ah batteries that don’t have a fuel gauge on them; to me, this makes the batteries pretty useless. There are a number of sellers on eBay selling the 1.5 Ah batteries with the gauges for about $30 per battery.

I saw that Ryobi released new HP brushless tools including a drill/driver kit with 2 1.5 Ah batteries that have fuel gauges! The cost, however, is $180 meaning the driver and drill are about $120. As I already have a perfectly good drill and driver, it was hard to justify.

For the holidays, I saw that Home Depot discounted the set by $40 bringing the cost to a bit more reasonable $140. I still didn’t need the set, but the new tools are lighter than my current ones and potentially more powerful than the ones that I bought many, many years ago. I couldn’t help myself and hit the buy button!

The tools arrived last week and the batteries are smaller and slightly lighter than my existing 1.5 Ah battery and have a sleeker design. The new impact driver weighs 842 g (without battery) and the drill 952 g vs 1192 g and 1226 g respectively for my old set (I have an even older drill that weighs 1420 g). The battery is 410 g vs 446 g for the 1.5 Ah battery. The weight differences are huge!

Drill/Drivers

Left is the oldest drill/driver; middle was the one I bought a few years ago and the one on the right is the latest brushless drill/driver

Old and new impact drivers
Left is old impact driver; right is new impact driver.

I’ve used both tools briefly and they perform well. Are they better than the older tools? Maybe marginally, but it is hard for me to tell. I’ve seen a video where the person compared the new brushless drill/driver with the old brushless driver and found it less powerful (he had some odd results depending on the type of battery he used). Am I going to notice? I will definitely notice the weight difference, but probably not the performance.

Pros

  • Brushless motors
  • Lighter than what I already had

Cons

  • May not provide better performance (depending on what you already have)

Summary
If you have existing tools that work, it is really hard to justify these new HP brushless drill/driver. Having extra batteries is always good and the lighter ones are well worth it for me. If the tools last as long as my old ones, then this will be an excellent purchase.

I was impressed enough with the set that I purchased the combo set for my dad. He has been using a 12V DeWalt drill for ages that is starting to fail. He likes the lightweight tools and I hope that he can get as excited for the Ryobi tools as I am.

Debugging Firebase Analytics on iOS

Once again I’ve been instructed to add analytics into an app. Anyone that has ever instrumented analytics knows that it is a royal pain as analytics requires various pieces of information in all kinds of places in apps. While there are ways to mitigate the number of places that code has to be modified, someone still needs to verify that the required events are fired and the necessary parameters are included.

Like many analytics systems, Firebase batches events and sends them off to the server every so often making it hard to see in real time what events are being fired. In order to facilitate analytics verification, Firebase has a method to enable near real time events. Unfortunately this requires access to the source as the parameter Google says to add is a runtime parameter (-FIRDebugEnabled). I was also told to look at an article about debugging, but clearly the author never actually tried the method described on iOS as it references the runtime parameter which is NOT available in TestFlight builds.

Just to make sure I wasn’t crazy that there was no documented way to enable debugging in a TestFlight build, I asked a friend to review the documentation. He confirmed what I thought, but pointed out the following:

This behavior persists until you explicitly disable Debug mode by specifying the following command line argument:

-FIRDebugDisabled

Immediately after he pointed this out, I got an idea that the runtime flag stored a parameter in the UserDefaults for the app. I ran my app in the simulator using the enabled runtime flag (and another flag) and then used ControlRoom to inspect the plist containing my user defaults. I then ran it again with the disabled flag and compared the results. I found the following 2 entries when the debugging was enabled:

    <key>/google/firebase/debug_mode</key>
    <true/>
    <key>/google/measurement/debug_mode</key>
    <true/>

In order to test my theory that these 2 preferences would turn on Firebase debugging, I added a hidden preference to the app to toggle it and ran the app.

UserDefaults.standard.set(true, forKey: "/google/firebase/debug_mode")
UserDefaults.standard.set(true, forKey: "/google/measurement/debug_mode")

Once I toggled the preference, I looked at the Firebase console and didn’t notice anything. Based on the fact that the Google used runtime parameters, I thought that maybe the values were only checked at startup. So I killed the app and re-ran it. Low and behold, data started showing up in the Firebase console! I fixed up my hidden debugging setting to call exit(0) after toggling the preference, built the app and tested on a device not connected to the debugger. It worked perfectly!

I suspect that Google wanted to keep this a runtime parameter so that it wasn’t accidentally turned on in the wild and cause extra load on the servers. However, it really makes it hard to debug the analytics without access to the source code.

Just after writing this article, I searched the web again for a way to do this and found a Stack Overflow answer that sets the runtime flags when the app is started. The answers are interesting, but should also have a mechanism to turn off the debugging! To be more complete, the answers should be more like:

    #if DEBUG || STAGING
    if UserDefaults.standard.bool(forKey: "firebaseDebug") == true {
        var args = ProcessInfo.processInfo.arguments
        args.append("-FIRAnalyticsDebugEnabled")
        args.append("-FIRDebugEnabled")
        ProcessInfo.processInfo.setValue(args, forKey: "arguments")
    } else {
        var args = ProcessInfo.processInfo.arguments
        args.append("-FIRAnalyticsDebugDisabled")
        args.append("-FIRDebugDisabled")
        ProcessInfo.processInfo.setValue(args, forKey: "arguments")
    }
    #endif

Then in some hidden debug screen, add a flag to turn on firebaseDebug UserDefault.

Building an Air Quality Sensor

With the recent fires in California, I’ve been concerned about the air quality as it tells me if I should run, if we should go on our daily walk and if we should leave our doors open like we usually do. The EPA uses air quality sensors around the country to collect data and displays them on the AirNow website. These sensors are very expensive and therefore not placed everywhere. The air quality, of course, can differ depending on where you live and the closest EPA sensor to where I live is about 10 miles away. The EPA has started including data from low cost sensors made by a company called PurpleAir in their fire and smoke map.

With someone’s PurpleAir sensor about 0.5 miles from me, I can get a reasonable view of local air quality. Being the tinkerer that I am, I decided to look into the PurpleAir outdoor air sensor. At $279, it was a little out of my “curiosity price range”. After a little research, I was able to determine what parts are in the PurpleAir sensor. It consists of 2 Plantower PM5003 laser particulate sensors, a BME 280 temperature/pressure/humidity sensor running on an ESP8266 board.

I’ve been experimenting with the NodeMCU microcontroller which is based on the ESP8266, so I was already familiar with parts of the setup. I already have an indoor temperature sensor running on a NodeMCU, so adding a second device shouldn’t be that difficult. On my Home Assistant instance, I’m running the ESPHome add on which makes the ESP modules available to Home Assistant. ESPHome has support for lots of devices including the PM5003 and the BME280 which simplifies the software part of the setup.

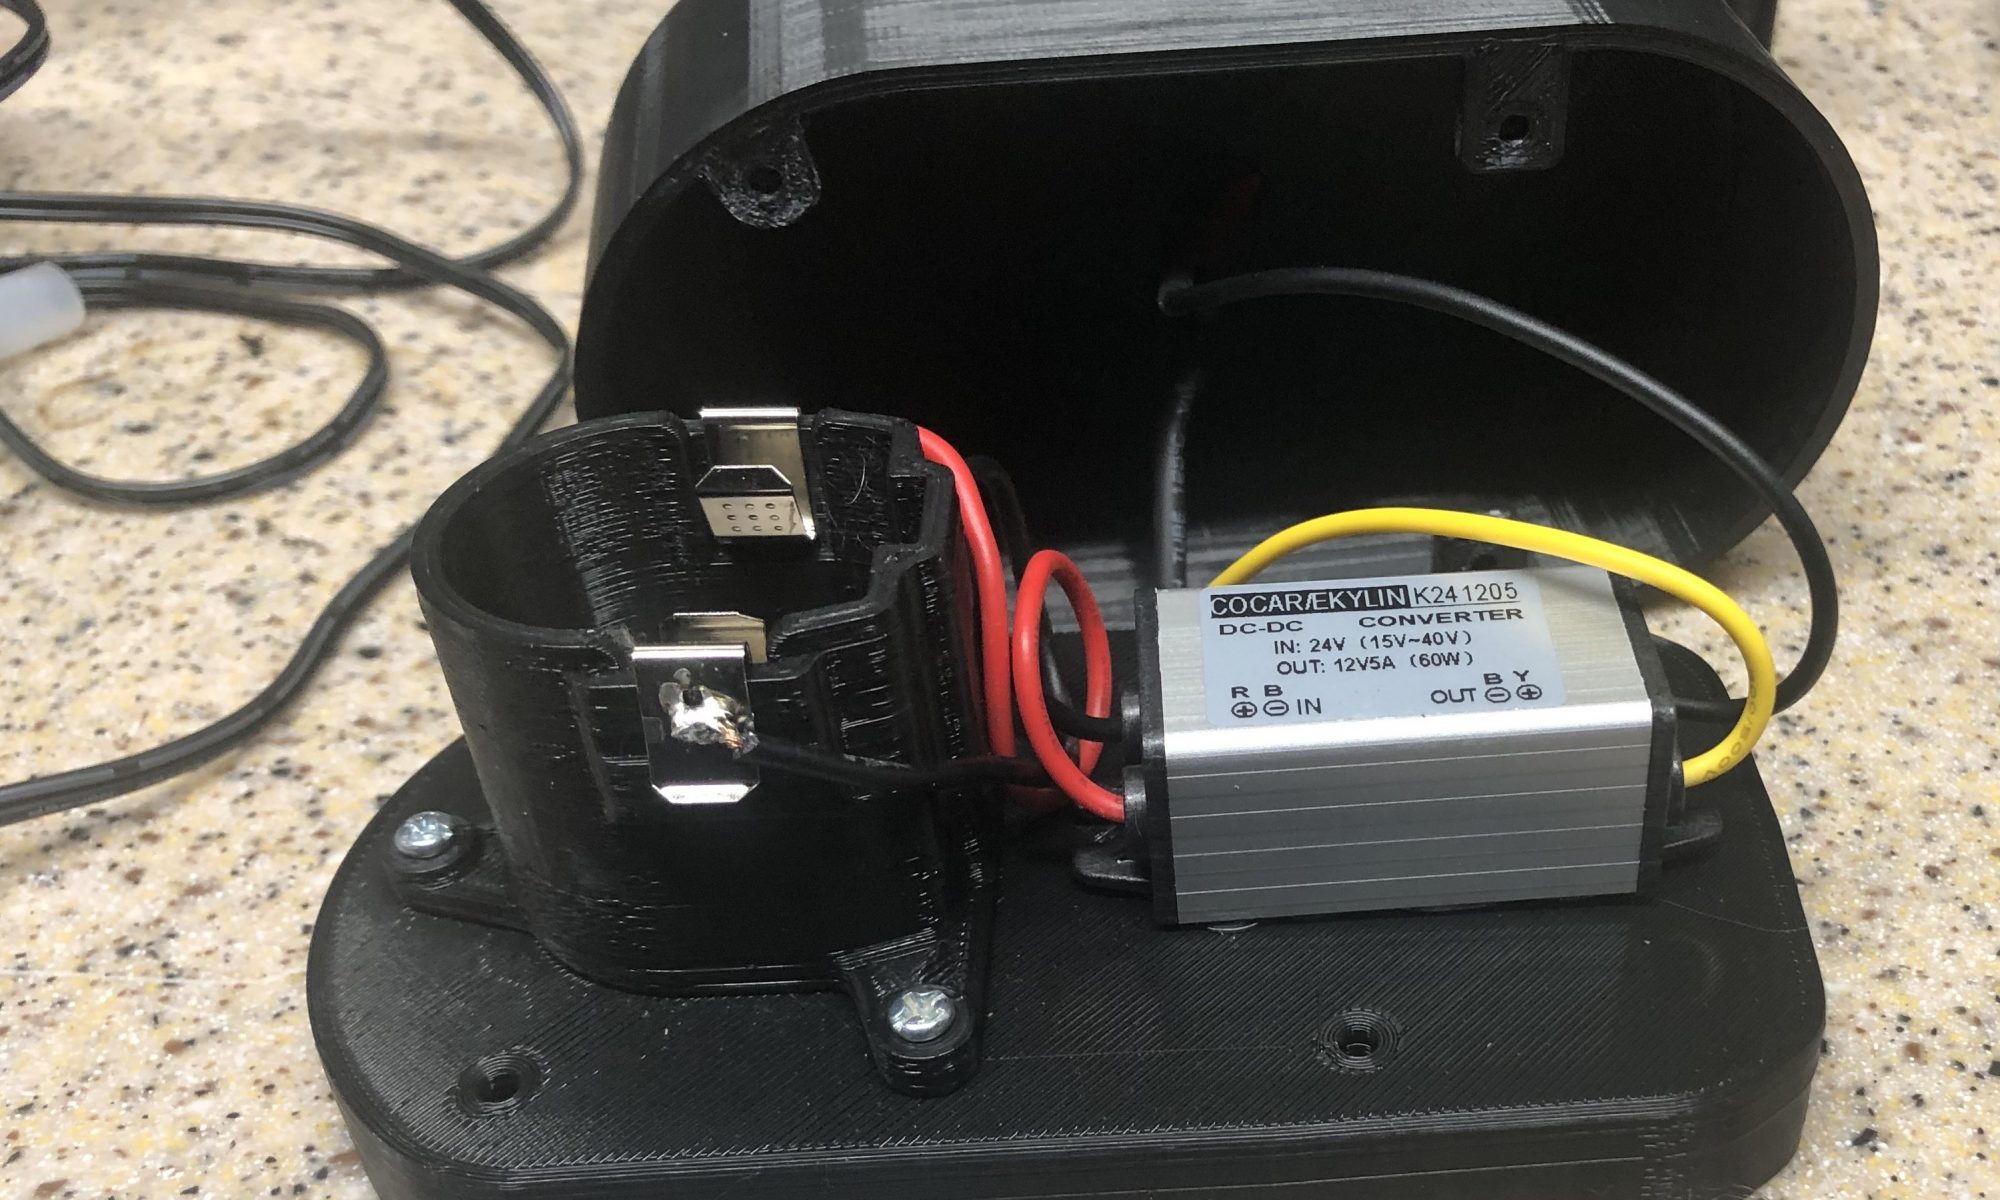
In addition to purchasing the PM5003, BME 280 and a Wemos Mini d1 compatible board (ESP8266), I purchased a PVC cap to mount it. Total parts cost was about $45. I followed parts of an online tutorial for wiring things up which meant soldering the PMS5003 power to the 5V on the board, the ground on the sensor to the board and the TX line to D4 on the board. For the BME 280, power went to 3V, SDA to D2 and SCL to D1.

Wired Board

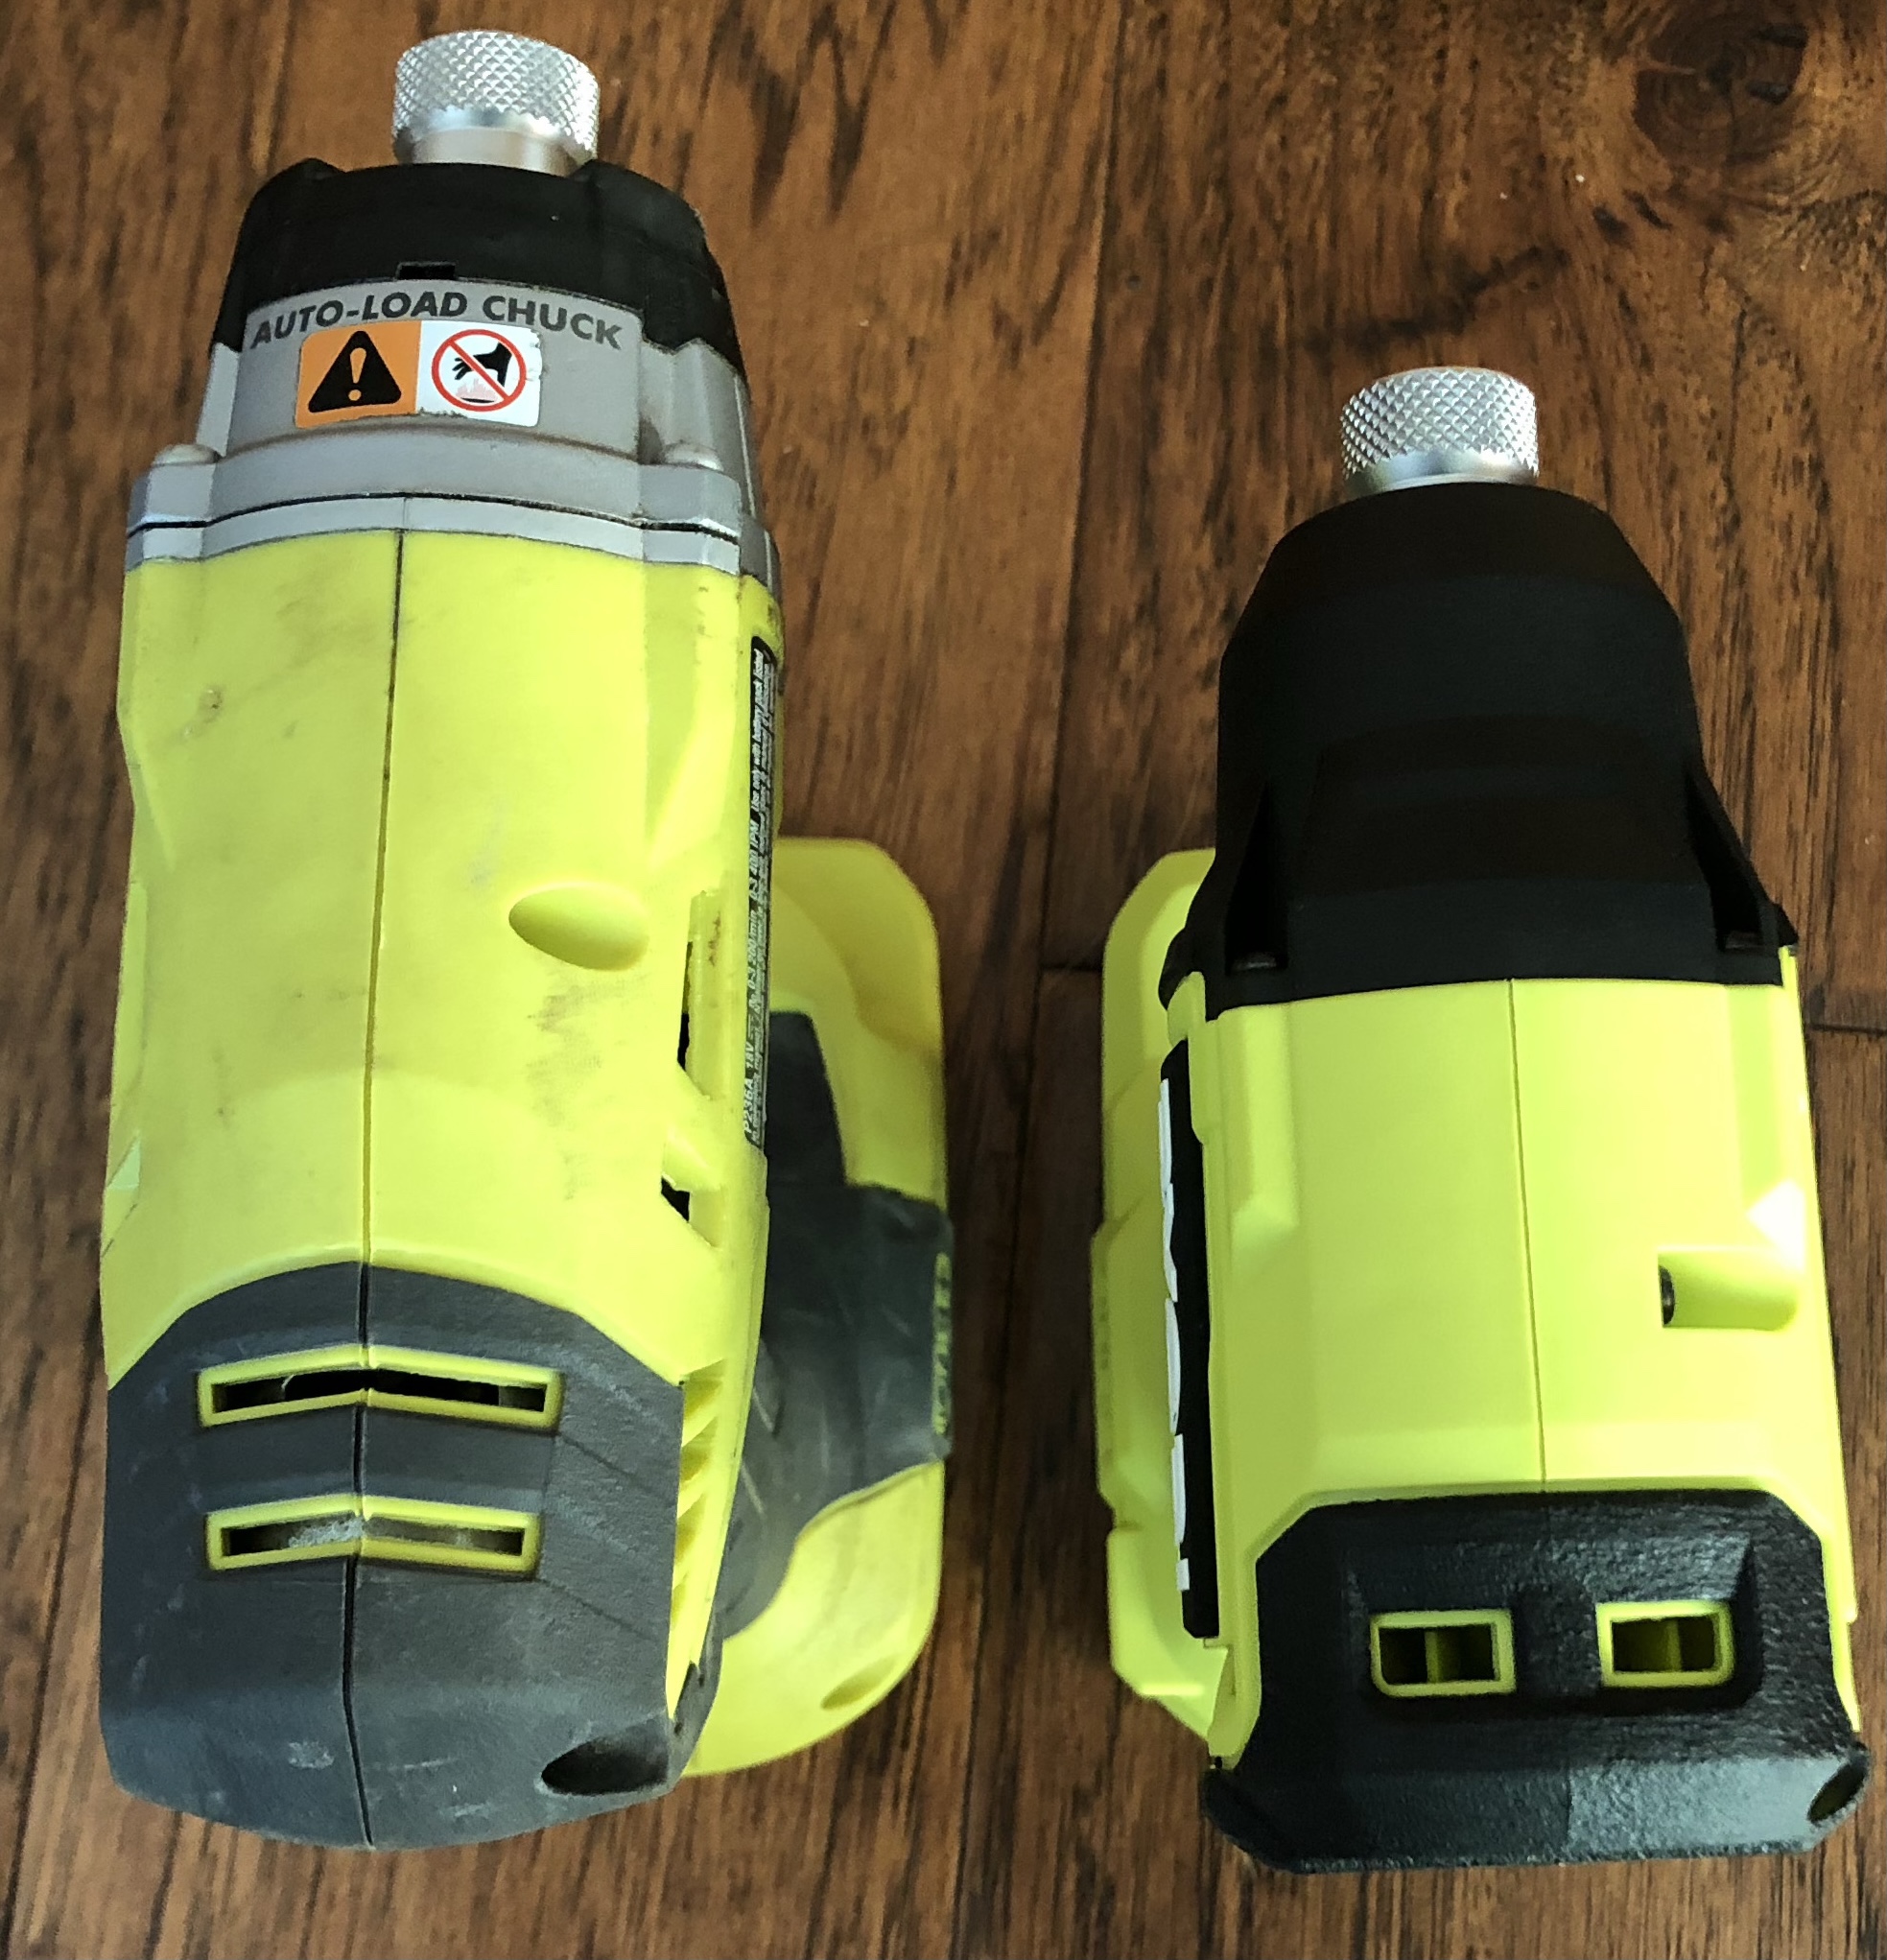
After wiring up the board, I used my trusty Ryobi Hot Glue Gun to glue the pieces into the PVC housing.

Mounted components

I then configured ESPHome. The ESPHome configuration is below:

uart:
  rx_pin: D4
  baud_rate: 9600

sensor:
  - platform: pmsx003
    type: PMSX003
    pm_1_0:
      name: "Particulate Matter <1.0µm Concentration"
      filters:
        - throttle: 30s
    pm_2_5:
      name: "Particulate Matter <2.5µm Concentration"
      filters:
        - throttle: 30s
    pm_10_0:
      name: "Particulate Matter <10.0µm Concentration"
      filters:
        - throttle: 30s

  - platform: bme280
    address: 0x76
    i2c_id: bus_a
    temperature:
      name: "Outside Temperature"
      oversampling: 16x
      accuracy_decimals: 1
    pressure:
      name: "Outside Pressure"
      accuracy_decimals: 1
    humidity:
      name: "Outside Humidity"
      accuracy_decimals: 1
    update_interval: 30s

  - platform: dht
    pin: D5
    temperature:
      name: "Outside Temperature Alt"
    humidity:
      name: "Outside Humidity Alt"
    update_interval: 30s

i2c:
  sda: D2
  scl: D1
  scan: True
  id: bus_a

In addition to the BME 280 sensor, I added a second temperature/humidity sensor, the DHT22 so that I can compare results as the BME 280 apparently doesn’t have accurate results as the component heats up itself. (I added the DHT22 after the pictures were taken.)

With the sensor setup in ESPHome, the next part was getting the readings converted into an air quality index (AQI). There are various calculations and corrections used to calculate the index. I stuck to a simple calculation that I found in Jason Snell‘s Scriptable widget that works with PurpleAir data.

I’m a big fan of Node-RED and used that to periodically take the data from the sensors and generate an AQI. In Node-RED, I have it poll the sensor once a minute and then calculate the AQI and then update the Home Assistant sensor

[{"id":"90c83f52.90ab4","type":"poll-state","z":"3c8c01a5.14121e","name":"2.5um","server":"d83da4b3.5bea38","version":1,"exposeToHomeAssistant":false,"haConfig":[{"property":"name","value":""},{"property":"icon","value":""}],"updateinterval":"60","updateIntervalUnits":"seconds","outputinitially":true,"outputonchanged":false,"entity_id":"sensor.particulate_matter_2_5um_concentration","state_type":"str","halt_if":"","halt_if_type":"str","halt_if_compare":"is","outputs":1,"x":110,"y":1380,"wires":[["46dfb46e.8c564c"]]},{"id":"46dfb46e.8c564c","type":"change","z":"3c8c01a5.14121e","name":"Set Payload","rules":[{"t":"set","p":"particulate","pt":"msg","to":"payload","tot":"msg"}],"action":"","property":"","from":"","to":"","reg":false,"x":350,"y":1380,"wires":[["54903d05.bb2a04"]]},{"id":"54903d05.bb2a04","type":"function","z":"3c8c01a5.14121e","name":"","func":"function calcAQI(Cp, Ih, Il, BPh, BPl) {\n    var a = (Ih - Il);\n    var b = (BPh - BPl);\n    var c = (Cp - BPl);\n    return Math.round((a/b) * c + Il);\n}\n      \nfunction getAQIDescription(aqi) {\n\tif (aqi >= 401) {\n\t  return 'Hazardous';\n\t} else if (aqi >= 301) {\n\t  return 'Hazardous';\n\t} else if (aqi >= 201) {\n\t  return 'Very Unhealthy';\n\t} else if (aqi >= 151) {\n\t  return 'Unhealthy';\n\t} else if (aqi >= 101) {\n\t  return 'Unhealthy for Sensitive Groups';\n\t} else if (aqi >= 51) {\n\t  return 'Moderate';\n\t} else if (aqi >= 0) {\n\t  return 'Good';\n\t} else {\n\t  return undefined;\n\t}\n }\n\nfunction getAQIMessage(aqi) {\n\tif (aqi >= 401) {\n\t  return '>401: Health alert: everyone may experience more serious health effects';\n\t} else if (aqi >= 301) {\n\t  return '301-400: Health alert: everyone may experience more serious health effects';\n\t} else if (aqi >= 201) {\n\t  return '201-300: Health warnings of emergency conditions. The entire population is more likely to be affected. ';\n\t} else if (aqi >= 151) {\n\t  return '151-200: Everyone may begin to experience health effects; members of sensitive groups may experience more serious health effects.';\n\t} else if (aqi >= 101) {\n\t  return '101-150: Members of sensitive groups may experience health effects. The general public is not likely to be affected.';\n\t} else if (aqi >= 51) {\n\t  return '51-100: Air quality is acceptable; however, for some pollutants there may be a moderate health concern for a very small number of people who are unusually sensitive to air pollution.';\n\t} else if (aqi >= 0) {\n\t  return '0-50: Air quality is considered satisfactory, and air pollution poses little or no risk';\n\t} else {\n\t  return undefined;\n\t}\n }\n\n\n\nvar pm = msg.particulate;\nvar aqi;\n\nif (isNaN(pm)) aqi = \"-\"; \nif (pm === undefined) aqi = \"-\";\nif (pm < 0) aqi = pm; \nif (pm > 1000) aqi = \"-\"; \n        /*      \n              Good                              0 - 50         0.0 - 15.0         0.0 – 12.0\n        Moderate                        51 - 100           >15.0 - 40        12.1 – 35.4\n        Unhealthy for Sensitive Groups   101 – 150     >40 – 65          35.5 – 55.4\n        Unhealthy                                 151 – 200         > 65 – 150       55.5 – 150.4\n        Very Unhealthy                    201 – 300 > 150 – 250     150.5 – 250.4\n        Hazardous                                 301 – 400         > 250 – 350     250.5 – 350.4\n        Hazardous                                 401 – 500         > 350 – 500     350.5 – 500\n        */\n\nvar particulateSize;\nvar sensorName;\nvar sensorFriendlyName;\nif (msg.topic.includes('2_5')) { \n    particulateSize = \"2.5\";\n    sensorName = \"aqi_pm_25\";\n    sensorFriendlyName = \"EPA PM 2.5 AQI\";\n\n    if (aqi === undefined) {\n\t\tif (pm > 350.5) {\n\t\t\taqi = calcAQI(pm, 500, 401, 500, 350.5);\n\t\t} else if (pm > 250.5) {\n\t\t\taqi = calcAQI(pm, 400, 301, 350.4, 250.5);\n\t\t} else if (pm > 150.5) {\n\t\t\taqi = calcAQI(pm, 300, 201, 250.4, 150.5);\n\t\t} else if (pm > 55.5) {\n\t\t\taqi = calcAQI(pm, 200, 151, 150.4, 55.5);\n\t\t} else if (pm > 35.5) {\n\t\t\taqi = calcAQI(pm, 150, 101, 55.4, 35.5);\n\t\t} else if (pm > 12.1) {\n\t\t\taqi = calcAQI(pm, 100, 51, 35.4, 12.1);\n\t\t} else if (pm >= 0) {\n\t\t\taqi = calcAQI(pm, 50, 0, 12, 0);\n\t\t} else {\n\t\t\taqi = undefined;\n\t\t}\n\t}\n} else {\n    particulateSize = \"10.0\";\n    sensorName = \"aqi_pm_10\";\n    sensorFriendlyName = \"EPA PM 10 AQI\";\n    if (aqi === undefined) {\n\t\tif (pm > 425) {\n\t\t\taqi = calcAQI(pm, 500, 301, 604, 425);\n\t\t} else if (pm > 355) {\n\t\t\taqi = calcAQI(pm, 300, 201, 424, 355);\n\t\t} else if (pm > 255) {\n\t\t\taqi = calcAQI(pm, 200, 151, 354, 255);\n\t\t} else if (pm > 155) {\n\t\t\taqi = calcAQI(pm, 150, 101, 254, 155);\n\t\t} else if (pm > 55) {\n\t\t\taqi = calcAQI(pm, 100, 51, 154, 55);\n\t\t} else if (pm >= 0) {\n\t\t\taqi = calcAQI(pm, 50, 0, 54, 0);\n\t\t} else {\n\t\t\taqi = undefined;\n\t\t}\n    }\n}\nmsg.payload = {\"aqi\": aqi, \"description\": getAQIDescription(aqi), \"message\": getAQIMessage(aqi), \"particulate\" : particulateSize, \"sensor_name\": sensorName, \"friendly_name\": sensorFriendlyName};\n\nreturn msg;","outputs":1,"noerr":0,"initialize":"","finalize":"","x":560,"y":1380,"wires":[["ba491750.52e4f8"]]},{"id":"ba491750.52e4f8","type":"ha-api","z":"3c8c01a5.14121e","name":"Update Sensor State","server":"d83da4b3.5bea38","debugenabled":false,"protocol":"http","method":"post","path":"/states/sensor.{{payload.sensor_name}}","data":"{\"state\":\"{{payload.aqi}}\",\"attributes\":{\"icon\":\"mdi:chemical-weapon\",\"friendly_name\":\"{{payload.friendly_name}}\",\"description\":\"{{payload.description}}\",\"particulate_size\":\"{{payload.particulate}}\",\"unit_of_measurement\":\"AQI\",\"message\":\"{{payload.message}}\"}}","dataType":"json","location":"none","locationType":"none","responseType":"json","x":800,"y":1380,"wires":[[]]},{"id":"d83da4b3.5bea38","type":"server","z":"","name":"Home Assistant"}]

Having the AQI sensor in Home Assistant allows me to quickly glance and see how bad the air is outside (at this point, I can actually see the poor air!).

AQI Graph

Good air quality is less than 50 and from the graph above, we haven’t seen that in awhile!

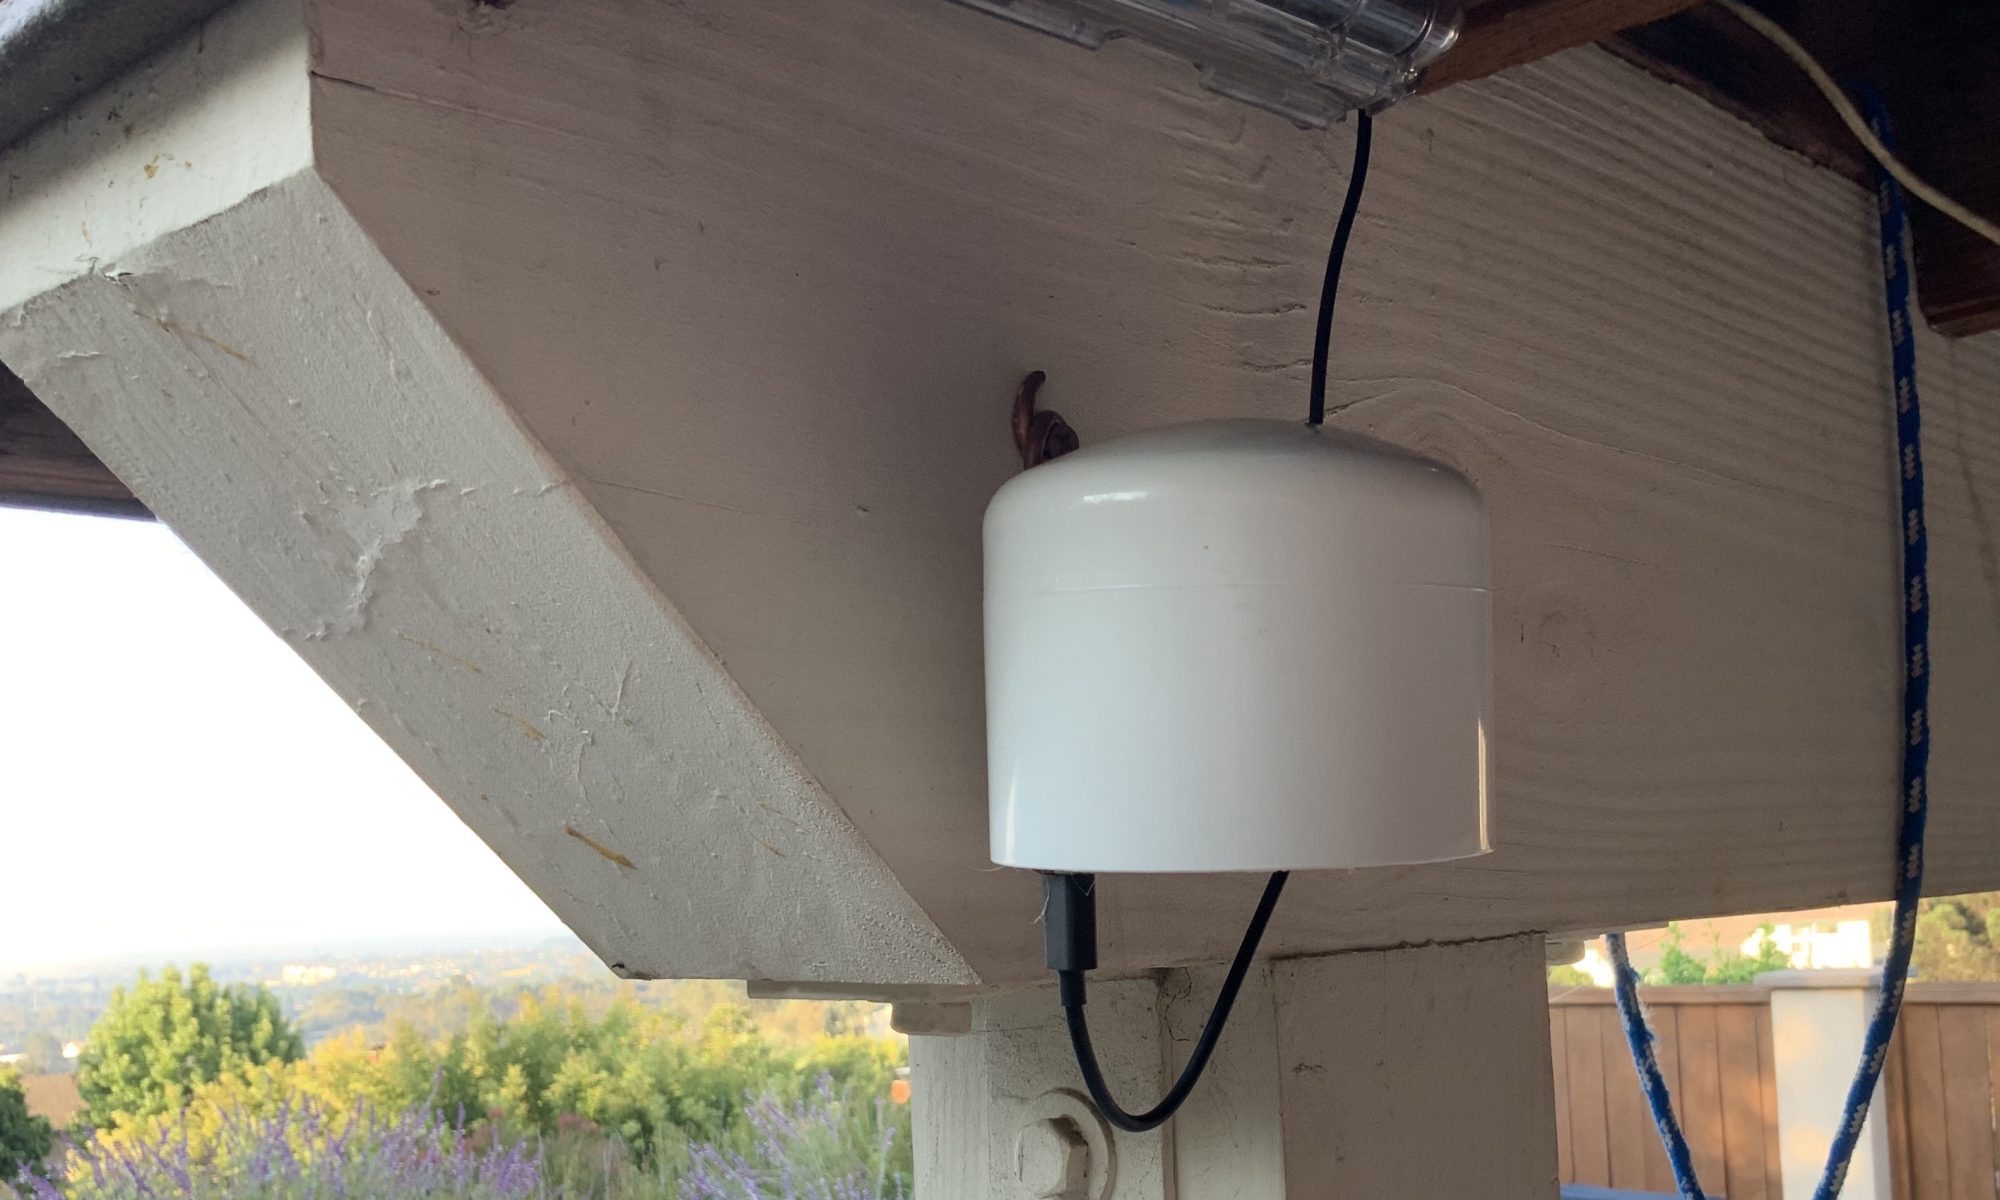
I mounted my finished product under a second floor deck which should keep the major rain out of it. PurpleAir recommends not covering the bottom with anything, so I’m going to go with that and see what happens. Having it completely exposed outside isn’t great. It is powered by a PoE to USB adapter as I had Ethernet going outside there anyway.

Final mounting

The AQI data is interesting and is actually useful in telling me how much physical activity I should do. Other pieces of data I collect are neat, but not all that useful.

Combining Ryobi Batteries and Emergency Preparedness

As I’ve written about before, I really like my Ryobi tools. I have a number of batteries to go with the tools that sit idle most of the time. Ryobi sells a USB charger as well as an inverter that plugs into the batteries. Ryobi’s options didn’t fit well with my usage as I wanted a way to be able to power 12V electronics such as my HAM radio, HAM radio charger, etc. and using a 120V inverter would be very inefficient. I found a 3D printed case that goes on top of the battery that was pretty close to what I wanted. However, I didn’t want a power switch, didn’t want USB ports and it didn’t terminate in Anderson PowerPole connectors that I use with my HAM radio equipment.

The first step in creating what I wanted was to get the case to look right. As my son is a wizard at Fusion 360, I asked him to make a few modifications to the case to close it up. I then printed the pieces and purchased a step down converter and some Keystone 209 cell leaf spring contacts. I soldered the spring clips to the step down converter, soldered the other end of the converter onto a short piece of 14 gauge wire and then terminated the wire in the PowerPole connectors.

Using some screws I had lying around and hot glue, I assembled all the pieces. Now I have a case that I can easily put on a Ryobi battery that has a 12V PowerPole connector on the top ready to accept any number of devices.

It is a pretty simple project and am not sure when I’ll ever need to use it, but I have 2 of them just in case I need some extra emergency power. I have a cigarette lighter adapter to PowerPole that I can plug in and then can put USB chargers in there or I can plug in an inverter or even my HAM radio. I’m not sure of the runtime with a battery, but with the 7 Ryobi batteries I have, I’m sure I can at least charge a few cell phones!

Ryobi Power Block

Ryobi Power Block with Inverter

How would I evacuate in an emergency?

This year has brought more reasons to prepare for an emergency and has gotten me asking myself if I am ready. When we had the great toilet paper shortage of 2020, I worked with my son on preparing our emergency kit as he was working on his Emergency Preparedness Merit Badge. This was a good start, but was more geared towards what to do when we didn’t have access to supplies or food. We didn’t think much about evacuations until the fires in Northern California started.

Several years ago, I wrote about preparing for an emergency. This was a start for what we’d need to take if we had to evacuate our house. Looking at the people leaving their homes in Santa Cruz and not being able to return for potentially weeks, having digital copies of things is only part of the solution.

How else can we prepare in case of an evacuation? Thinking about this, I realized that we have camping gear that is readily accessible. This includes tents, sleeping bags, ground clothes, flashlights, camping stove, etc. If we grabbed all this as we were leaving, we’d have a lot of gear needed to survive outside of our house. Clothing is one area that I will say that we’re not that organized for an evacuation. We do have duffel bags under the bed, so we’d grab them and shove clothes in them.

While the reasons to evacuate our house in San Diego are small (tsunami is unlikely, wildfire where we live is also not likely; the most likely reason is post earthquake having a limited amount of time to gather stuff), I think that given 15 minutes, we would be in good shape to evacuate. The plan is pretty basic and consists of gathering the following:

  • Laptop bag in my office – stuff it with the hard drives and other documents (extra keys and safe deposit key as well) that are kept in the fire safe. The bag already has an extra laptop charger and a way to connect the drives. Also, put my laptop in the bag.
  • Portable electronics including hotspot, laptop, iPads and phones.
  • Plastic boxes next to the fire safe that has chargers, some camping supplies, flashlights, HAM radio equipment.Supply Boxes
  • My wallet and keys.
  • Portable HAM radio off my desk.
  • Hats and coats that are easy to grab on the way out.
  • 3 large plastic containers of emergency supplies that are in the garage.
    Emergency Supplies
  • Tents, sleeping bags, chairs, and tarps used for camping.
    Tents and Camping Supplies
  • Gallons of water that are in the garage stored right as we enter the garage. We use these for camping, so they are replenished periodically.
  • Some clothes. Put them a duffel bag stored under the bag. Include hiking shoes.

After pulling together everything, I’d load it into the car (along with the mammals) and go.

Our house is relatively small and my office is right next to the garage, so getting items out of my office and loading them into the car is easy. The camping gear is in a rack above my car and the emergency supply boxes are in a cabinet right in front of my car.

I hope that I never have to use my plan, but by thinking about it and rehearsing it in my head makes me rest easier at night.

Ryobi Tools Still Going Strong

About a decade ago, I wrote about Ryobi cordless tools. At the time, I stated that the tools weren’t the top of the line, but adequate for my use. In the course of that time, I’ve added a number of tools and batteries to my collection. I’ve been very pleased with the variety of tools from a tire inflator to a jigsaw to a vacuum cleaner.

I think I’m up to almost 20 tools and a handful of batteries. Having the right tool for the right job is always key to me, so when I’ve found deals on new tools to add to the collection, I’ve been trying to jump on them. In the time that I’ve owned all the tools, I’ve had 2 or 3 batteries fail, but other than the circular saw initially not working, everything is holding up. My most used tool is probably the reciprocating saw. It has gotten beat up as I use it to cut bamboo, tree limbs, etc. It still is a solid performer.

For the average homeowner, I would hands down recommend the Ryobi 18V tool system as having a single type of battery for all tools makes it so easy to just grab a tool and use it. I have 2 of the chargers mounted on my workbench and can just charge batteries when I need them; the charged batteries sit on a shelf and I always have one ready.

Failure of Slent Sunglasses Nose Pieces

Last year I purchased a pair of prescription sunglasses from SportRX. As my eyes are pretty bad, my choice of sunglasses is quite limited (thick lenses). This time I got a pair of 100% Slent glasses. These glasses have held up fairly up with all my outdoor activities as well as driving. Unfortunately I recently noticed that the nose pieces had melted. This is either from the heat when the glasses sit in my car in the center compartment (not in direct sunlight) or broke down due to my sunblock.

IMG 3192

When I contacted SportRX, they said to contact 100%. 100% said that I should contact SportRX and get them covered under warranty. I’ve had them over a year, so the warranty has already expired. A helpful customer service rep at 100% tried looking for replacements, but was apparently unable to locate any and offered me 50% off at their site. Since I only wanted sunglasses, it would cost me $55 to just replace the nose pieces! Ouch.

The nose pieces are pieces of rubber so I decided to ask my son if he could 3D model replacements and I could print them in TPU. It wouldn’t quite be the same material, but I thought it would work well enough. After 6 iterations, he was able to come up with replacements that fit well. My 3D printer has once again proven its value!

IMG 2951

While the nose piece isn’t as comfortable as the rubber that came with the sunglasses, they’ll do the job.

My son has allowed me to post the STL file as long as I give him credit for his hard work.

Here is the file.

I hope that these help someone and I wish that companies would provide STL files for parts so that people can print replacements (or make replacement parts available at a reasonable price) and not simply throw something out because a simple part needs to be replaced.

Searching for a new car

Several years ago I was in the market for a new car. I really wanted a PHEV (plugin hybrid electric vehicle) as most of my driving is around town, but I’d have the flexibility to go on longer trips. At the time there weren’t many choices that interested me. I test drove an Audi A3 e-tron and while it was a nice little car, it didn’t have CarPlay. After Apple introduced CarPlay, I knew that I had to have it on my next vehicle as I never wanted to update the maps in the navigation again and with annual iOS updates, I knew that I’d get tweaks to the system every year which I’ve come to expect.

I continued my car search and was looking for either a compact SUV or a hatchback/wagon/5 door that had OK gas mileage, some technology and of course, CarPlay. My options were quite limited and I found the 2017 Subaru Impreza. At the time, Toyota wasn’t onboard with CarPlay, so I’d have to leave Toyota. On paper, it had everything I wanted (except PHEV). The price was right and I purchased one right when a local dealer got it. While the car isn’t a sports car, I enjoy using the paddle shifters sometimes and the car has performed OK. It was the first model year on a new platform and has had some problems (6 recalls at the last count). The car has enough room to go camping (I’ve downsized our camping equipment and am strategic about what we bring) and we’ve used it on a few road trips. I went from a Toyota Highlander to the Impreza, so I lost a bit of room.

As I mentioned earlier, CarPlay was a requirement for me and I’ve written about it before. Unfortunately, the infotainment system in the car has been the biggest disappointment for me. Early on, CarPlay wouldn’t always start and required me to figure out how to reboot the system which sometimes doesn’t work. There have been a number of software updates each requiring me to take it to the dealer. It has gotten better, but there are still times when the system won’t boot or I have to reset it. There has even been a class action lawsuit about the system. Some people on various forums ask if others bought the car just because of the infotainment system or they are overreacting; I actually did purchase the car because of the infotainment system and would have looked elsewhere.

Other than the infotainment system, the car has functioned adequately; my new car excitement has worn off and it is just a car. I’ve had an issue with low speed shifting, but the dealer says that it isn’t a problem. With only a few Subaru dealers in San Diego, taking it to another one for service isn’t a feasible option to get a second opinion.

The car still serves its purpose and has pretty low mileage on it, but right before the world got turned upside down this year, I saw that Toyota was coming out with a PHEV RAV4. After reading about it, I knew that this is the car I would have purchased if it had been out a few years earlier. The waiting game began once I had my heart set on replacing my car!

As I’ve written about before, dealers are charging huge markups and supply is limited on the RAV4 Prime, so I wait. I’d really like to get this vehicle before the federal tax credit runs out because it will be a lot less attractive at $7,500 (+ local incentives) more.

Supply and Demand or …

For a number of reasons, I’ve decided to get a new car. I’ve settled on the Toyota RAV4 Prime as it is really the vehicle I wanted 5 years ago when I was searching for a car. The car is a plugin hybrid (PHEV) which means that most of my driving will be on electric (42 miles on electric). With my newly installed solar, I won’t be paying extra for the electricity (I’ve already paid for it and factored in this car when sizing the system).

The problem now is that the car is in such high demand and Toyota is going to make less than 5000 this model year. While the vehicles are starting to show up according to reports on forums, dealers in Southern California have decided that a $10,000 markup is the way to go. I’ve read that in other regions (Southern California including San Diego is considered the LA region) such as the northwest and east coast, people are getting the cars at MSRP which is reasonable.

Every dealer I’ve communicated with in San Diego and LA is adding the markup no matter the trim. That number is ubiquitous across the board. On one forum that I posted this to, someone suggested that I look at an article on the FTC’s website. The article says that while dealers can charge what they want for a vehicle, they basically have to come to their pricing on their own independently of other dealers. Given that they all (of the ones I’ve contacted) are charging the exact same amount over MSRP, did they come to this conclusion on their own or did they come to the pricing together as a region? One salesman speculates that it is regional. However, there are some people on RAV4 forums who are talking about different markups; I’m not sure of their regions.

Is what the dealers doing legal? I have no idea. Is it right? In my opinion, no and it goes into the feeling that many people have that car dealers are not the most honest people. Going into a dealership makes me cringe and this just reinforces it.

I guess I’ll be waiting awhile for the vehicle I want; hopefully I can get it before the federal tax credit runs out.

Scott’s Cyber Safety Primer

Lately the topic of cyber safety has come up a few times for me. I’m the point person for CyberChip for my son’s Scout troop. I help the Scouts earn the award which is required for the Scout and Star ranks; I’ve overseen a few Scouts complete the requirements. In addition to this, I’ve seen how something innocuous that has been posted years ago can come back and be devastating. Lastly, have seen how someone could easily get scammed.

While I don’t claim to be an expert on cyber security, I did have lunch with Phil Zimmerman to discuss working on he Mac port of PGP and had Phil Karn as a mentor teaching me about Linux! I’ve been using the Internet for over a quarter of a century and have learned a few things about “being safe”.

Using two of the points of CyberChip Internet Safety Pledge as a starting point, I’m going to elaborate on what I think is important.

I will think before I post.

This is a pretty important point as everything on the Internet exists forever. If you do a search on my name, you’ll find posts I made years ago. Luckily, most of it is innocent. Recently I learned of someone that was terminated from a position because of a post they made many years ago. Even if you post something that you think is private, send a picture to someone or send a text, there could be a data breach or the recipient could take the message and post it, blackmail you, or in other way cause you irreparable harm.

While your messages to others could be encrypted (like using iMessage), the other end can easily take a screenshot of whatever you wrote and use it against you.

Unless you want something to come back on you at some point in the future, don’t post it or send it electronically.

Also, remember that when you take photos, the location of the photo is stamped (in the metadata) on the photo. If you are on vacation or traveling and post pictures with the location data on the photo, people can know that you aren’t home. If you are home, people can know where you live. While there are a number of ways to find out where people live, you don’t want to make it easy on them. When sharing photos, remove the location data (in iOS when you share, there is an option to remove the data) and don’t post photos when you are traveling; wait until you return home.

I will protect myself online.

This point requires a little more effort than “thinking before you post” and relates to password security, fake websites and scammers.

Passwords

The common thinking on passwords is to create complex passwords that you can remember such as substituting numbers for letters and symbols for other letters. This thinking is nearly impossible to combine with the thinking that you should create a separate password for every website. The only way to reconcile this is to use a password manager such as 1Password, LastPass, or Dashlane to name a few. Each site must have a separate password and each password must be complex. Of course, you have to remember your “master” password to get into the password manager.

You cannot write down any of your passwords with the exception that some of the password managers setup a “recovery” sheet where you write down your master key and then the sheet should be placed in a safe or a safe deposit box. It is quite unlikely that someone will go through the trouble of getting your recovery sheet.

Websites

When I first registered a domain many years ago through Network Solutions, it wasn’t easy to do. This became a slight hurdle in people setting up scammy websites. Since then, getting a domain name and setting up a website can be done in minutes. There are tons of sites that rely on typos to major websites to redirect users to their sites. Luckily many browsers pick up on this and make it easy to get to the right site. People are taught that seeing the lock icon in a browser means that a site is secure. While that is true, you have to look at what that means. Obtaining an SSL certificate up until recently took a little extra effort and wasn’t particularly cheap. With the advent of Let’s Encrypt, getting an SSL certificate is now free and easy to setup. I use Let’s Encrypt and securing traffic from my browser to servers is great.

Securing traffic is only part of a secure website. You have no idea what happens behind the scenes. Years ago I worked for a company that stored credit cards in clear text in an unencrypted database along with the CVV codes. In my tenure at the company I worked to bring it into compliance with PCI DSS, but credit card numbers were still accessible to employees and they still had roundabout access to CVV codes.

So even if a site has a lock icon, it doesn’t mean that it is safe to visit the website. Securing the traffic is very different from a site being safe to visit. Even the federal government has given given bad advice on this.

One of the safest ways to visit a website is to use a trusted search engine such as Google or DuckDuckGo and click the links from there; most popular websites should be at the top of the search results. However, before clicking a link check that it is indeed the site you want to visit.

Scammers

The other day I got a phone call that purported to be from Apple security saying that my Apple ID had been compromised. The call came from a Michigan number and was a recording. I pressed one and was connected to an agent. I asked for his employee ID and he responded with FUC…

Companies will not proactively call you about security issues. If you suspect there is an issue, hang up and call the company to verify the information. Also asking for an employee ID is a good way to weed out some scammers.

Never give out information to anyone that calls you; always call the company back if you have questions. Also never give anyone access to your computer remotely.

AppStores/Installing Software/Malware

If possible, always install software from an AppStore. While this doesn’t guarantee that you won’t get malware, it does reduce the possibility. Verify that software comes from a known source if you can’t install it from an App Store.

If you see messages that your computer is running slow or “click here” to get support, you may have malware on your computer. If this happens, immediately turn off WiFi and either contact your most tech savvy friend or family member for advice or take the computer to BestBuy’s GeekSquad to remove the malware.

Credit Cards

Whenever you pay for something online, always use a credit card. Never use a debit card. Credit cards have better consumer protections than debit cards. Never give a credit card number to anyone that calls you! If you make a purchase over the phone, verify that the phone number you are calling belongs to the proper company. Don’t just call any random number you find doing a Google search.

Conclusion

  • Anything you post on the Internet even in private could come back to haunt you.
  • Remove location data from photos before sharing.
  • Always use a different password for every website.
  • Use a password manager.
  • The lock icon on a website doesn’t mean the site is safe.
  • If you have to call a company, verify the number that you are calling is actually for the right company and not just some random number you found.
  • Install software from an App Store or a known source.
  • Never give your credit card number to someone that calls you. Always call a company back.
  • Never use a debit card on the Internet; only use credit cards.