[As this article relates to my son’s Eagle Scout service project, I wrote most of it, but he had editorial discretion and added some content in various places. In the article, "I" refers to Scott, and "he" refers to Aiden, my son.]
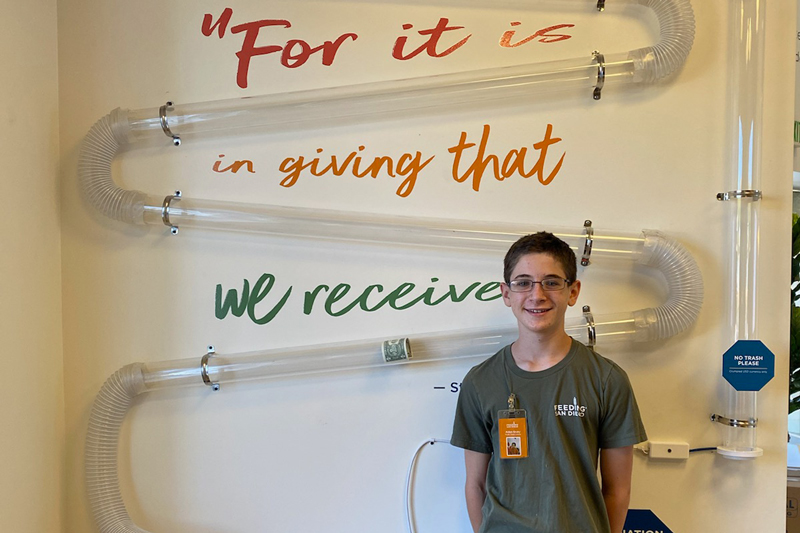
About 9 years ago, my wife and I decided that we wanted to impart a sense of giving back to our son, so we decided to start volunteering with Feeding San Diego. We’ve been regular volunteers since, and when the opportunity arose to become trained as Team Leaders, we did so and our son, Aiden, at age 10 became the youngest team leader.
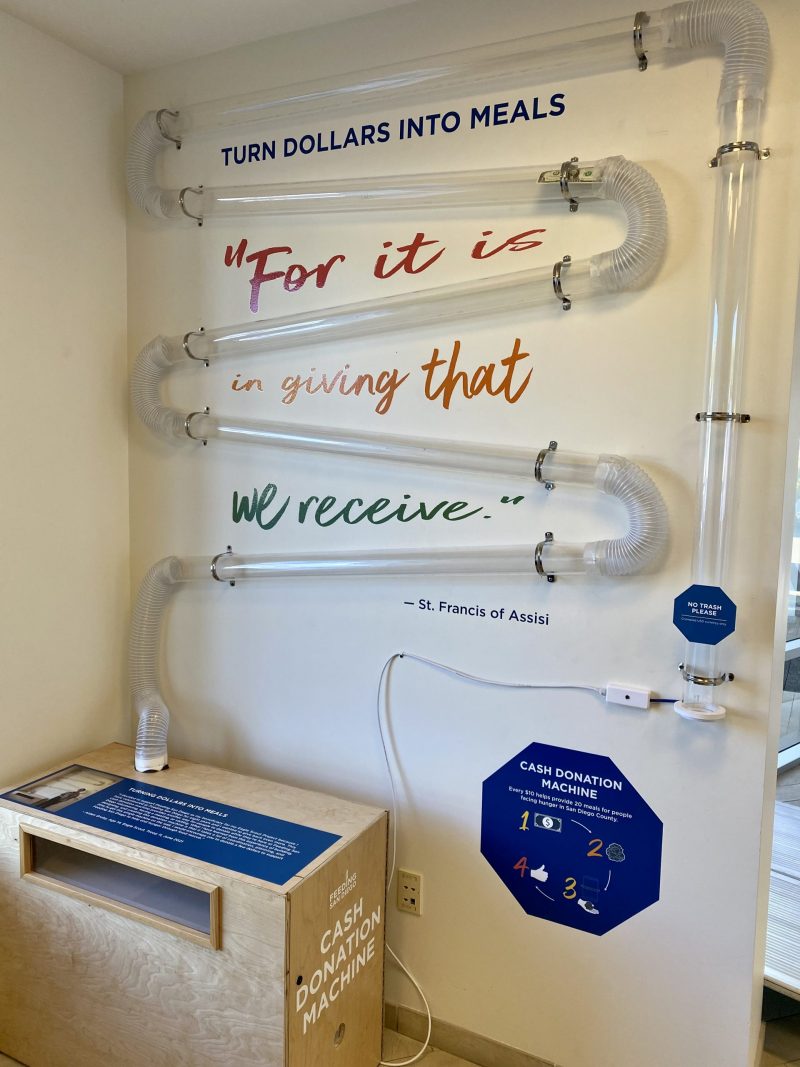
When it came time in August 2020 for Aiden to start planning his Eagle Scout service project, he wanted to do something for Feeding San Diego. He brainstormed with their marketing department, and they decided on a cash donation machine similar to ones at science museums and children’s museums, which suck the money up through a series of clear tubes. Aiden went back and forth with them over the course of many months to come up with a design and get it approved. While ironing out the design, he started figuring out the actual mechanics of how it would work. I was as hands off on the project as possible, but gave some suggestions here and there. While this donation machine won’t be handling million dollar donations, it will hopefully encourage people to donate, and be used as a talking piece in their lobby.

He started his concept using an open source project he found, but it didn’t quite meet his needs. The first part was to be able to turn on a vacuum when some type of trigger (more on that later) was activated. I prototyped using a WiFi outlet and a WEMOS D1 Mini, but didn’t tell him how I did it just to give myself confidence that it could be done. It was a pretty simple concept where I setup the WEMOS as a WiFi access point and had the outlet connect to it; when a button was pressed, the WEMOS (basically an Arduino) sent an HTTP command to the outlet running Tasmota firmware. This concept was great, but in the end there was too much wireless interference when Aiden installed the project for it to actually work. Luckily Aiden found a UL listed wired switch called the Dataprobe iBoot-IO. This product was quite expensive, but turned out to be reliable and met our requirement of being UL listed.
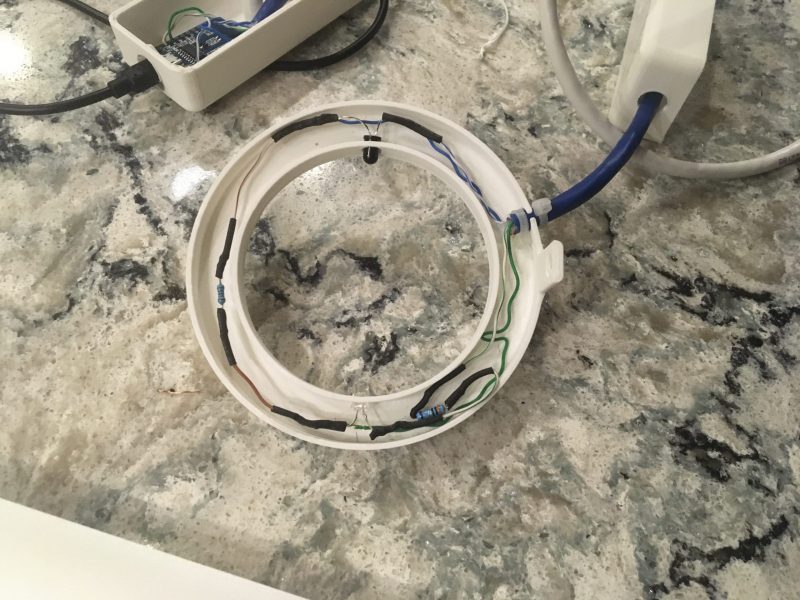
After getting the outlet to trigger, the next piece was how should it trigger? Basically, when money is put in the tube, it breaks an infrared beam and sends a signal to the outlet. This was completely out of my scope of knowledge, so Aiden did some research, figured out how to wire an IR sensor and receiver. The schematic is below. With that out of the way, how was it going to be mounted? Aiden has become a pro at using Fusion 360 and designed a ring to house the electronics and fit around the tubing. As part of programming the sensors, Aiden wrote the Arduino code to turn off the outlet after a certain number of seconds to allow the money to go through the series of tubes.

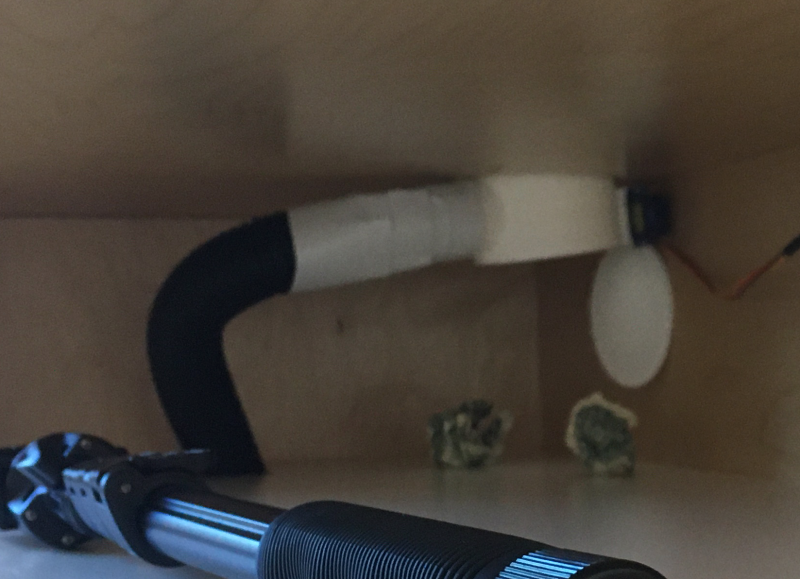
Is the project done, yet? I kept asking myself that numerous times over the 10 months of the project! Feeding San Diego wanted to make the cabinet to house the vacuum, electronics and collect the money, so Aiden designed and provided the dimensions for the box (again using Fusion 360). Unfortunately, the box wasn’t made to those dimensions, but that turned out to be a good thing. The box had a compartment for the vacuum and then a top compartment where the money would go that had a window for people to see. Aiden’s assumption on the box is that the top part would be completely sealed such that the vacuum could be attached to the bottom and there would be enough suction to draw the money through the tubes. I wasn’t, however, convinced of this and suggested that Aiden have a backup plan. I gave him an idea of a flap on the end of the tube that would close when the vacuum was turned on (the vacuum would provide enough suction to close the flap). Unfortunately the vacuum didn’t do that, so Aiden expanded on the idea and designed a flap with a servo such that his program sent a command to the servo to close the flap when the vacuum was turned on and then opened the flap when the vacuum was turned off so that the money would just drop.

With that finished, Aiden was confident that everything would work when installed. A few days before he installed the project, we were able to pick up the box so that Aiden could prepare it by installing thick foam to deaden the sound of the vacuum. When install day came around, Aiden led a number of Scouts and adults from his troop on attaching it to the wall. At the end when it came time to turn on the machine, the wireless interference I mentioned before caused problems with it not being reliable. After trying to troubleshoot it, Aiden finally found the iBoot IO box and ordered it as that would be more reliable and he wouldn’t have to worry about it. Waiting for the part, however, was torturous for him.

Once the part arrived, we went back to Feeding San Diego and he installed it. The electronics worked well and did what it was supposed to do. Unfortunately, there was another hiccup and that was that if the money wasn’t crumpled, it wouldn’t make it through the tubes. Back to Fusion 360 to design a "cap" to make the hole smaller and require people to crumple the money (signage has been added). Was that the final piece in making everything work? No. Turns out the vacuum was a bit underpowered, and the money wouldn’t always make it through even if it was crumpled. More research and a trip to Home Depot for a larger vacuum got him one step closer. Remember I mentioned the larger box before? The new vacuum was larger and some of the insulation he put in had to be cut out to accommodate it.
Was he done after the new vacuum? Well, almost. Aiden didn’t follow the KISS principle in his code which caused some false activations on the vacuum. I encouraged him to remove extra code and just turn on and off the outlet when the sensor was tripped; he had code in there that attempted to detect if someone kept triggering the vacuum and was playing around. That code, unfortunately, was a bit too complex for this application.
Does it work? Yes!
Aiden wanted me to write up his project and I’ve done my best to capture the big pieces.
If you have any questions about this, please don’t hesitate to contact me.

Good job Aiden! Great skills for industrial systems there. Now we need a video of it working on the blog.
Hi Mark,
I just added a video to show the machine in action (the video was taken before the graphics were put up on the wall).
Great work by Aiden on a very cool project! Solving interesting problems is where it is at. Thanks for writing it all up Scott.
SO COOL! Lots of great lessons throughout, and a very satisfying result!