I’ve been so pleased with Home Assistant that I decided to see if I could migrate completely away from Vera and run all my Z-Wave devices on Home Assistant. Currently Home Assistant uses OpenZwave as the base and has basic support for a lot of Z-Wave devices. While OpenZwave isn’t as mature as Vera in its implementation, I found that with the exception of 4 Leviton VRCZ4-M0Z zone controllers, everything worked well. I’ve read that some people have had problems with Z-Wave on Home Assistant, but so far things have been going quite well for me using an Aeotec Z-Stick Gen5 as the controller. I suspect that my success is due to the type of devices I have (only outlets, switches, 1 light bulb, 2 portable MiniMote controllers and these VRCZ4s); I don’t have any sensors and only 2 of my devices are battery powered.
In order to complete my transition away from Vera, I had to get the 4 VRCZ4s to work. A Google search turned up very little information on how to do this with the exception of one post that gave me some clues. The post uses a third party piece of software that I don’t have to program the controllers, so that was pretty much out. However, the post did talk about the SCENE_CONTROLLER_CONF Z-Wave command class. With this information in hand, I decided to see if I could program my controllers.
Here’s what I eventually did.
Controller Programming
- Sign up for a developer account on Silicon Labs.
- Download the Z-Wave Developer kit, specifically the Z-Wave PC Controller software. (Windows only, but works fine in VMWare Fusion)
- Reset the VRCZ4 by pressing and holding the left side of buttons 1 & 3 until it blinks amber and then remains a solid red.
- Press left side of buttons 1 & 3 of the VRCZ4.
- Add node in Z-Wave config in HA
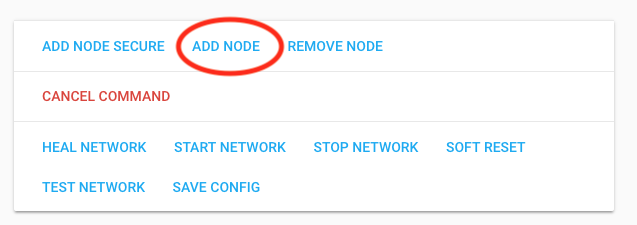
- Wait until node is added. I like to look the the OZW_Log.txt to check status. The node will say Complete next to it when it is done.
- Select node in Z-Wave config called Leviton VRCZ4-M0Z. Make a note of the node number.
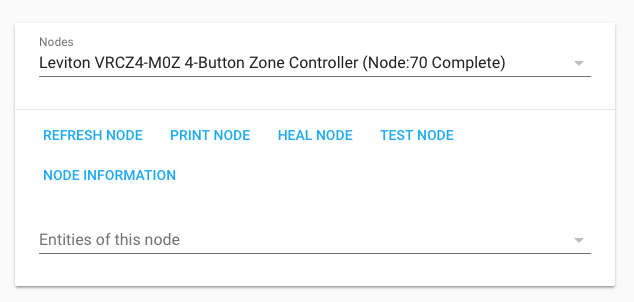
- Rename Entity by going to Node Information, selecting the gear and entering a new node.
- Under Node Group Associations, select Group 1
- Make sure Aeotec Z-Stick (node 1) is selected and click Add to Group.
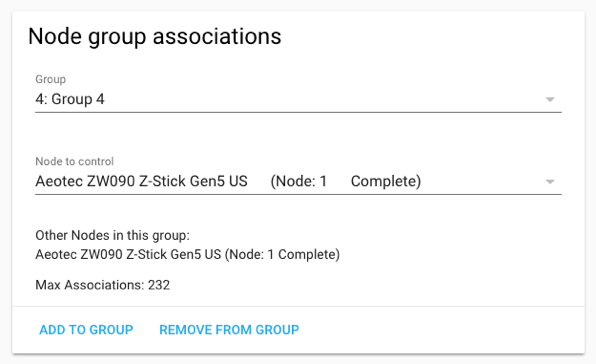
- Repeat the above 2 steps for Groups 2-4. The VRCZ4 needs to know where to send commands when the buttons are pressed.
- If you have other devices you want to control such as lights or outlets and they support Z-Wave association, associate the devices with the VRCZ4 now. Groups 1-4 corresponds with buttons 1-4. So if you want button 1 to control an outlet, associate it with the outlet.
- If all the buttons on the VRCZ4 are going to be associated with other devices, you can stop here as the associations will cause the buttons to turn on/off the associated devices. You can even associate more than 1 device to a button (i.e. 2 backyard lights).
- If you want of the buttons to control scripts or automations on Home Assistant, you’ll have to do some more steps.
- Shutdown the HA box (not just HA, but the entire box).
- Connect Aeotec Z-Stick to computer with Z-Wave PC Controller software.
- Launch PC Controller software.
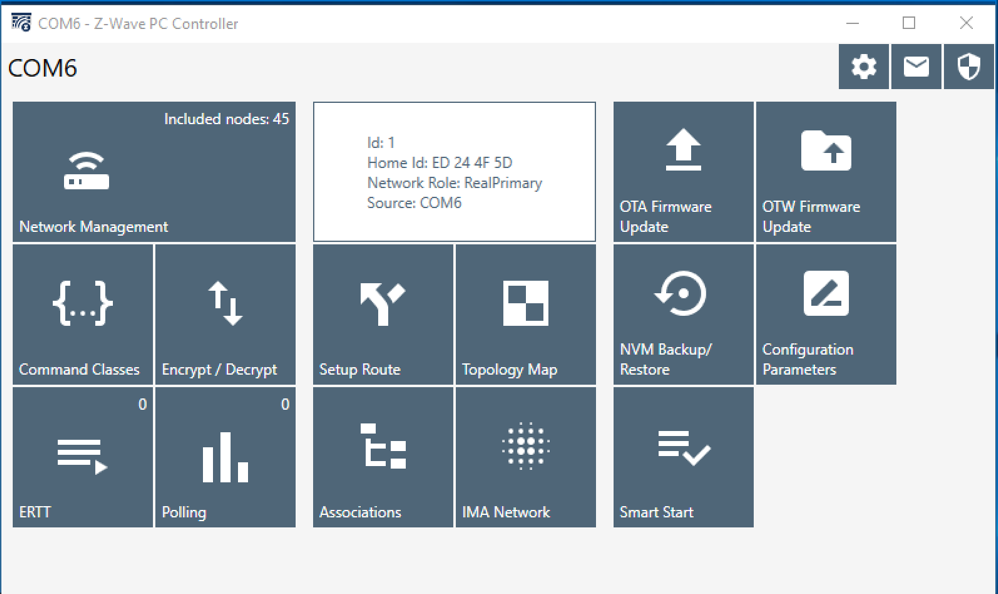
- Click Command Classes
- Locate node of controller on left side.
- Click on it and then click Node Info.
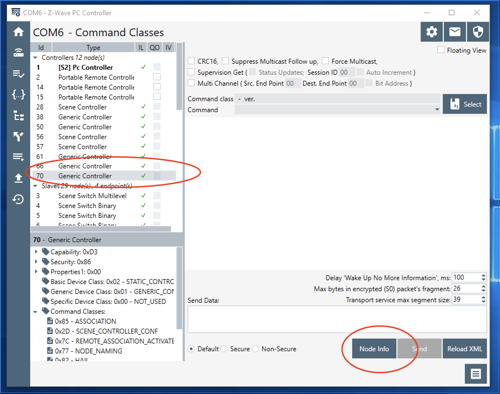
- Double click SCENE_CONTROLLER_CONF in the lower left.
- Change command to SCENE_CONTROLLER_CONF_SET.
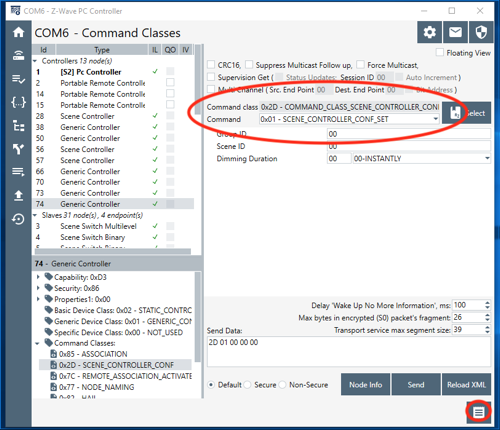
- Click the button in the lower right to show the log.
- At this point, you need to program each button where you are not using associations to control devices.
- The Group IDs for the buttons are as follows:
Button 1 on - 1 Button 2 on - 2 Button 3 on - 3 Button 4 on - 4 Button 1 off - 5 Button 2 off - 6 Button 3 off - 7 Button 4 off - 8 - For each group ID, you have to assign a scene ID. Apparently the scene IDs should be unique across the entire Z-Wave network, but for my case I assigned the same scene IDs for each controller and can distinguish between the controllers in Home Assistant. You can choose whatever numbering scheme you want, but I went with the following:
Button 1 on - 1 Button 1 off - 2 Button 2 on - 3 Button 2 off - 4 Button 3 on - 5 Button 3 off - 6 Button 4 on - 7 Button 4 off - 8 - For each group ID, assign a scene ID and click send.
- You’ll see some message in the logs.
- To verify that the scene IDs are set, press a button and in the log you will see a SCENE_ACTIVATION_SET message with the scene ID.
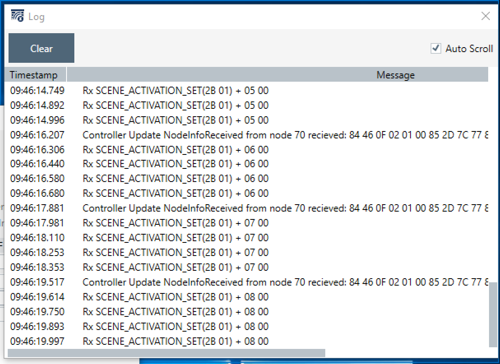
- Note that the group IDs and the scene IDs are in hex. Since I’m only using 1-8, it doesn’t matter but if you use different scene IDs, be aware of this.
- Repeat for each button you want to set.
- Unplug the Aeotec Stick from the computer and plug it back into HA and reboot HA.
Using the Scenes
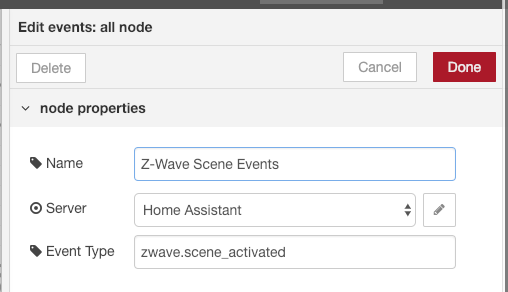
The programming has now been done, so the next step is to use the new commands in Home Assistant. I use Node-RED and have setup a sequence that handles all of my controllers.
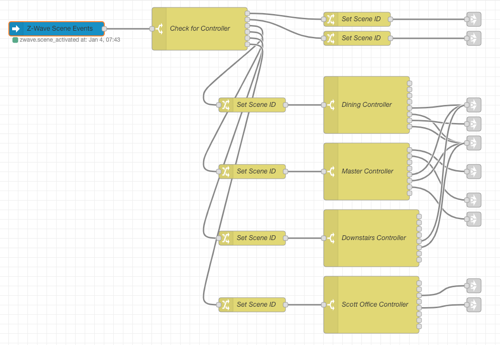
1. Drag an events node (top left in Home Assistant) to the workspace and set it up to only look at zwave.scene_activated events.
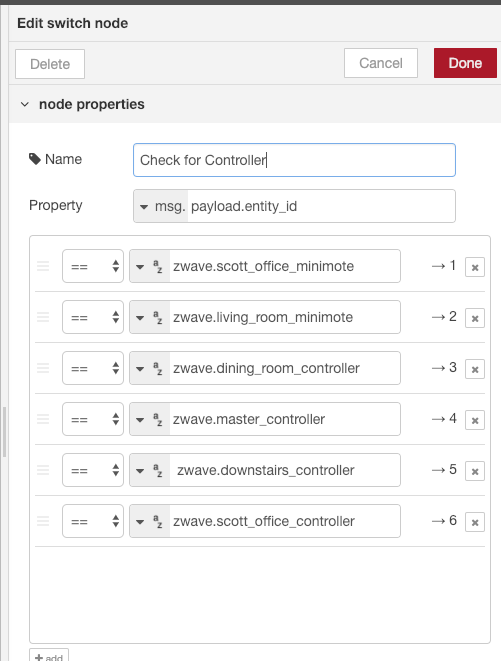
2. Use a switch node to differentiate between the controllers.
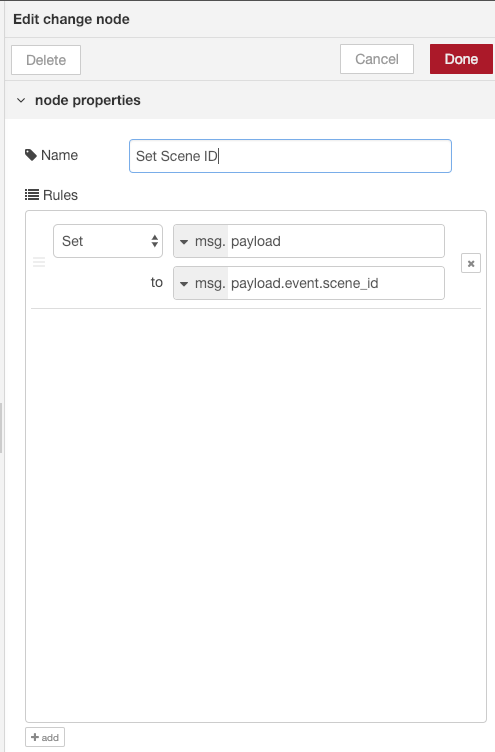
3. Use a change node to extract the scene ID.
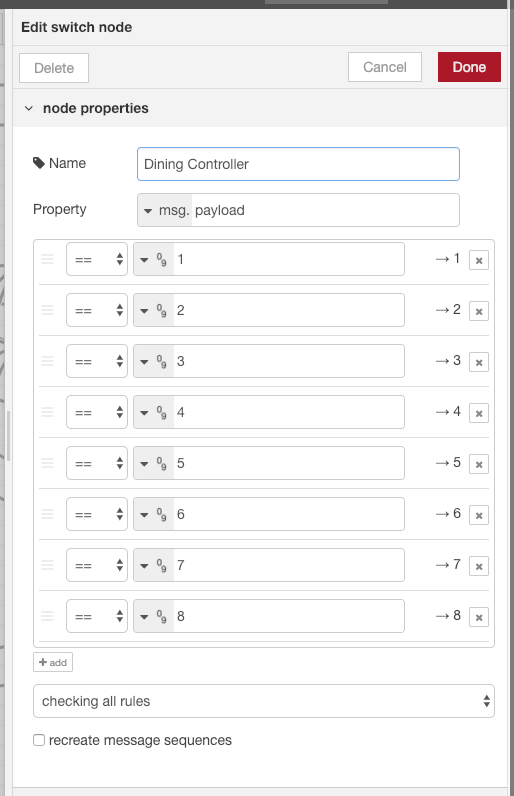
4. Next use a switch node to separate out the scenes. If you didn’t follow my scene numbering, you will have to enter whatever scene IDs you used.
5. Connect up nodes for each scene.
While this seems like a lot of work, I probably took longer for me to write this up then to actually configure a controller! I’m not an expert in Home Assistant, Node-RED or Z-Wave so send feedback if you have any.
Enjoy!