For many years, I’ve been intrigued about routers that have cellular backup to maintain connectivity when the primary Internet does down. I’ve never pursued setting this up as my Internet connection has been quite reliable with downtime measured in hours over the last few years. The cost to set this up could never be justified for my home setup.
One of the features of the latest UniFi Controller is the ability to turn an unused Ethernet port on the USG to be a WAN failover. This is a great addition for a enterprise class router, but overkill for my needs.
About a year ago I purchased a HooToo Travel Router to experiment with setting up a VPN when I travel. I had some success with it, but ultimately gave up and have just been using it as a battery for other devices. I’ve been reading forums about the Mobley and saw that the Mobley could be tethered to a router and not just used as a hotspot. Now I had a mobile hotspot and a router that maybe I could put together to be a WAN failover.
The forums talking about the Mobley mentioned router firmware called ROOter that supports various routers and modems. There happened to be firmware for a router similar to my portable router, so I decided to give it a try. Worst case is that I’d brick the router and this exercise would be over.
After a bit of fiddling, I got everything working. The below steps detail what I did. There are a large number of steps, but they’re pretty simple. There should be very few, if any, changes for different LTE modems.
- I grabbed firmware for the HooToo TripMate Nano router.
- I then flashed the firmware onto the router. This is going to vary based on the current firmware on the router.

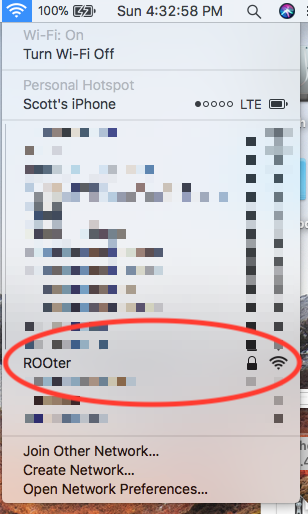
- Select the ROOter SSID on your computer. Use the default WiFi password of rooter2017.
- Goto Safari and enter 192.168.1.1.
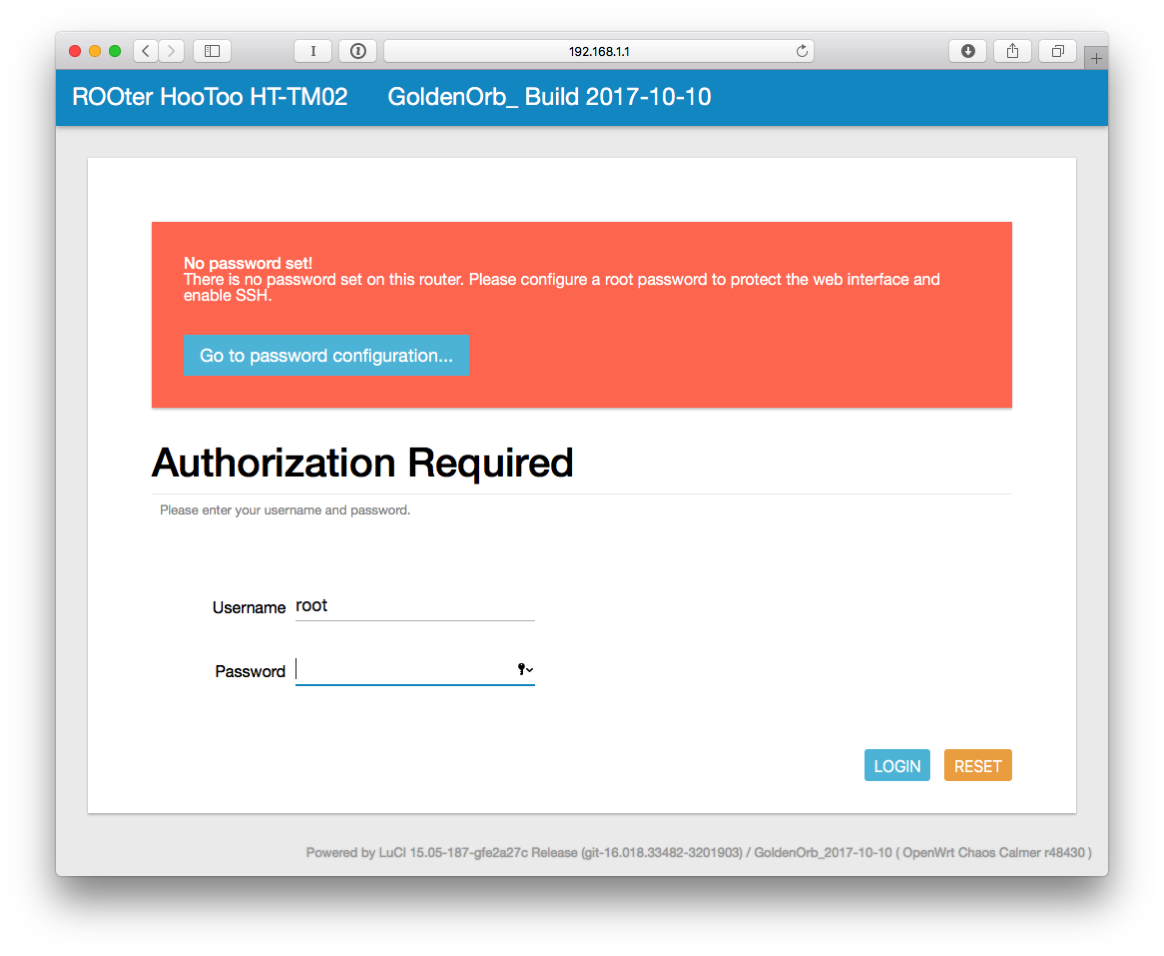
- Click Login.
- Click on “Go to password configuration…”
- Enter a password and confirm it.
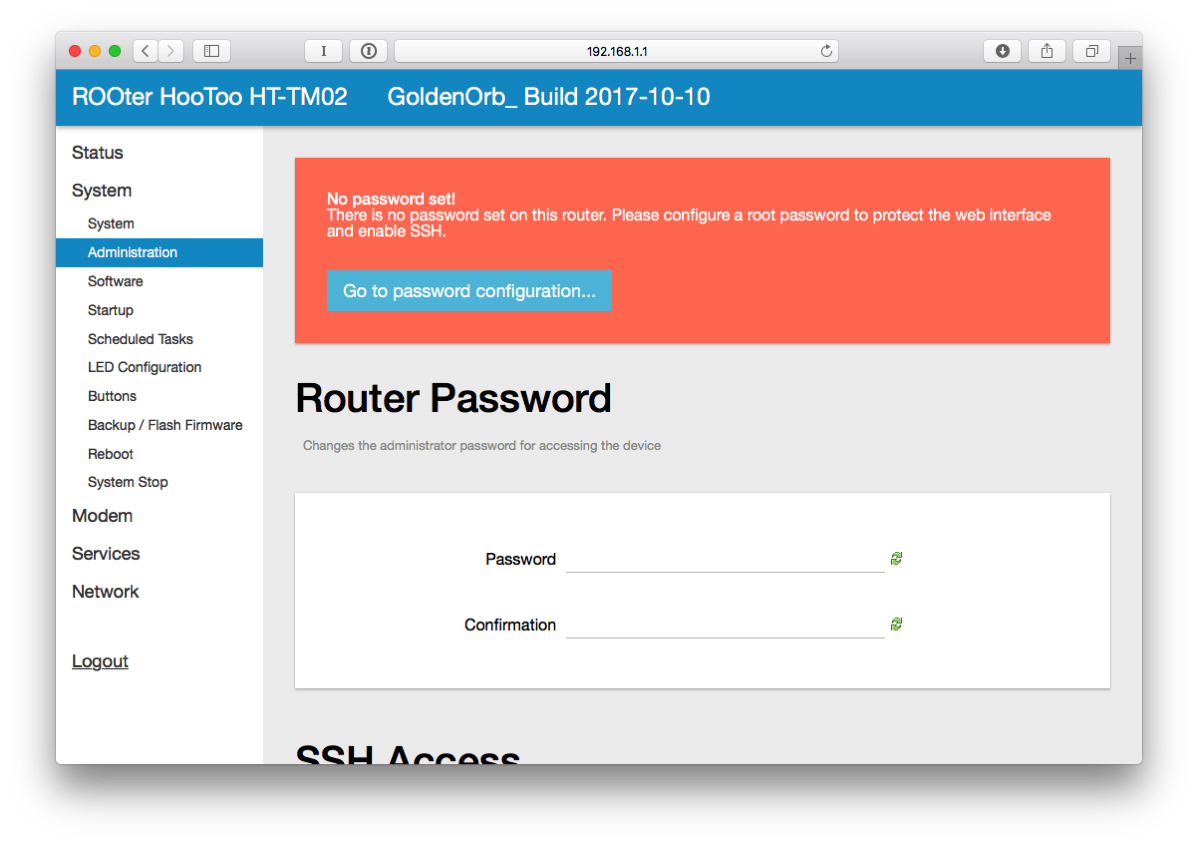
- Click SAVE & APPLY at the bottom of the page.
- On the left side, click on Network and then Interfaces.
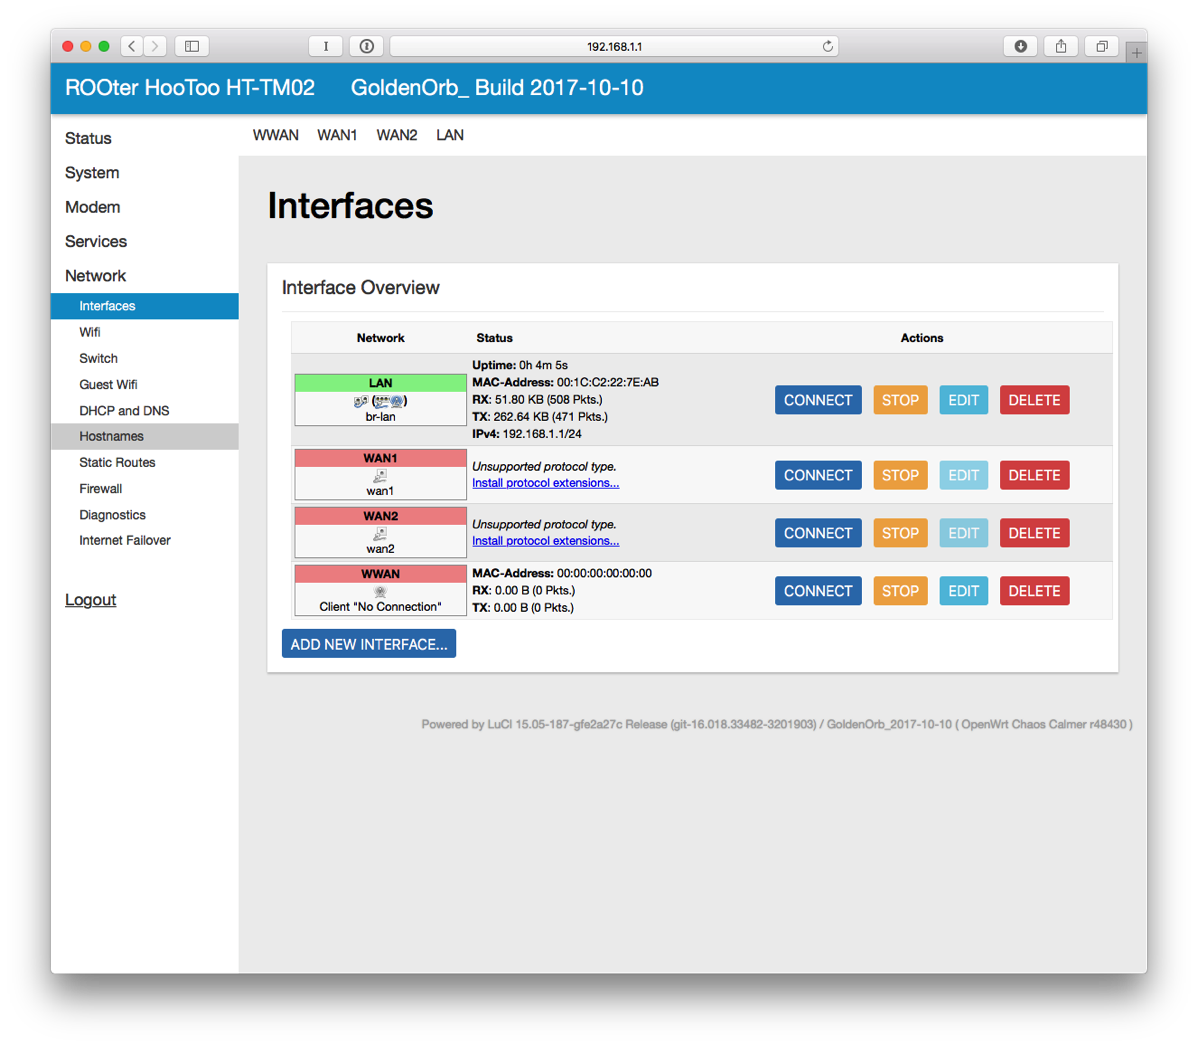
- Next to LAN, click on EDIT.
- For the IPv4 address, enter 10.10.10.1 (it has to be a different subnet than the hotspot and I like this numbering scheme). At the bottom of the page, click SAVE & APPLY.
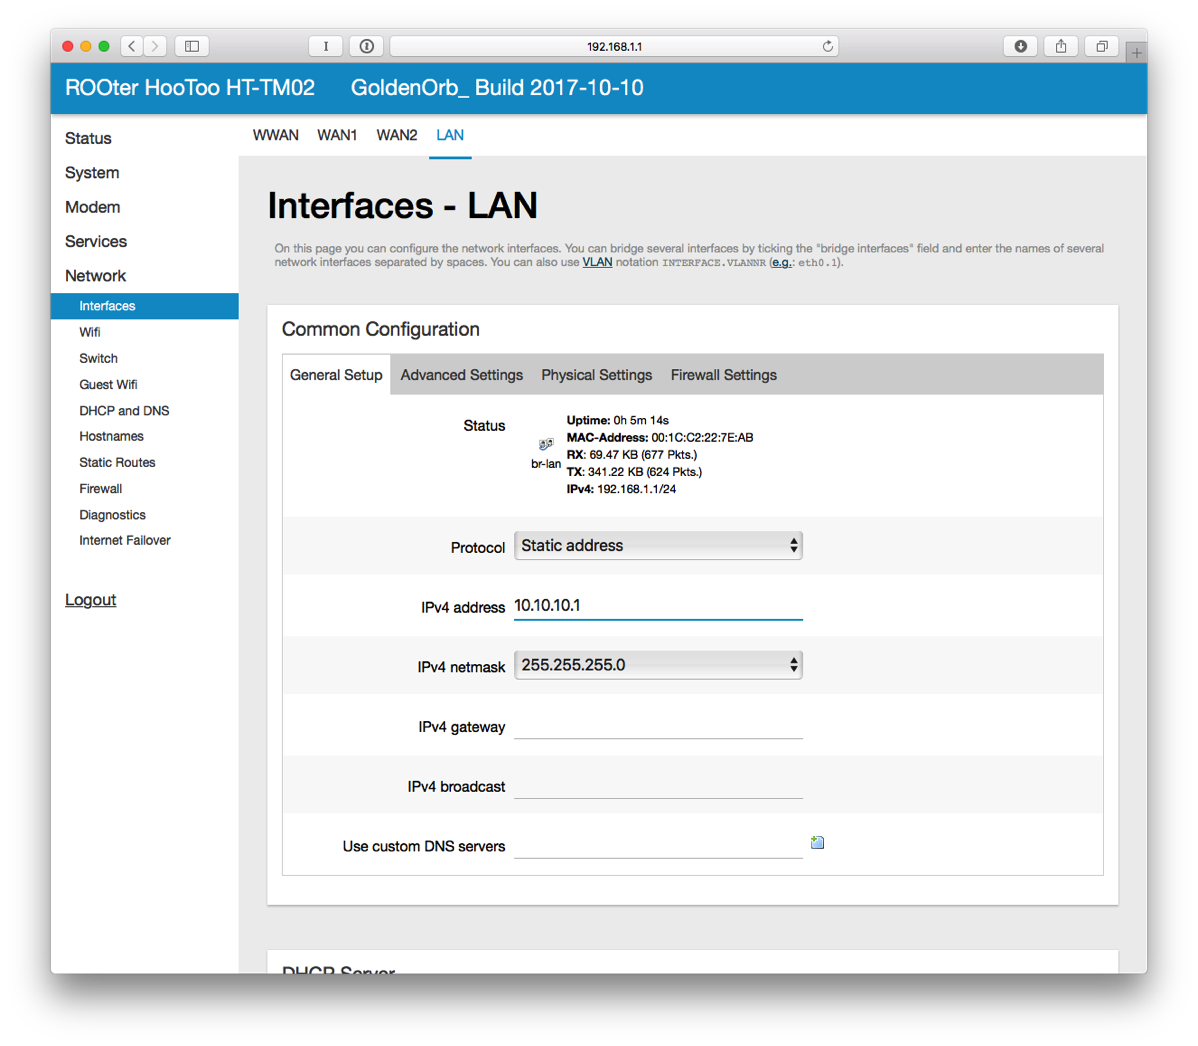
- The router will apply the settings and knock you off the network. I did have to disconnect from WiFi and reconnect to get assigned a new IP address.
- In Safari, connect to 10.10.10.1. Login.
- On the left side, select DHCP and DNS.
- Enter 8.8.8.8 and 8.8.4.4 for DNS Forwardings. Click SAVE & APPLY at the bottom.
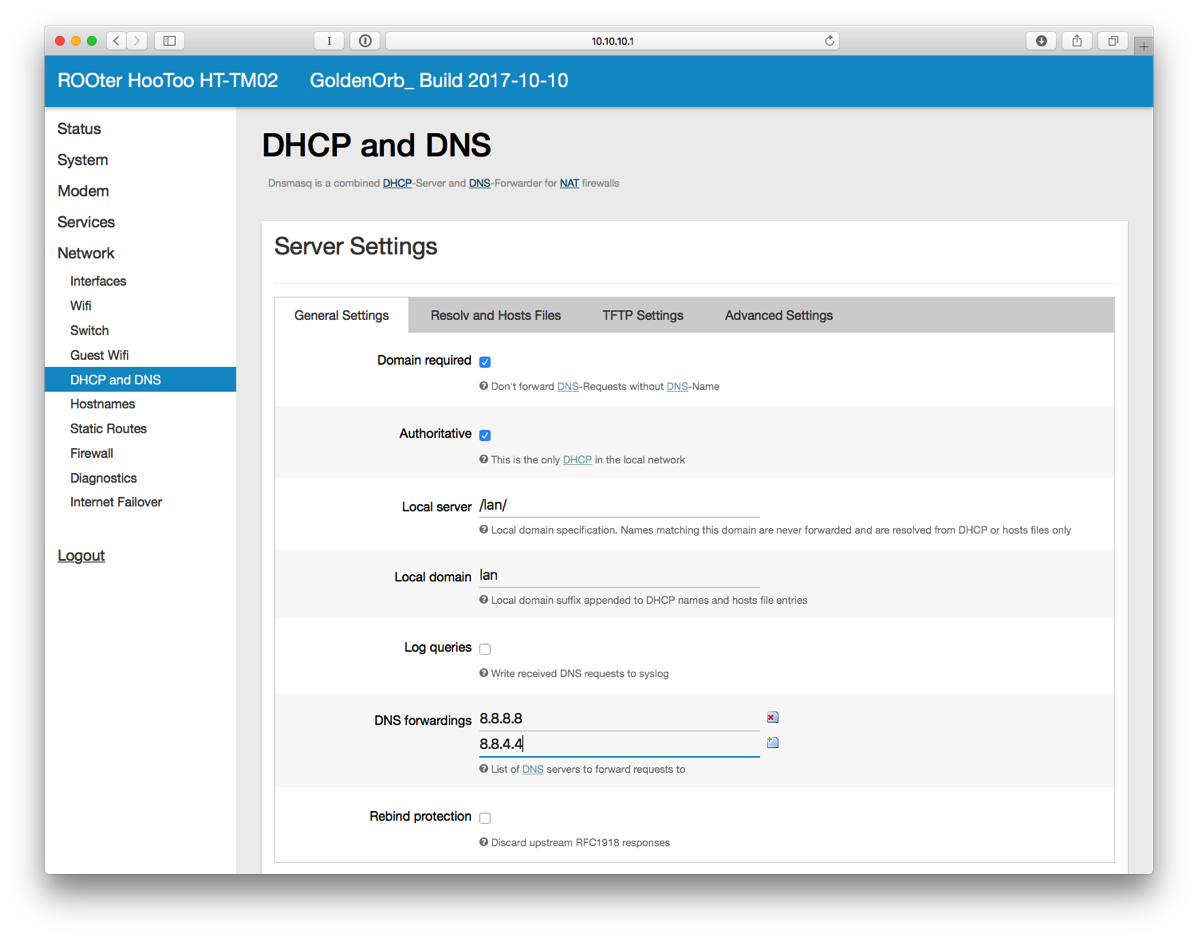
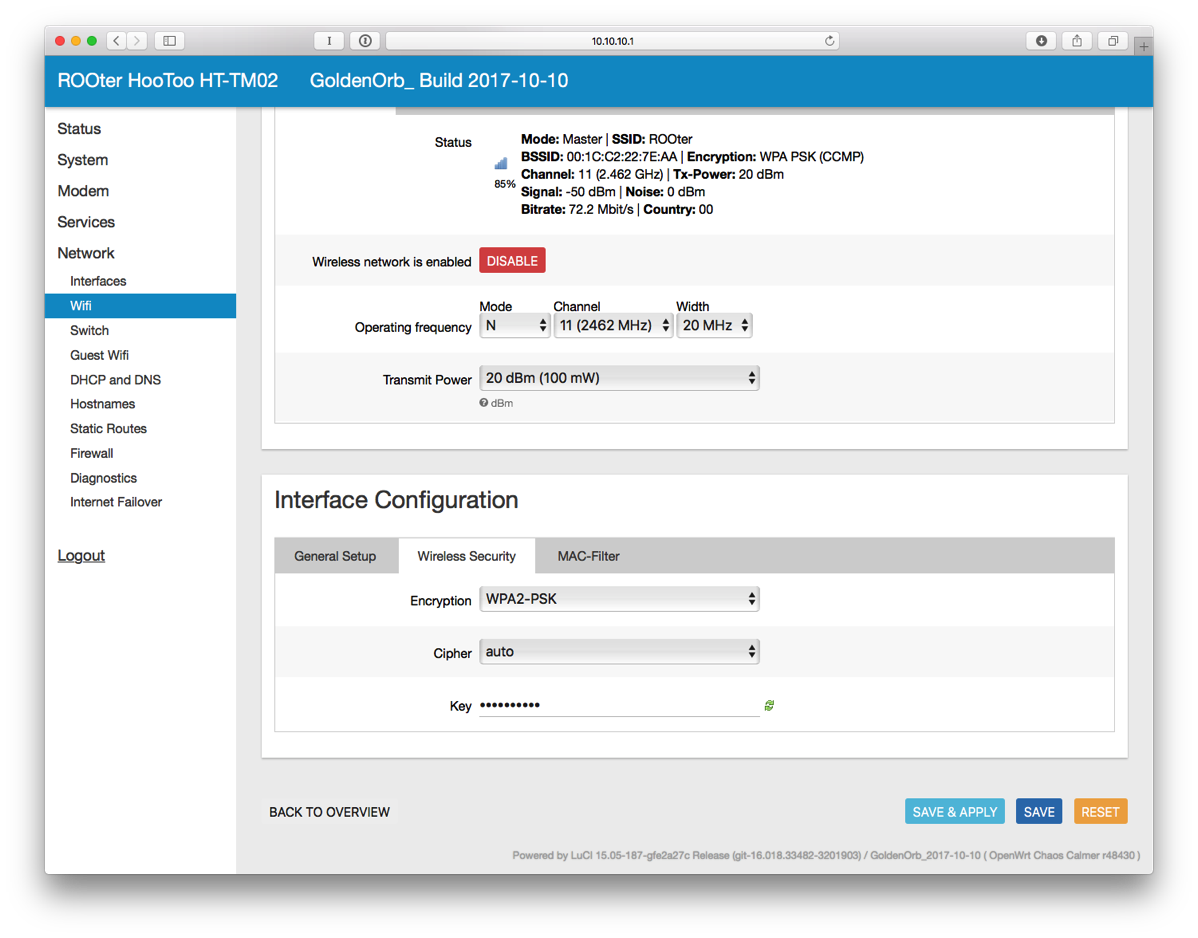
- On the left side, Select Wifi under Network and then click EDIT next to ROOter.
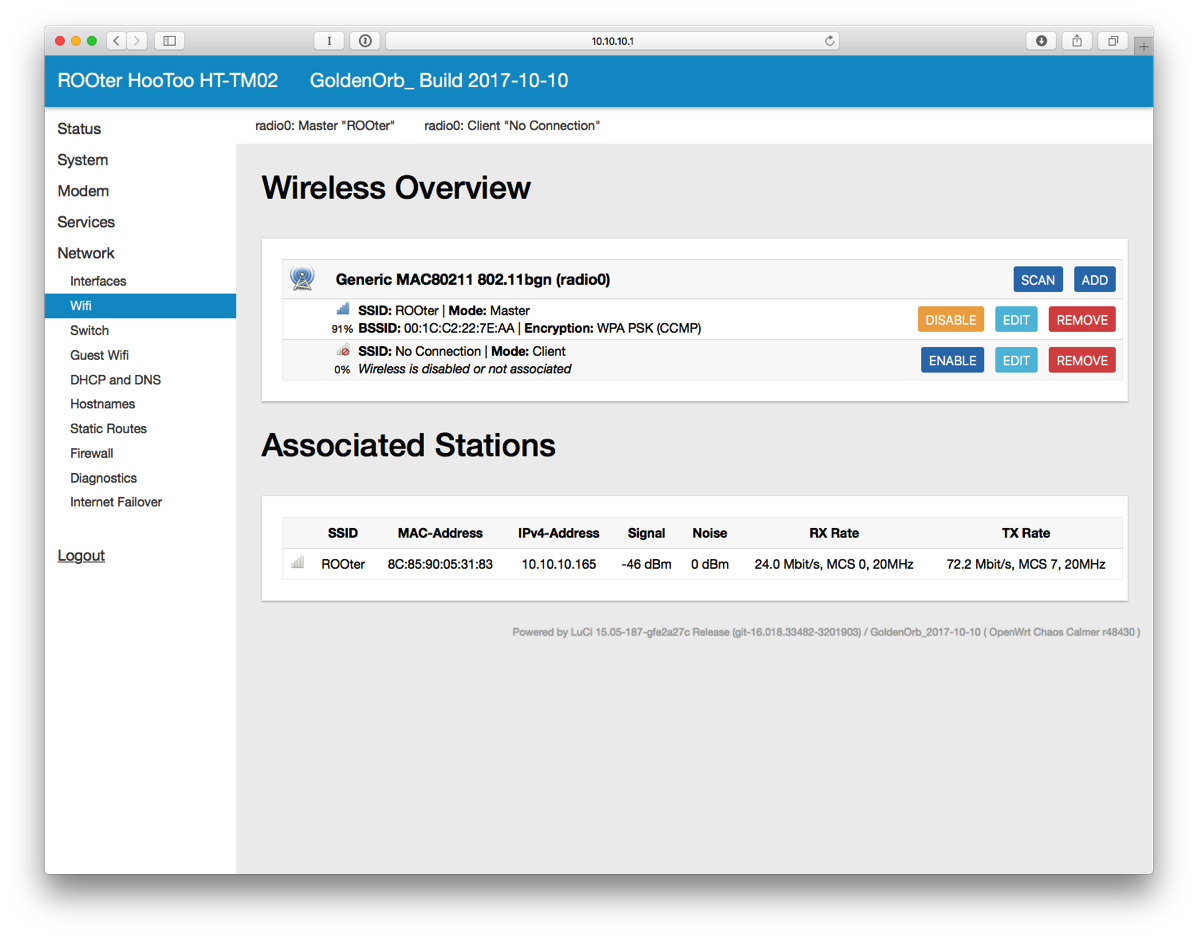
- Change the ESSID to whatever you want.
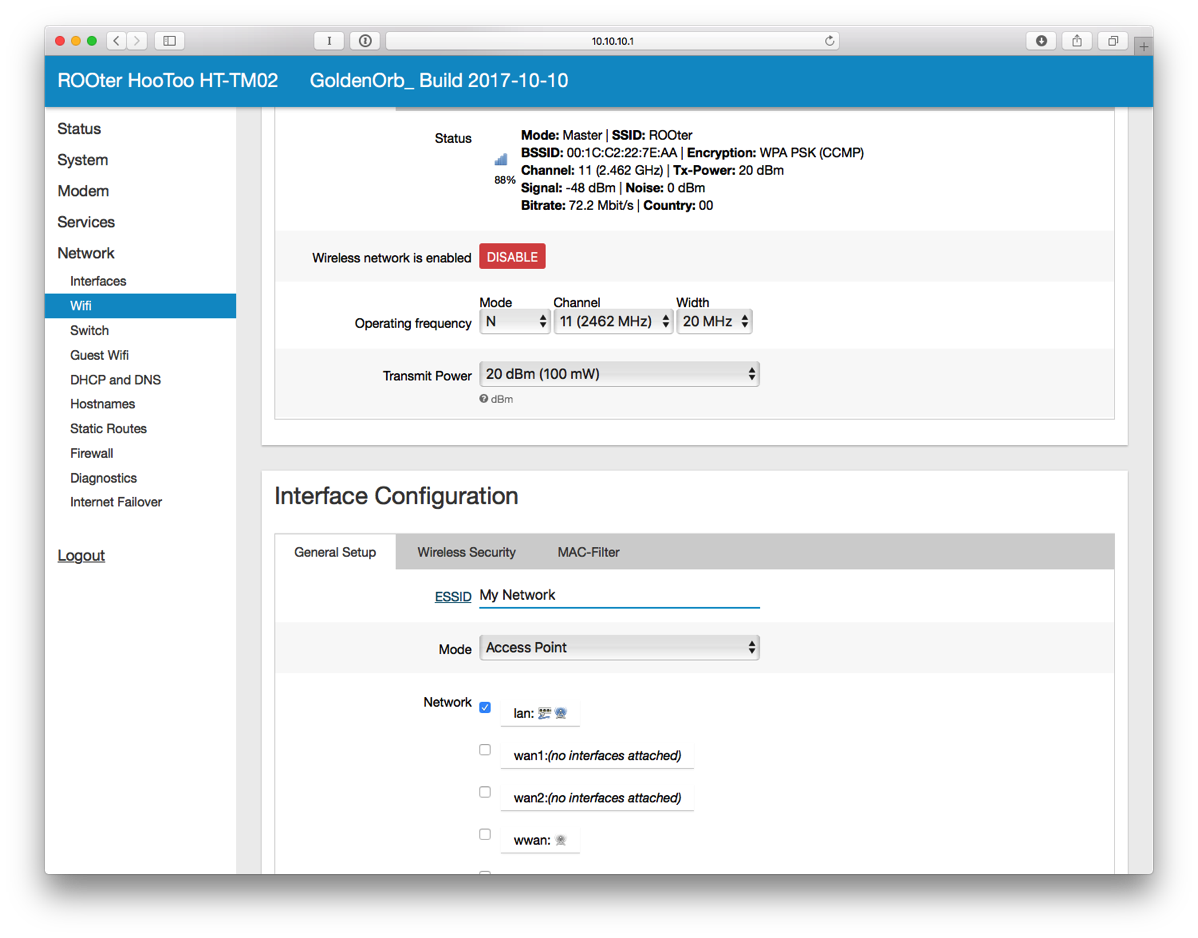
- Click on Wireless Security.
- Change Encryption to WPA2-PSK. Change the Key as well. Click SAVE & APPLY.
- You’ll have to reconnect to WiFi for the new SSID that you just set.
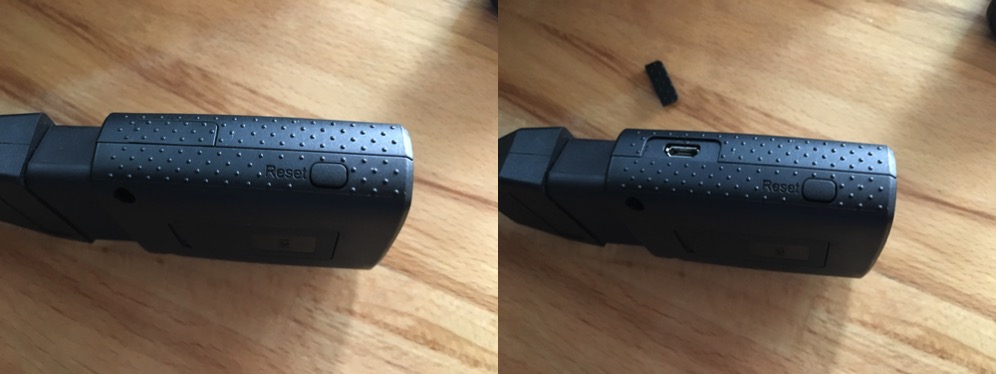
- Power on the Mobley. It can’t be plugged into the USB port of the TripMate as there is a separate USB port on the Mobley for tethering.
- On the Mobley, peel off the little cover on one side to reveal a micro USB port.
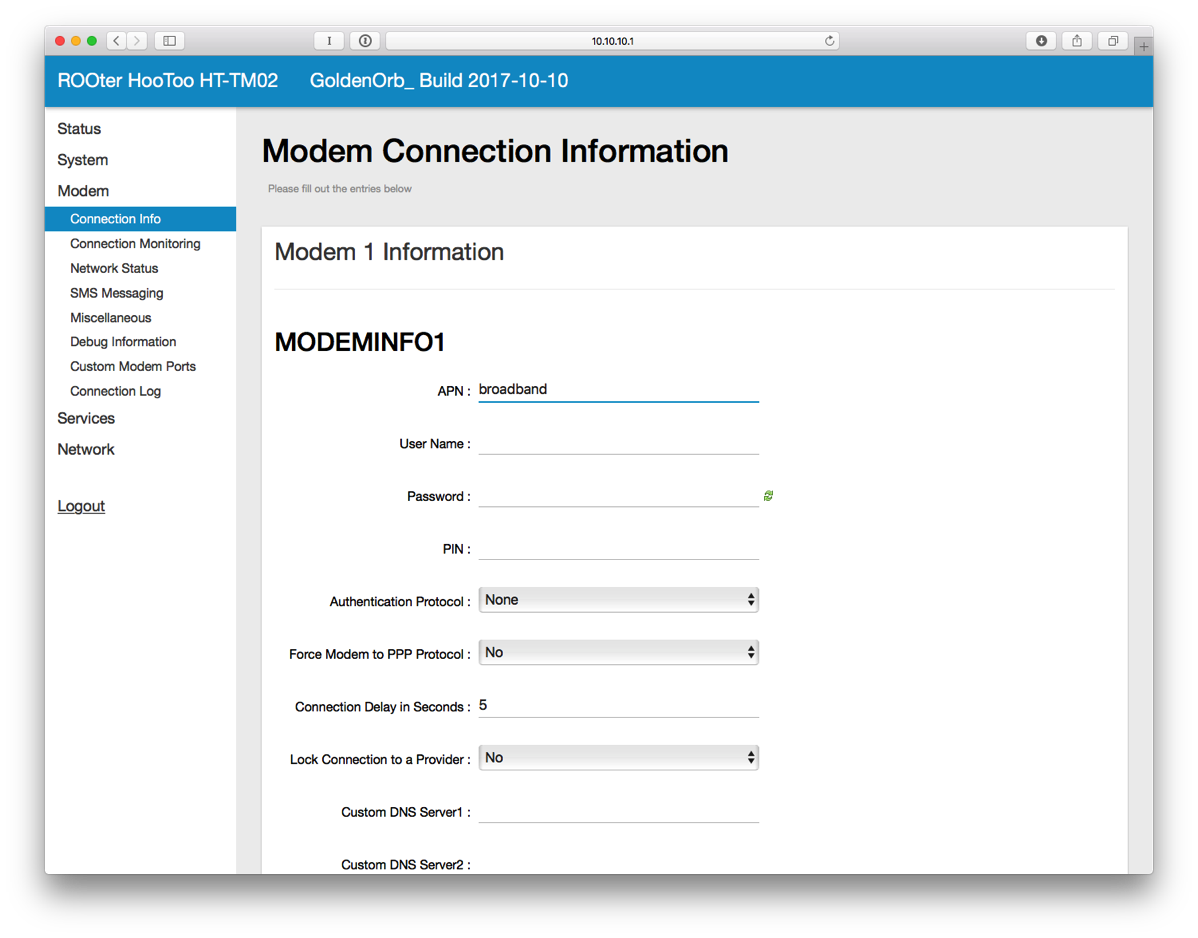
- On the left side of the interface, click on Modem and then Connection Info.
- Enter broadband next to APN and click SAVE.
- Plug in a micro USB cable from the router to the Mobley.
- On the left side, click on Network Status. Wait a little bit until the connection is established. Once connected, it will look like this.
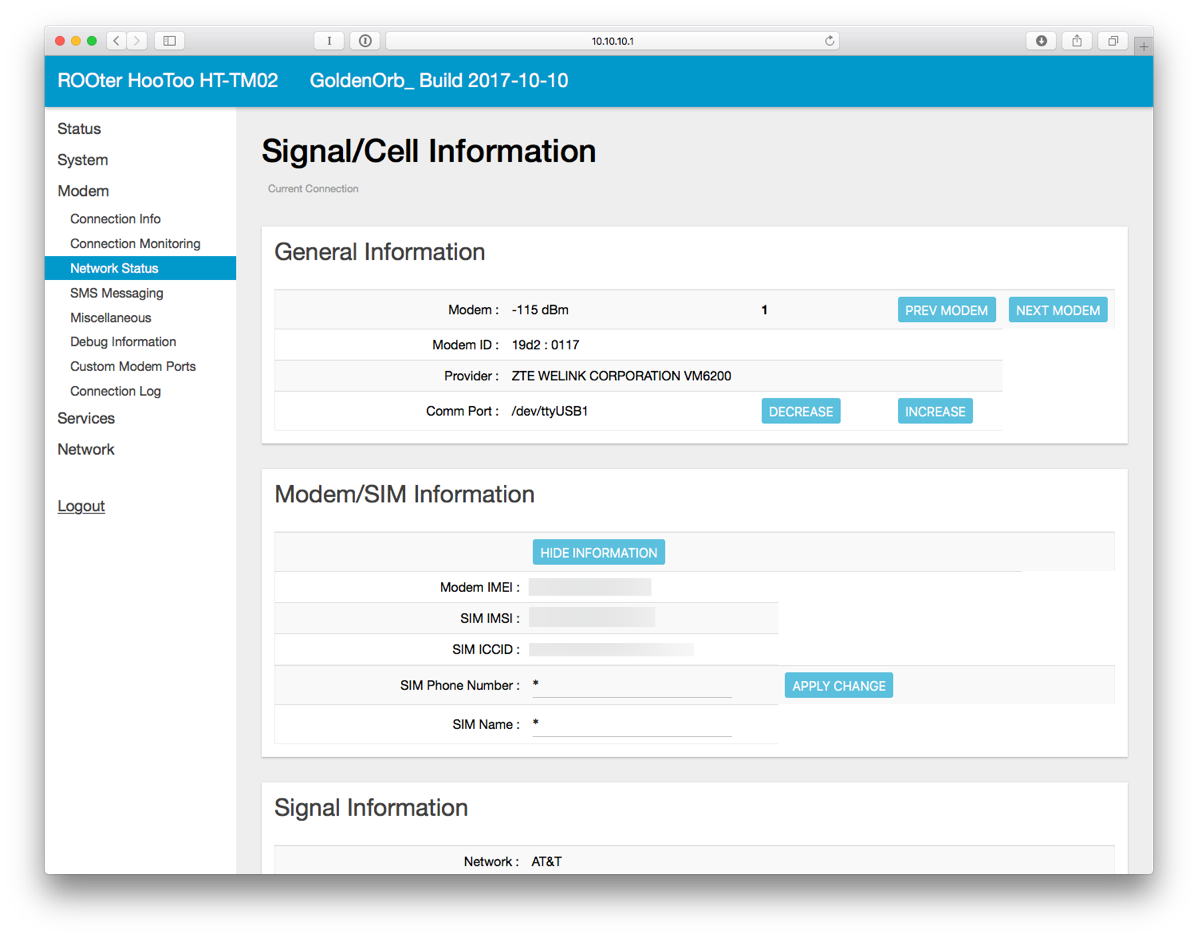
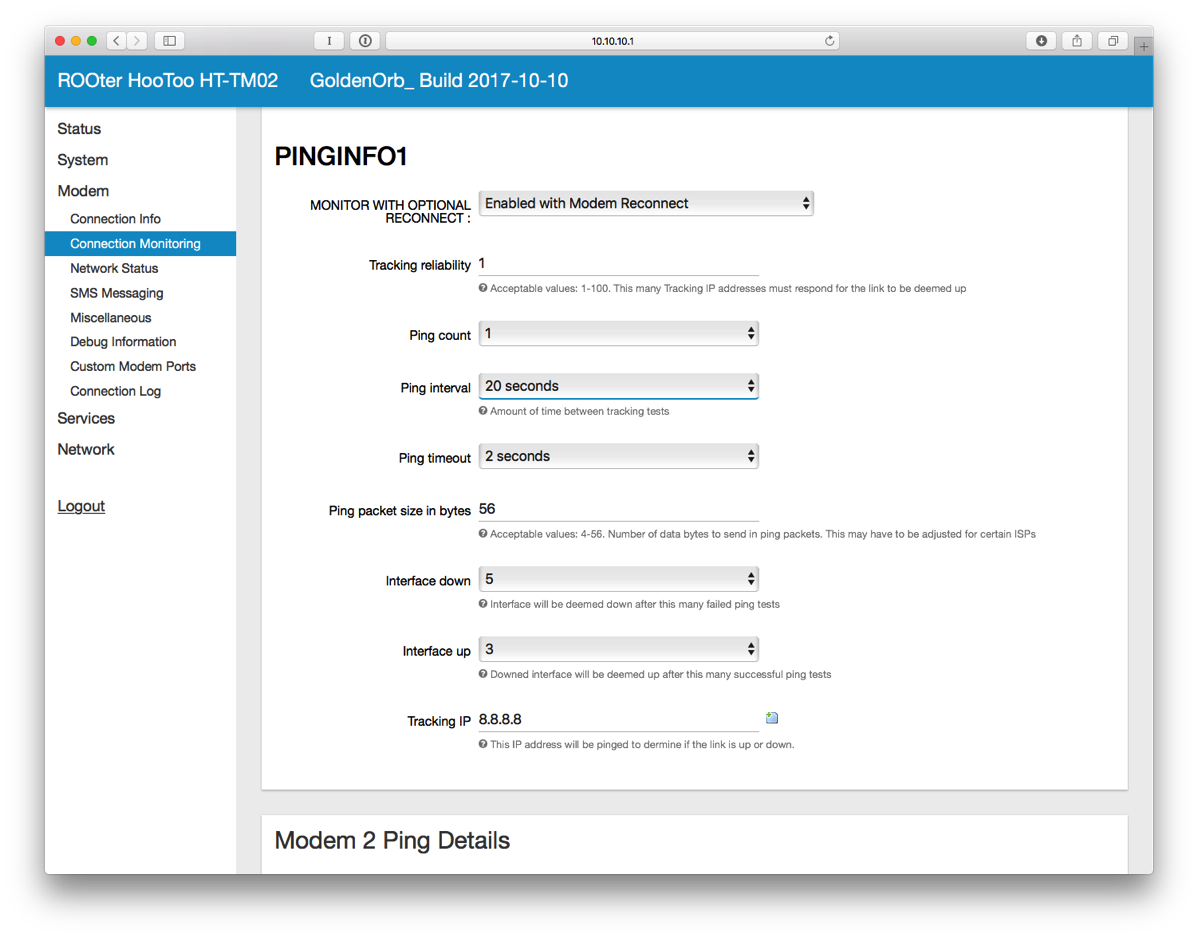
- You may also want to setup Connection Monitoring which will attempt to reconnect the modem in case of network failure.
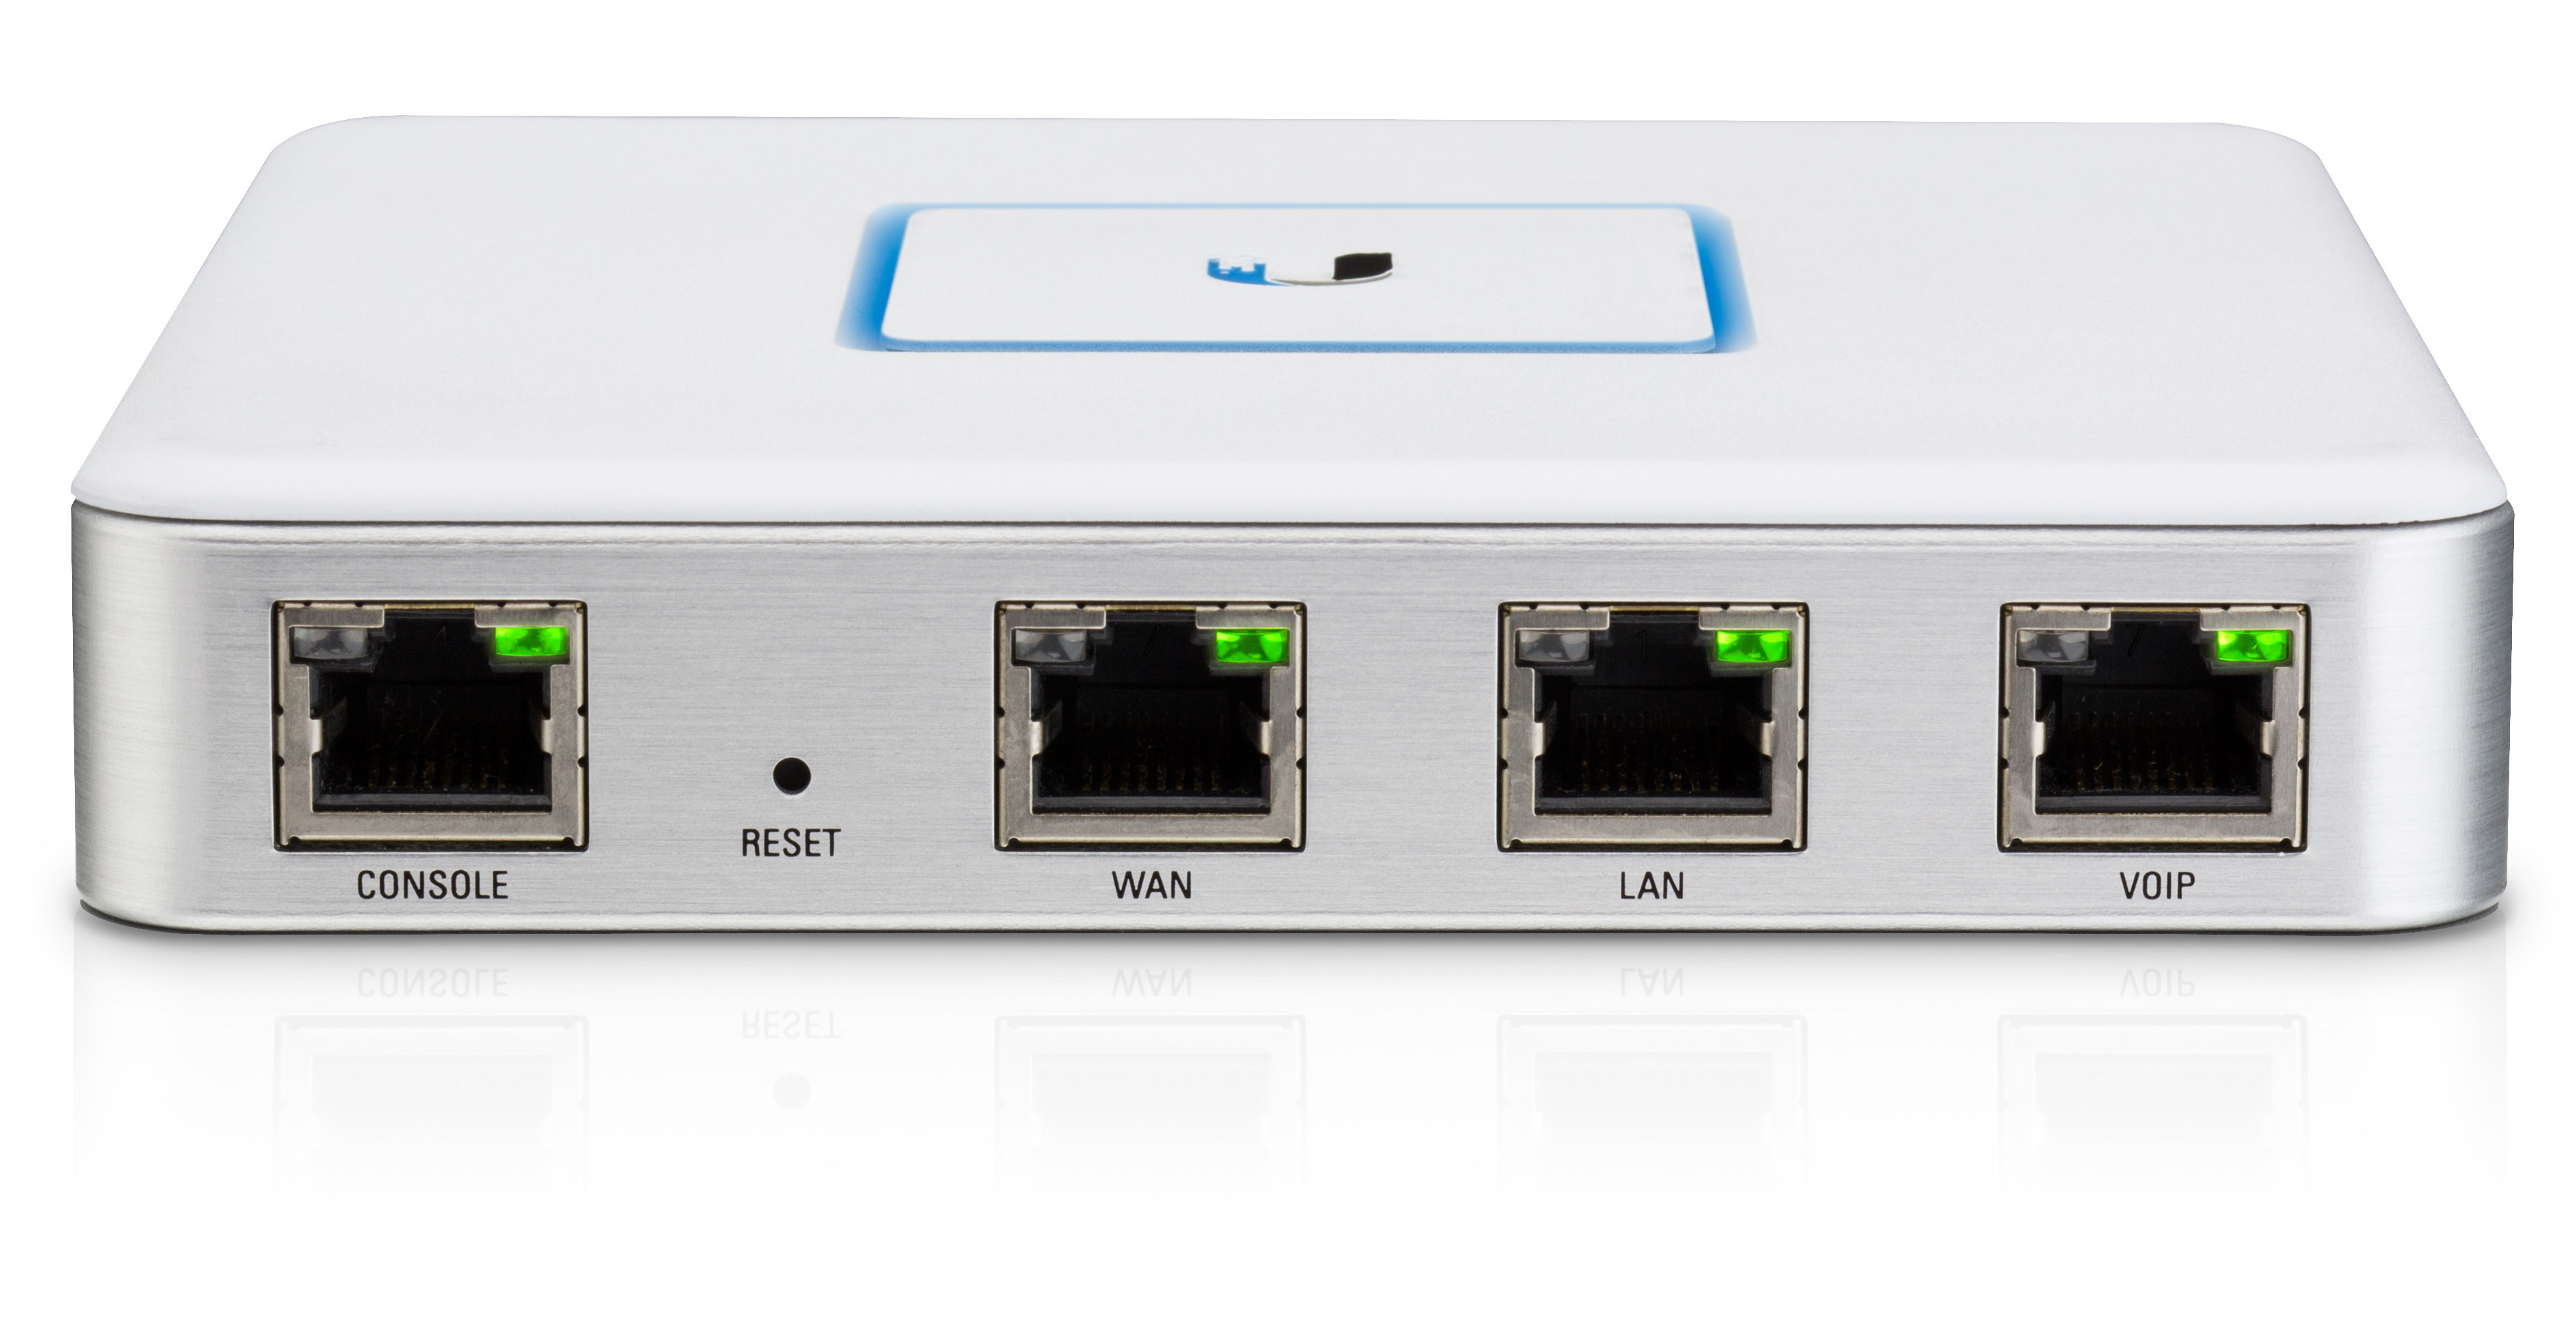
- Plug in an Ethernet cable from the router to the VOIP port (or LAN2 depending on the model) of the USG.
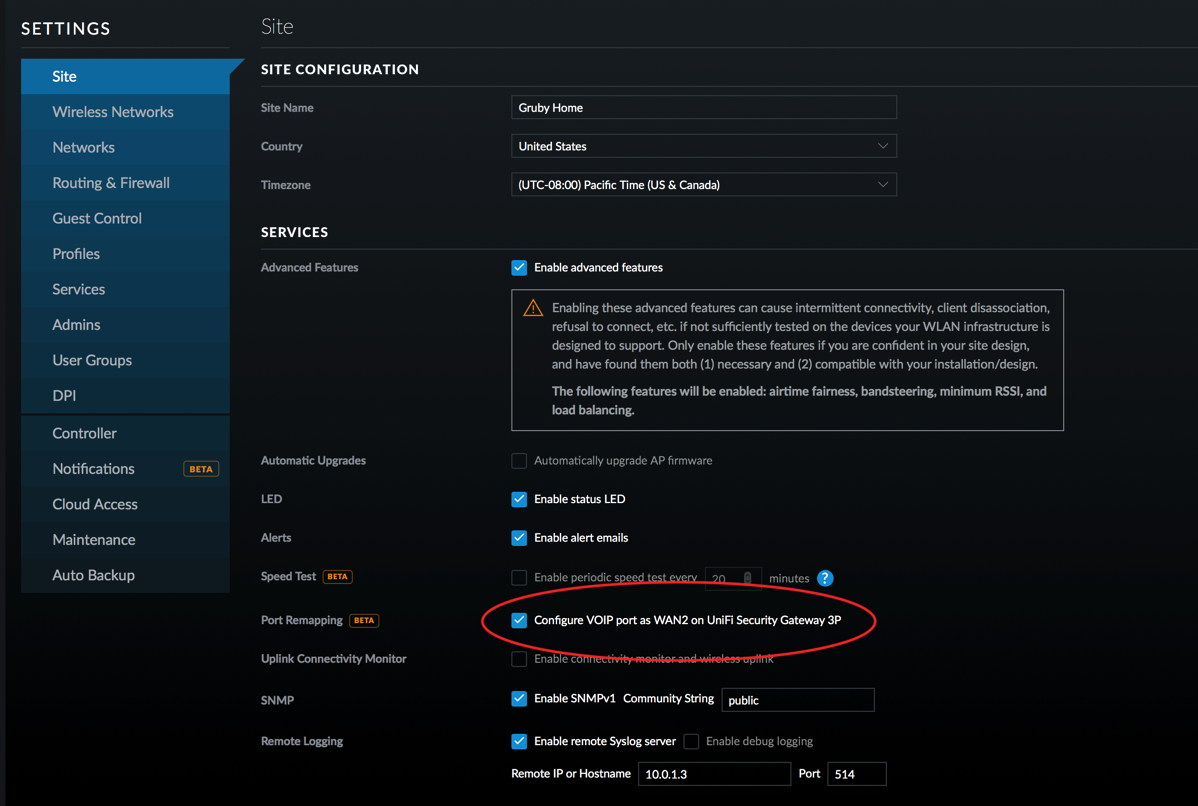
- On the UniFi Controller, setup the VOIP port to be WAN2. Wait for the USG to re-provision.
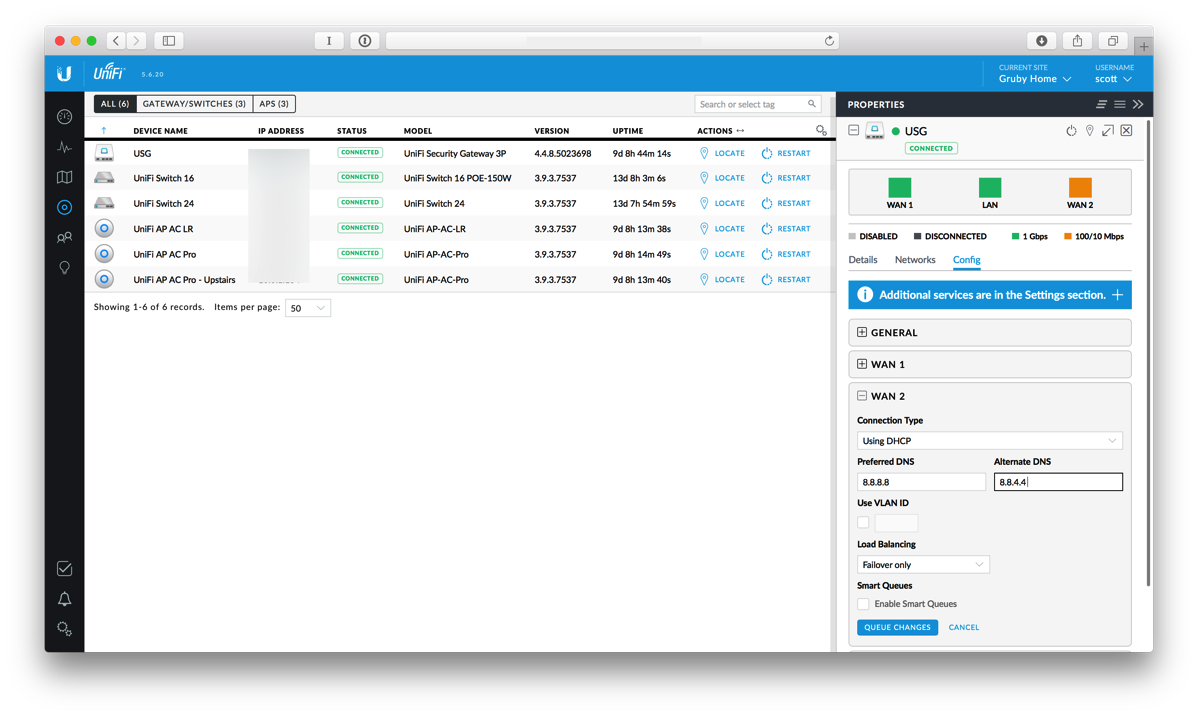
- Click on the devices icon and select the USG.
- Select WAN2 and enter DNS settings. I’ve used Google’s DNS, 8.8.8.8 and 8.8.4.4.
- Make sure Load Balancing is set to Failover Only and then click QUEUE CHANGES. Then click APPLY CHANGES.
In order to verify that things are working, SSH into the USG using your admin username and password.
Type show load-balance status and you’ll see something like this:
    Group wan_failover
      interface   : eth0
      carrier     : up
      status      : active
      gateway     : x.x.x.x
      route table : 201
      weight      : 100%
      flows
          WAN Out : 624
          WAN In  : 0
        Local Out : 2

      interface   : eth2
      carrier     : up
      status      : failover
      gateway     : 10.10.10.1
      route table : 202
      weight      : 0%
      flows
          WAN Out : 0
          WAN In  : 1
        Local Out : 0
This tells you that eth0 is the main connection and eth2 is the failover.
Next type show load-balance watchdog and you’ll see something like this.
Group wan_failover
  eth0
  status: Running
  pings: 62
  fails: 0
  run fails: 0/3
  route drops: 0
  ping gateway: ping.ubnt.com - REACHABLE

  eth2
  status: Running
  failover-only mode
  pings: 15
  fails: 0
  run fails: 0/3
  route drops: 1
  ping gateway: ping.ubnt.com - REACHABLE
  last route drop   : Sun Oct 29 19:05:59 2017
  last route recover: Sun Oct 29 19:06:36 2017
This shows that both eth0 and eth2 have working network connections.
In order to test, I unplugged the WAN connection and waited a few minutes. Much to my delight, the connection switched over to cellular and everything continued to work on my network.
When the primary WAN goes down, show load-balance watchdog will show something like this:
Group wan_failover
  eth0
  status: Waiting on recovery (0/3)
  pings: 84
  fails: 3
  run fails: 3/3
  route drops: 1
  ping gateway: ping.ubnt.com - DOWN
  last route drop   : Sun Oct 29 19:13:16 2017

  eth2
  status: Running
  failover-only mode
  pings: 53
  fails: 0
  run fails: 0/3
  route drops: 1
  ping gateway: ping.ubnt.com - REACHABLE
  last route drop   : Sun Oct 29 19:05:59 2017
  last route recover: Sun Oct 29 19:06:36 2017
Doing a show load-balance status yields:
Group wan_failover
  interface   : eth0
  carrier     : down
  status      : failover
  gateway     : unknown
  route table : 201
  weight      : 0%
  flows
      WAN Out : 1140
      WAN In  : 0
    Local Out : 4

  interface   : eth2
  carrier     : up
  status      : active
  gateway     : 10.10.10.1
  route table : 202
  weight      : 100%
  flows
      WAN Out : 192
      WAN In  : 1
    Local Out : 1
While I have no plans to keep this connected all the time, it is good to know that if my Internet connection goes out, I have a backup mechanism. For enterprise applications, I’d recommend a beefier router and a dedicated LTE modem.
Feel free to send corrections or ask questions.
Things to note
- The router does NAT, so you won’t be able to connect from the outside world to your USG or internal network. It will work for outgoing connections which may be more important.
- This particular modem has to be powered separately from USB and the router has to be powered. You’ll need two USB cables to power this setup.
- If you unplug the Ethernet cable on the second WAN port and leave it disconnected, the USG may failover when it can’t ping the Ubiquiti host that is used for failover checking. This may be intermittent and could cause your network to go down. I’d suggest disabling the failover if you’re not going to keep the second WAN connection.
- The router I’m using has a 10/100 Mbit port, so the connection isn’t going to use the full bandwidth of the LTE. In addition, the router is pretty underpowered and will definitely impact performance.
- A user on the Ubiquiti forums suggests a modification to the config.gateway.json to ping an IP address instead of ping.ubnt.com by adding and then forcing a re-provision on the USG:
  "load-balance": {
    "group": {
      "wan_failover": {
        "interface": {
          "eth0": {
            "route-test": {
              "type": {
                "ping": {
                  "target": "8.8.8.8"
                }
              }
            }
          },
          "eth2": {
            "route-test": {
              "type": {
                "ping": {
                  "target": "8.8.8.8"
                }
              }
            }
          }
        }
      }
    }
  },
Thanks a lot for it. I am struggeling with that thing still with Dual Wan Failover…. because no ports are forwarded from WAN2 in their beta software declared as stable, lol. So what I got you must add that to the config json manual what make it not easier 🙂
So if you need a topic for a post… would be really great 🙂
I don’t use port forwarding on the USG, so unfortunately I won’t be able to help you. Personally I find the software quite stable even the parts that are still listed as beta. Software always evolves, so maybe the fixes you need will be in a future release.
hello
same behaviour as hqa …
NAT forwarding is not working with WAN 2 (after failover) …
firmware : up2date,
ISP orange, 2 x fiber (1Gb/s), failover is working properly
but VPN is not working (VPN is supplied by a Synology NAS).
i also opened a ticket … we ‘ll see !
If you could deal with the USG’s VPN, might I suggest trying that? I have the IPSec VPN turned on as well as OpenVPN and both of those may behave better with failover.
hello,
according to support, NAT is not working for WAN2.
Here is an laternative : https://help.ubnt.com/hc/en-us/articles/235723207-UniFi-USG-Port-Forwarding-Configuration-and-Troubleshooting
via SSH and configure cmd.
Sebastien
Thanks for letting me know! This kind of makes sense as they are different interfaces. Maybe a future controller/firmware will automatically duplicate the NAT settings.
Thanks, Scott (and it has been a very long time since our paths have crossed)! Was just about to set this up myself. Hope you are well.
Hi Greg,
I hope my writeup helps! Sometimes things on the Internet don’t age well.
Cheers!
Hi Scott – Was enough for what I needed. I added an LB1120 using a Project Fi sim from Netgear to a USG as WAN 2 as a secondary port. Some minor changes in what you did as a result of the controller updates, but generally works.
Hi Greg,
Excellent, I’m glad things worked out!
Hi,
really great tutorial.
I trie to following this additional hint from aem.
To macke some adds to the exiting port forwarding rules I would check the existing entries. w
What for a comand I need on the ssh prompt to get a list of all portforwarding I setup by the gui.
In case I will setup a failower solujtion over LTE I should dublicate some of the rules to have access via the LTE Router.
I the example on the unfi website they used this
set service nat rule 4000
I am sure each rule needs a different numer besite the 4000.
Would be great to get a little bit help.
Thank you T.